

Confluence Google Drive Integration
Create a single source of truth with seamless syncing and real-time collaboration.
Read more


Administrators can adjust how the Google Drive Connector for Jira app works to meet your team's needs and comply with company policies.
As the name implies, these settings are only visible to users with Administrator privileges. All the settings on this page are accessible by entering the “Apps” section on Jira settings and then clicking the "Google Drive Settings" link on the sidebar.
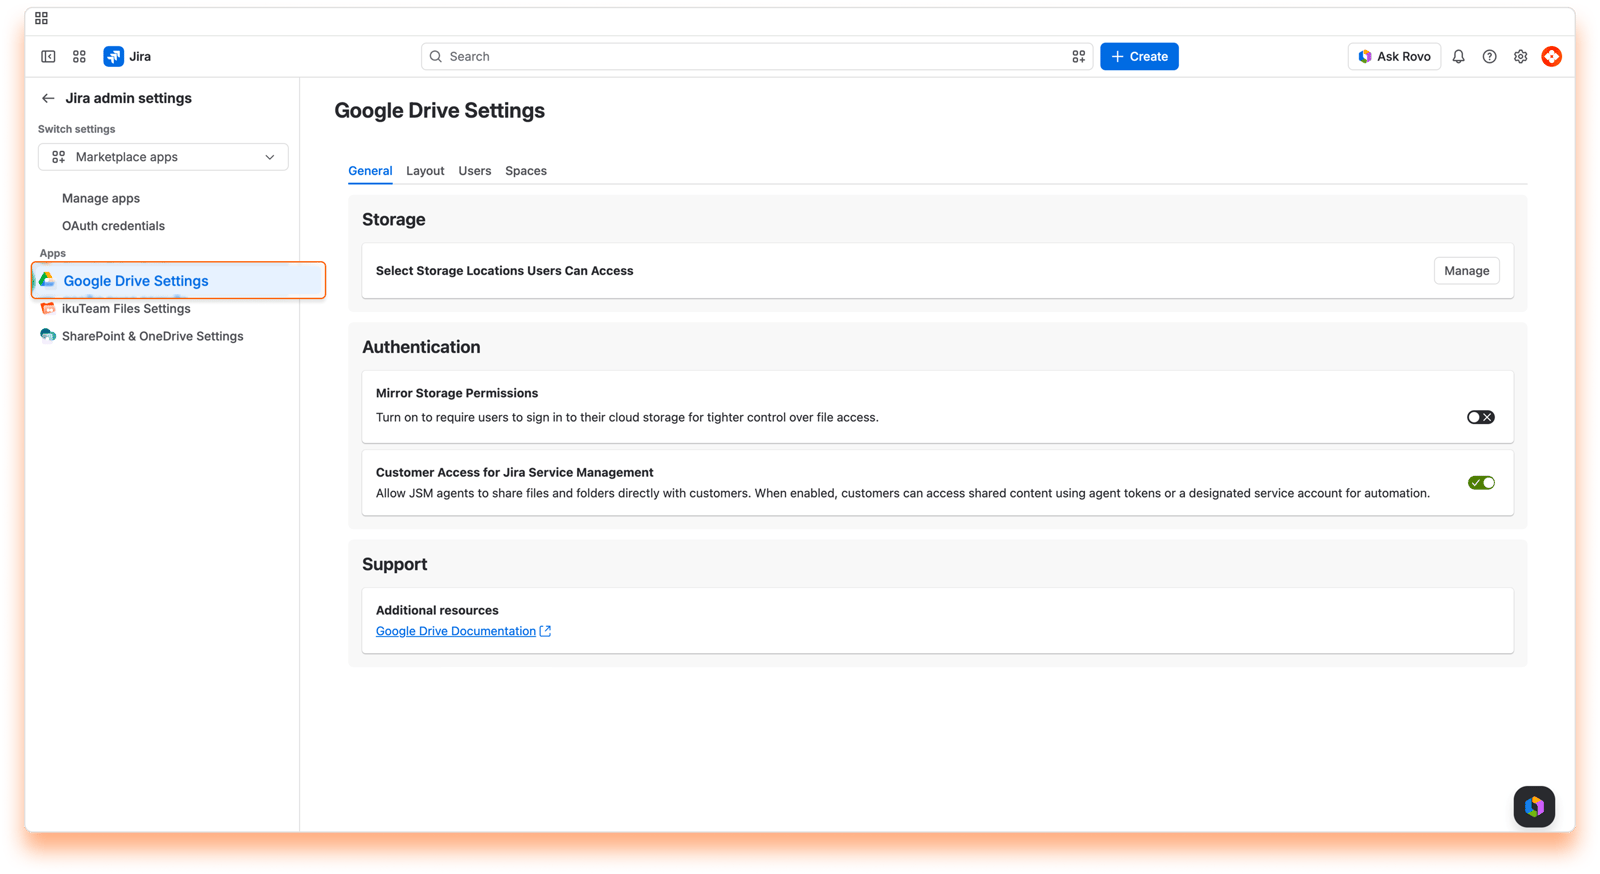
The Storage card on the General tab has a Manage button next to Select Storage Locations Users Can Access. It opens the Allowed storage places dialog, where Google Drive is turned on by default. Keep it on: if you turn Google Drive off, users can't connect Google accounts or folders, and the folders already connected and the files and folders attached from them are blocked until you turn it back on. Changes save automatically and apply immediately.
Mirror Storage Permissions is ON by default in the Google Drive Connector for Jira app, so each user authenticates with their own Google account, and the permissions set in Google Drive apply. Admins can switch to Mirror Storage Permissions OFF to favor ease of use with simplified permissions. With Mirror Storage Permissions OFF, the app uses the folder owner's account, so we recommend connecting folders with a service account instead of a personal account. That way, your audit trail stays clear and folders keep working when people leave.
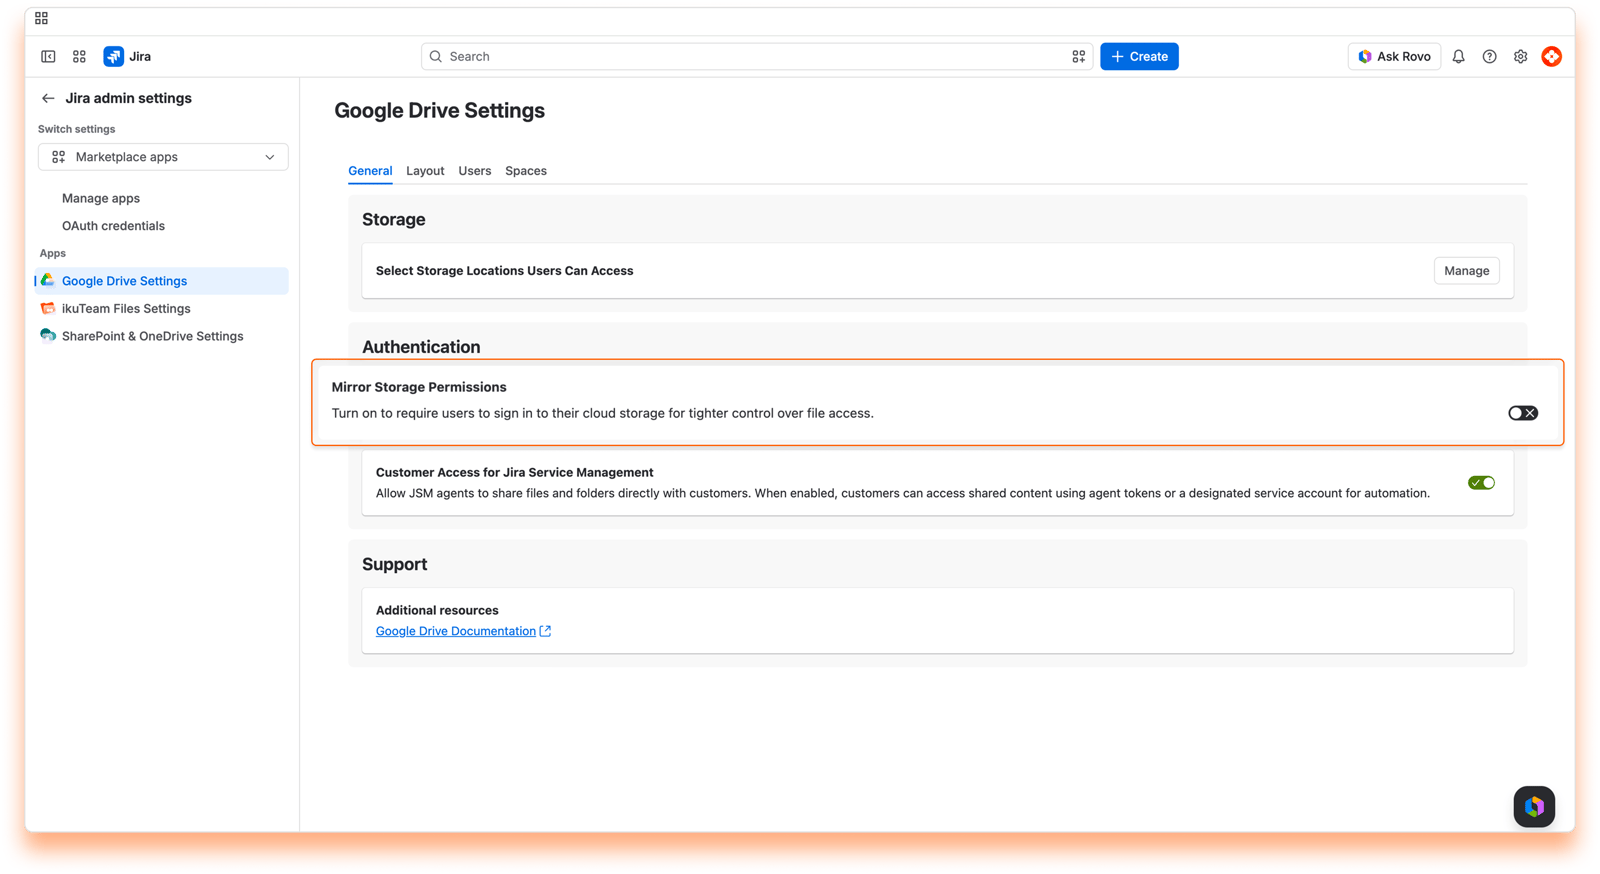
With Mirror Storage Permissions ON, each user signs in to each connected folder with their own Google account, so the right permissions apply to everyone. With Mirror Storage Permissions OFF, users don't sign in per folder, and the app uses the folder owner's account for everyone. Learn what changes with Mirror Storage Permissions OFF
On the General tab of the Google Drive Settings page, go to the Authentication card.
Click the toggle to turn off the option "Mirror Storage Permissions".
Changing this setting saves automatically and applies immediately.
On the General tab of the Google Drive Settings page, go to the Authentication card.
Click the toggle to turn on the option "Mirror Storage Permissions".
Changing this setting saves automatically and applies immediately.
Customer Access for Jira Service Management is part of the Advanced Edition of the app. It lets JSM agents share files and folders directly with customers.
When it's on, customers can open the shared content in the customer portal, using agent tokens or a designated service account for automation.
To turn on Customer Access:
On the General tab of the Google Drive Settings page, go to the Authentication card.
Click the toggle to turn on "Customer Access for Jira Service Management".
When Customer Access is off, customers can't open the files and folders shared with them. Agents who open the customer files on a work item, or try to attach a folder for customers, see a message asking a Jira admin to turn on Customer access. Jira automation actions for customers, like Google - Connect a customer folder, also need Customer Access turned on.
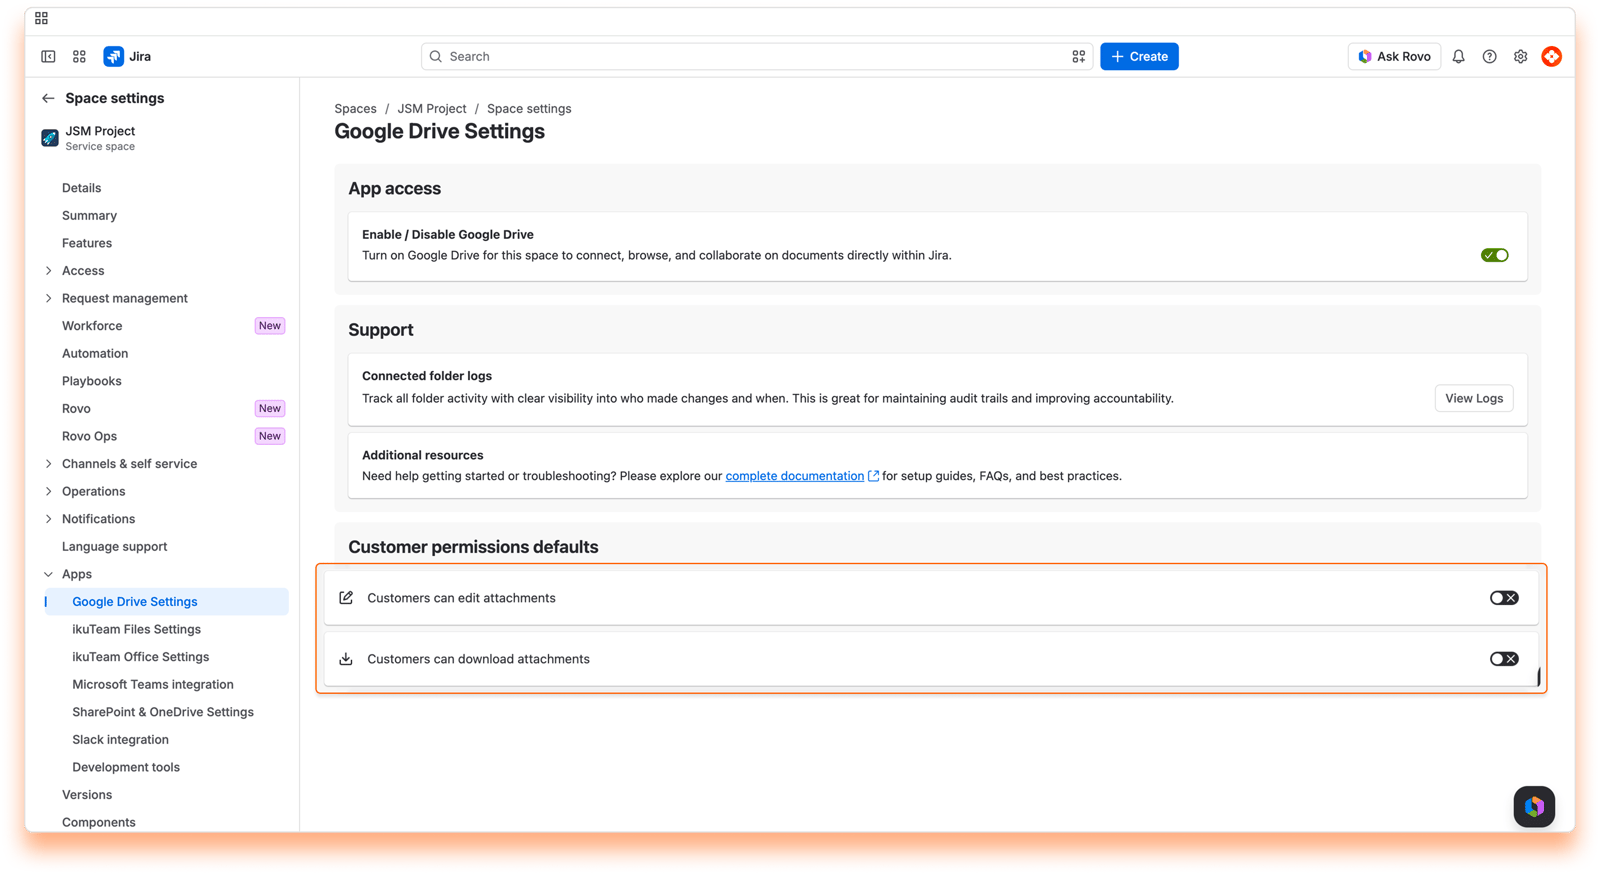
You set customer permissions defaults in each Jira Service Management space, not on this page. In the space settings, choose whether customers can edit and download attachments by default. See 3.2 Space settings.
By default, the files and folders attached to Jira work items use a regular header and appear in the collapsed view to use less space on the screen. It’s easy to preview the file by clicking the arrow to open the expanded view, which uses the width of the page and is 464px tall by default, or clicking the file name (or preview button) to open the full-screen preview.
The Admin can set different defaults for new work items in the Layout tab of the Admin settings.
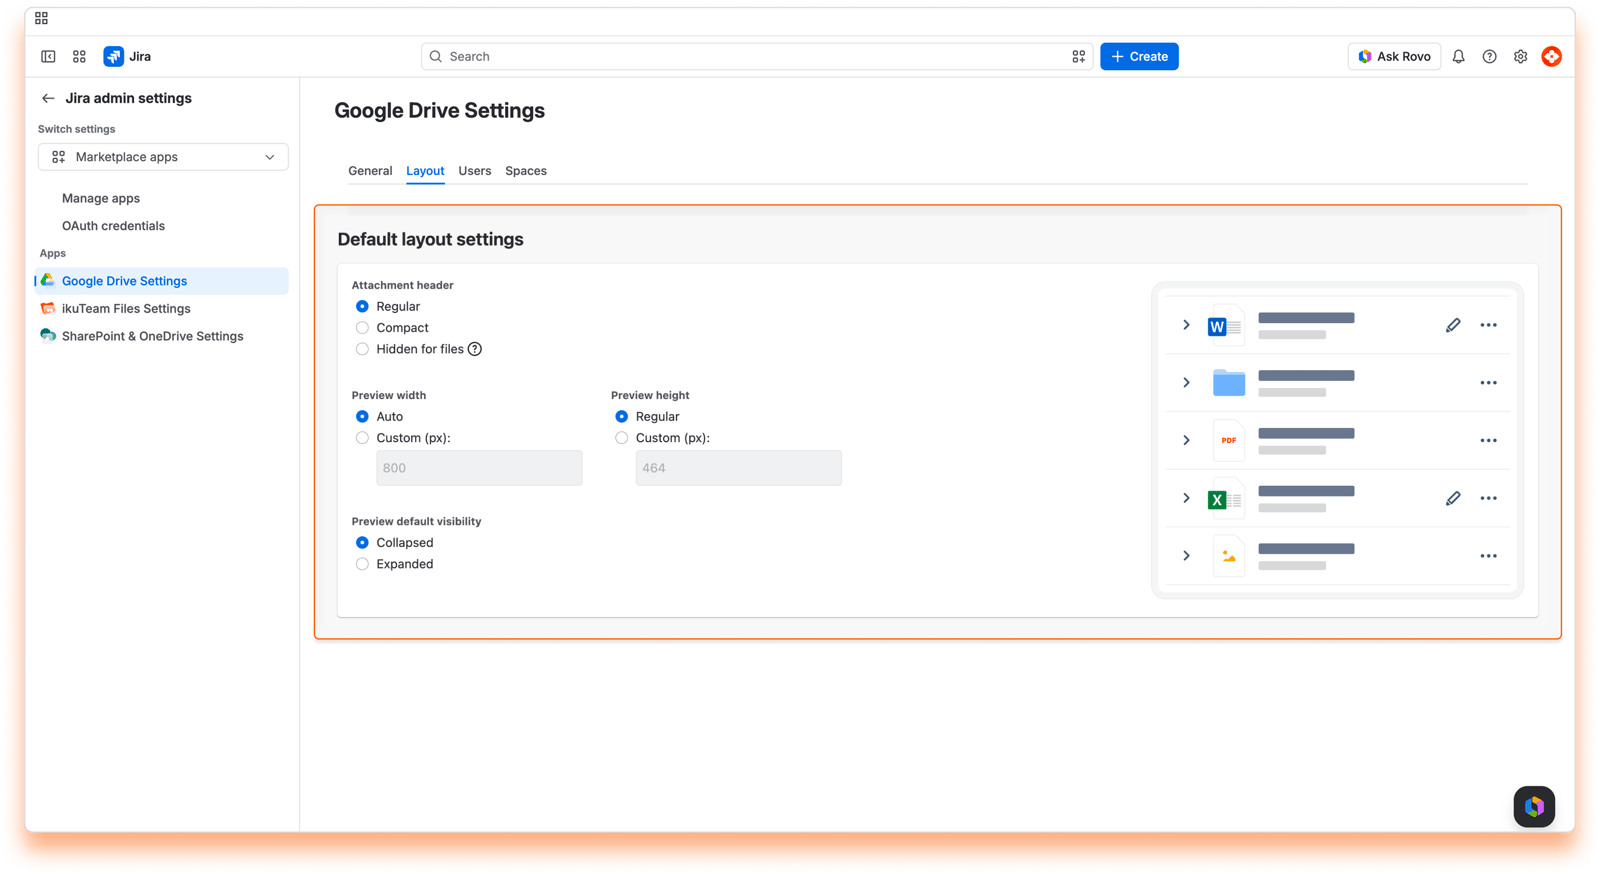
Select the default size for the header of attachments:
Regular: The standard size for the header of attached files and folders. It shows a big icon and additional details;
Compact: Uses a smaller icon and only shows the name of the file or folder;
Hidden for files: Completely hides the file header and forces the expanded preview option. Moving the mouse over the file will show a compact header.
Select the default height for the preview:
Regular: The standard height for previews (464px);
Custom: Define a value for the height of the preview area.
Select the default width for the preview:
Auto: The standard option. The preview uses the available width of the page;
Custom: Define a value for the width of the preview area.
Select the default behavior for the preview:
Collapsed: The standard option that hides the preview;
Expanded: Automatically shows the preview of files and folders. This option is required when selecting the “Hidden for files” header.
Changes to these settings are saved automatically and applied immediately.
By default, all users and groups can use the Google Drive Connector app. It’s accessible from its tab in the space navigation (or from the sidebar in Jira Service Management spaces).
However, an Admin can specify which users and groups can use the Google Drive Connector app. When someone doesn’t have permission to use the app, the file manager and the app are blocked for them.
The current settings are in the "Users" tab. There are three main options that you can select from the drop-down menu:
All users and groups can access the Google Drive Connector app using the default option.
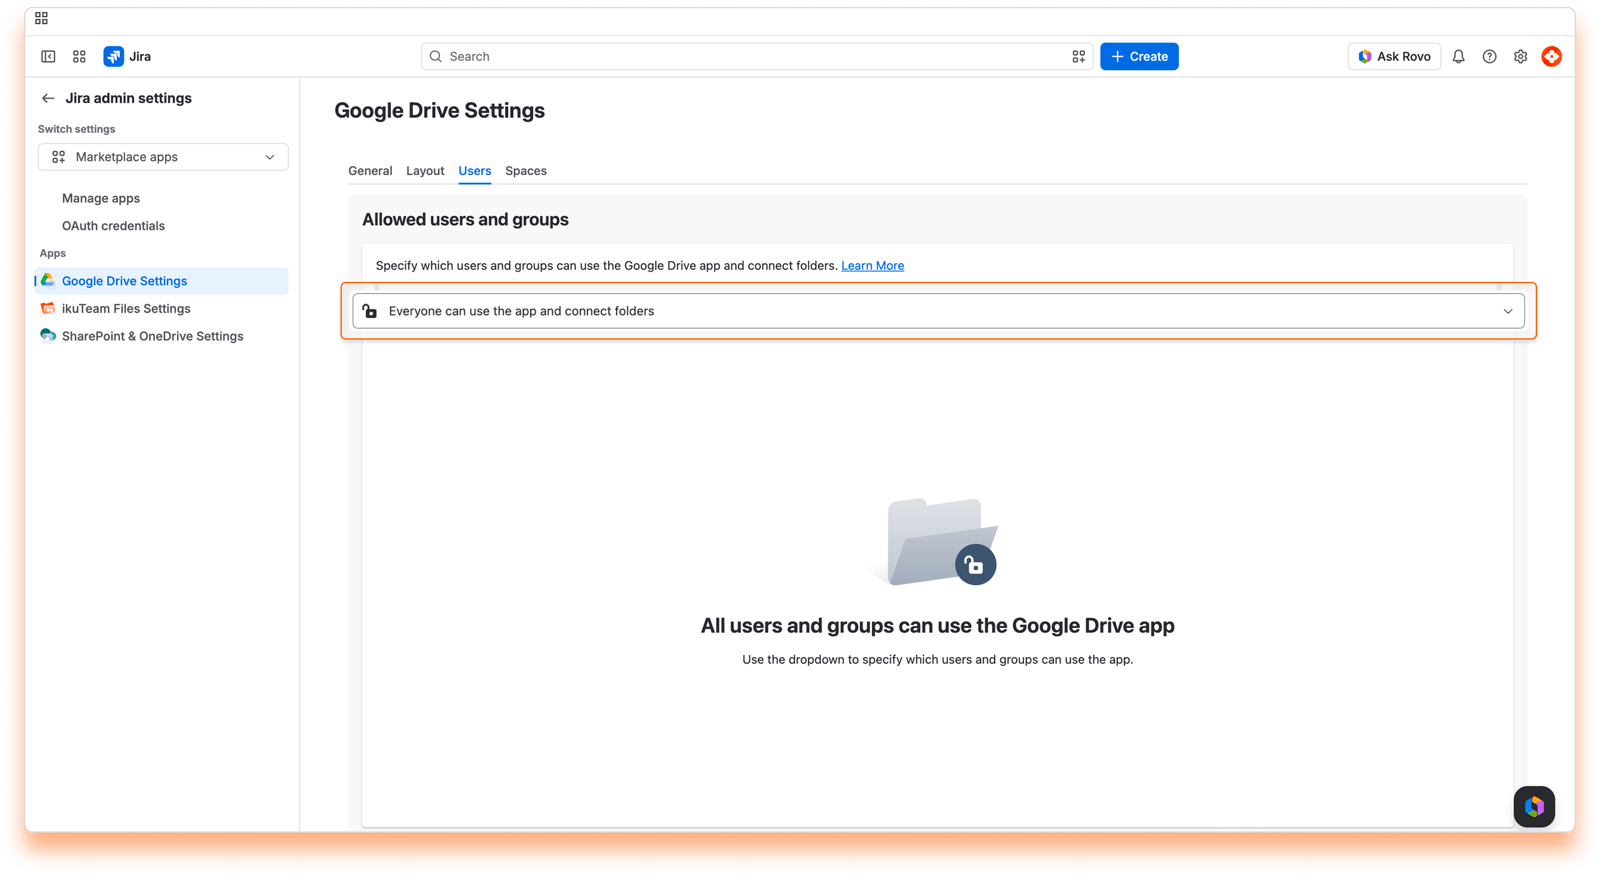
Select this option if everyone should be able to use the Google Drive Connector app, but only some users and groups can connect folders.
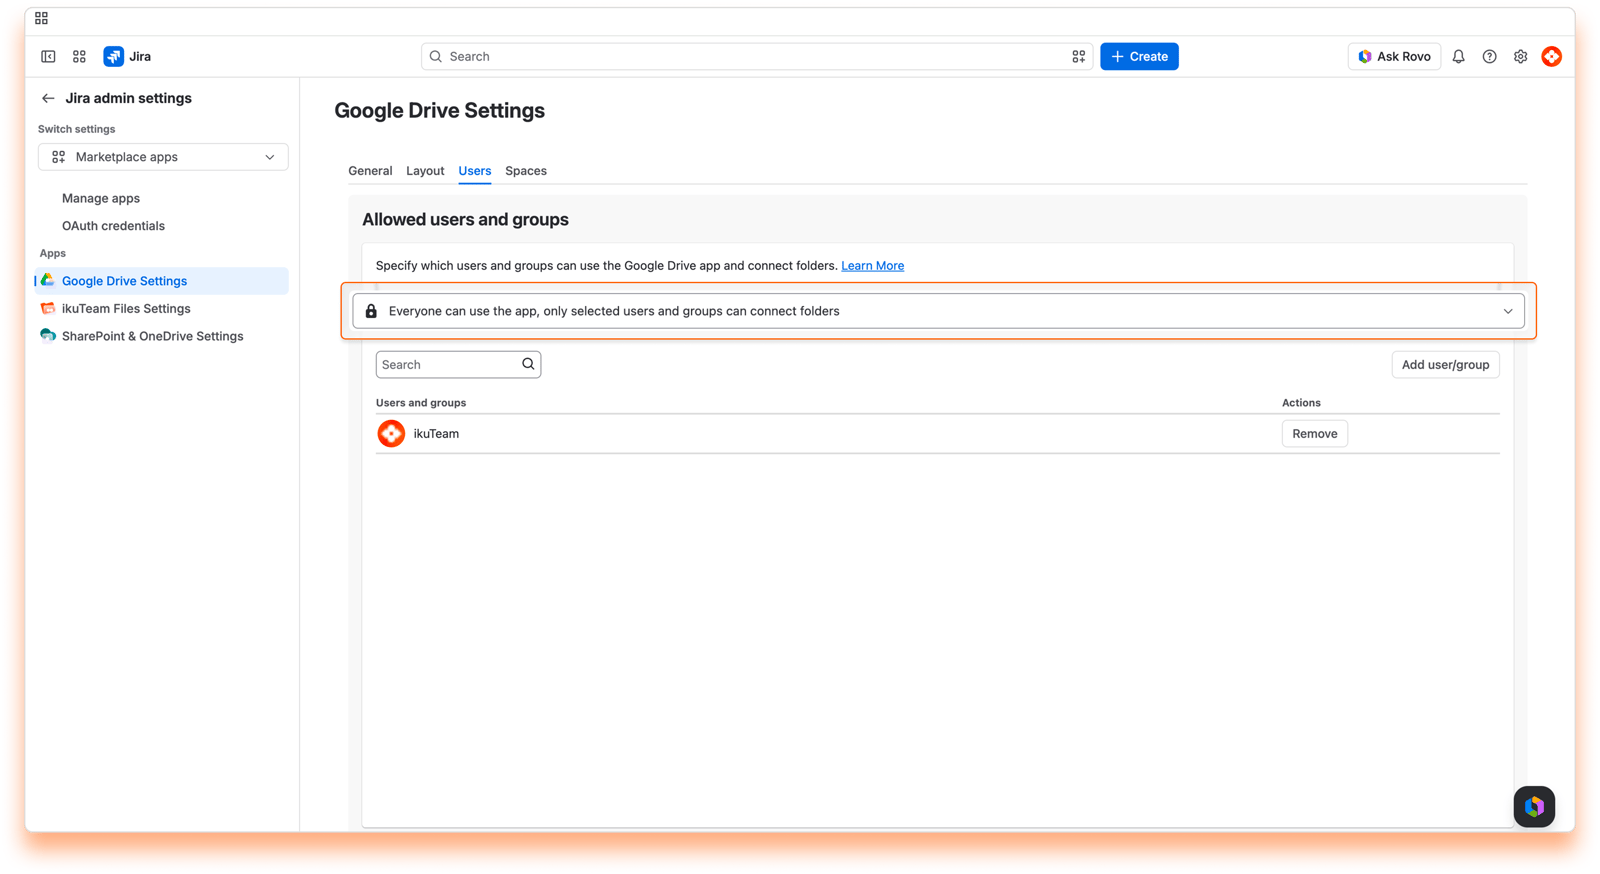
Click the “Add user/group” button, start typing to select a name, and click the “Add” button. The user or group gets access to connect folders immediately.
Search for the user or group you want to remove, click the “Remove” button, and confirm. The option to connect folders will be hidden from the user or group immediately.
Select this option if you only want some users and groups to use the Google Drive Connector app, and specify who can connect folders.
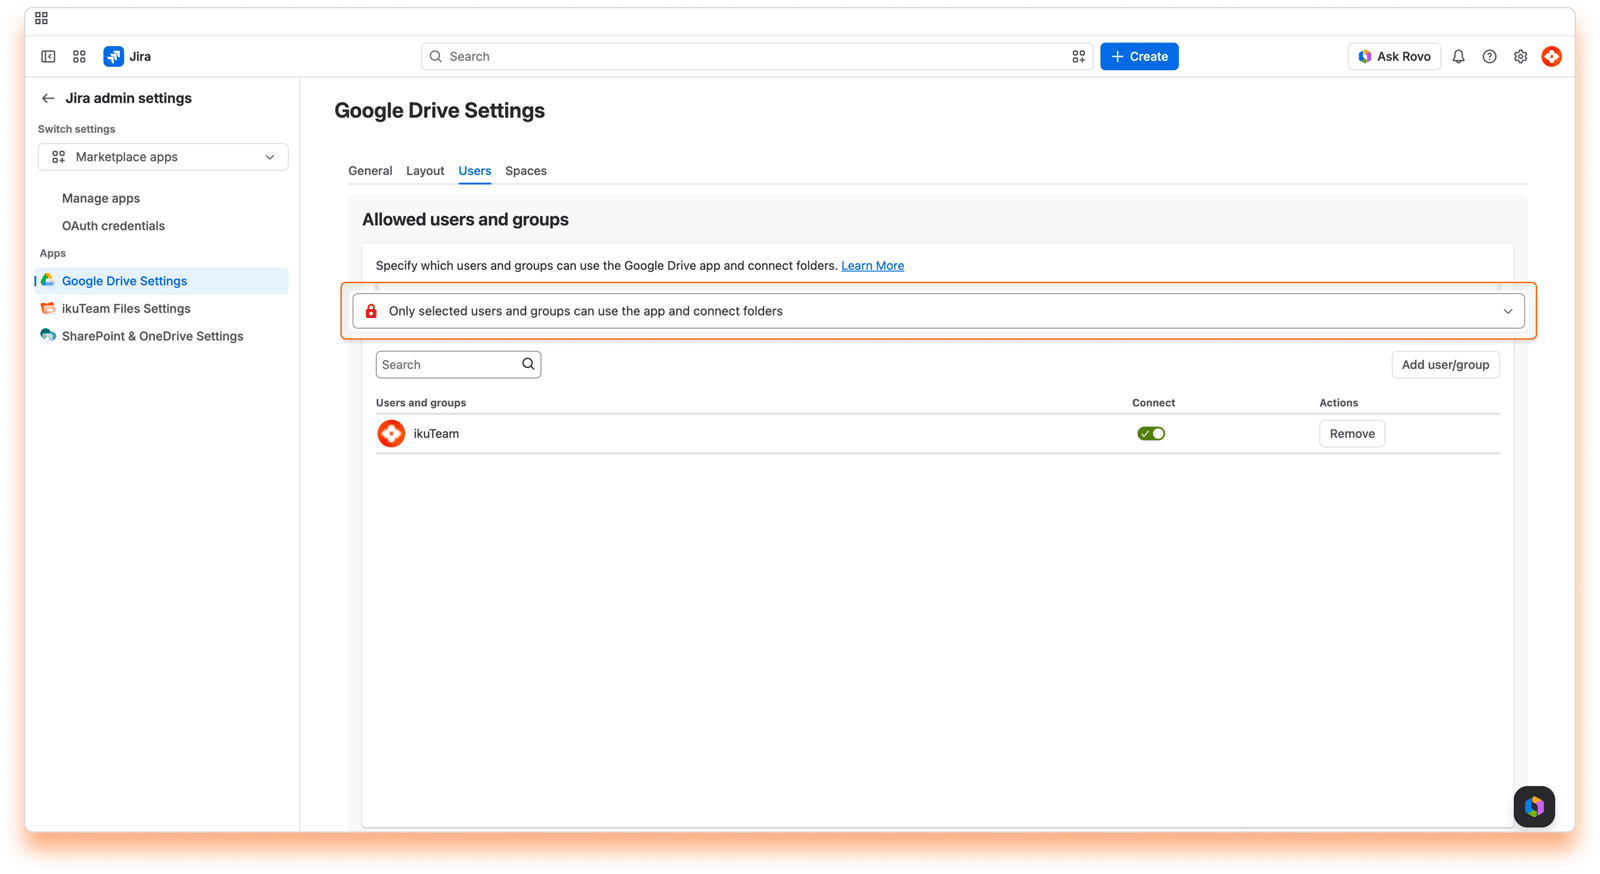
Click the “Add user/group” button, start typing to select a name, and click the “Add” button again. The user or group will have immediate access to the app.
Use the toggle button to determine if a user or group can connect folders.
Search for the user or group you want to remove, click the “Remove” button, and confirm. The app will be blocked for that user or group immediately.
By default, the Google Drive Connector app can be used on all spaces. It’s accessible from its tab in the space navigation (or from the sidebar in Jira Service Management spaces) and a button on the work items to attach files and folders.
However, an Admin can specify which Jira spaces can use the Google Drive Connector app. The file manager and the attach button are hidden when a space doesn’t have permission to use the app.
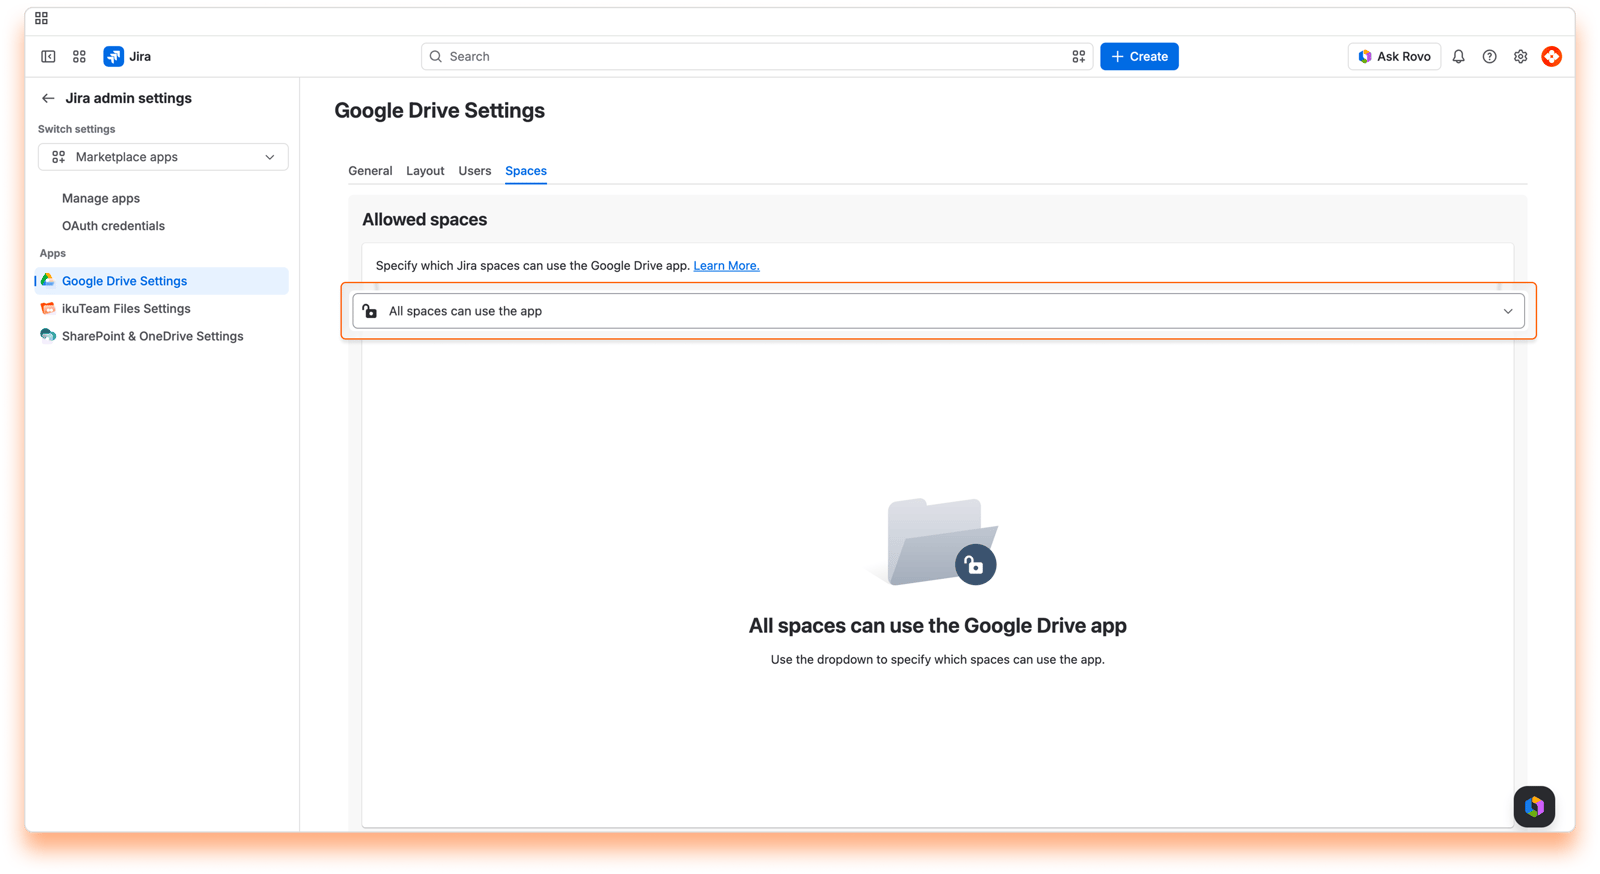
In the "Spaces" tab, you can see the current settings. There are three main options that you can select from the drop-down menu:
This is the default option, meaning every space can access the Google Drive Connector app.
Select this option if you only want to allow the Google Drive Connector app for some spaces.
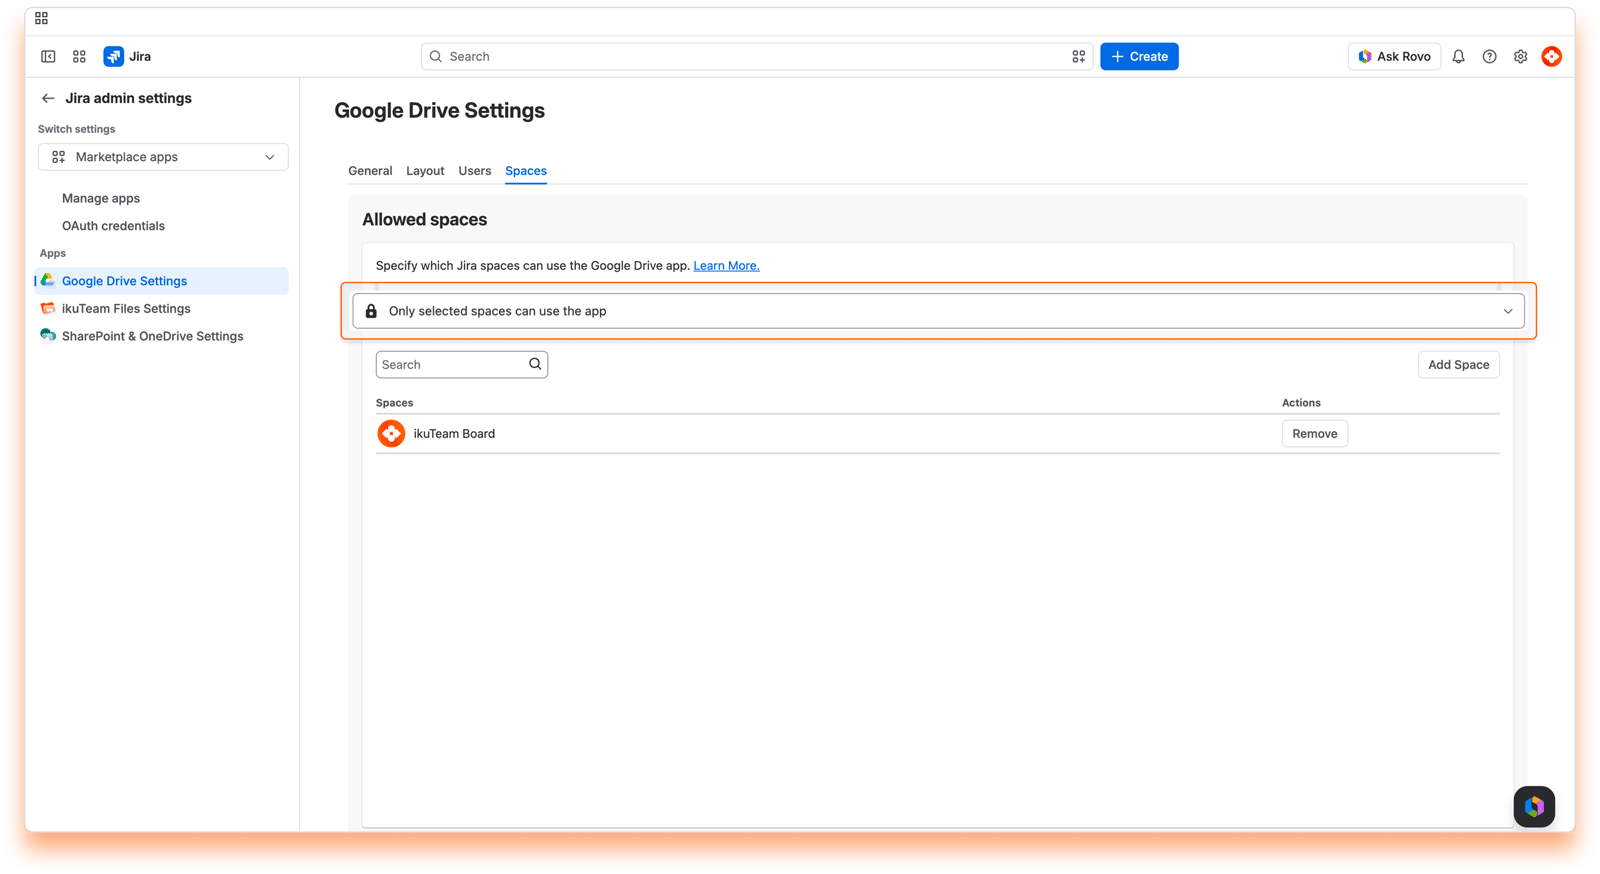
Click the “Add space” button, start typing to select a space, and click the “Add” button. The space gets access to the app immediately.
Search for the space you want to remove, click the “Remove” button, and confirm. The app is hidden from the space immediately.
Select this option if you only want to hide the Google Drive Connector app for some spaces.
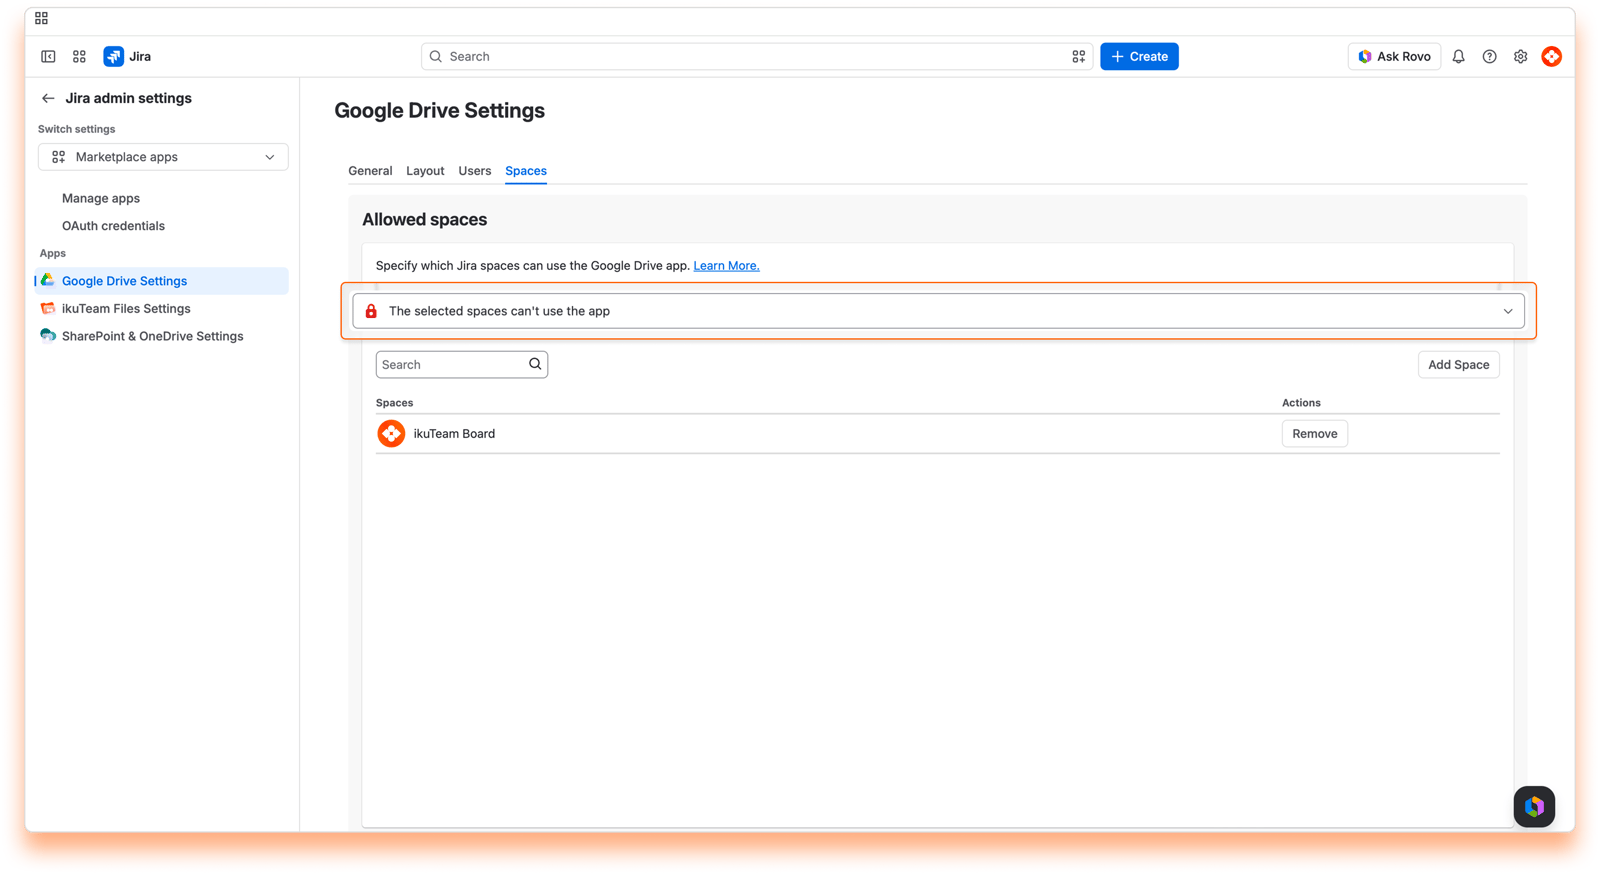
Click the “Add space” button, start typing to select a space, and click the “Add” button. The app is hidden from the space immediately.
Search for the space you want to remove, click the “Remove” button, and confirm. The space gets access to the app immediately.
Blocking the Google Drive Connector app for a space already using it hides the file manager link and all the attached files and folders to work items. The attachments will be there if the app is allowed again.
Space admins can also toggle on/off the Google Drive Connector app in the Space settings as long as the Admin allows it.
The Support card on the General tab has an Additional resources section with a link to the Google Drive Documentation. Use it whenever you need setup guides or help with a setting.
On this page, you learned about all the Admin settings currently available.
If you still have questions or require help with other global settings, visit our support portal to send us your questions or feature requests. Our team is always happy to help.


