

Confluence Google Drive Integration
Create a single source of truth with seamless syncing and real-time collaboration.
Read more


These use cases show how to create folders in Google Drive, connect them to work items and fill them with files, using the Google Drive Connector for Jira automation actions. The workflows use Jira’s native automation engine, so folders and files land in the right place in Google Drive when specific triggers occur.
The automation actions are part of the Advanced Edition of Google Drive Connector for Jira. For setup instructions, see 4.2 Set up your first automation flow. For every action and option, see 4.1 Google Drive Connector automation actions.
Trigger: When a new work item is created in the Support space.
Steps:
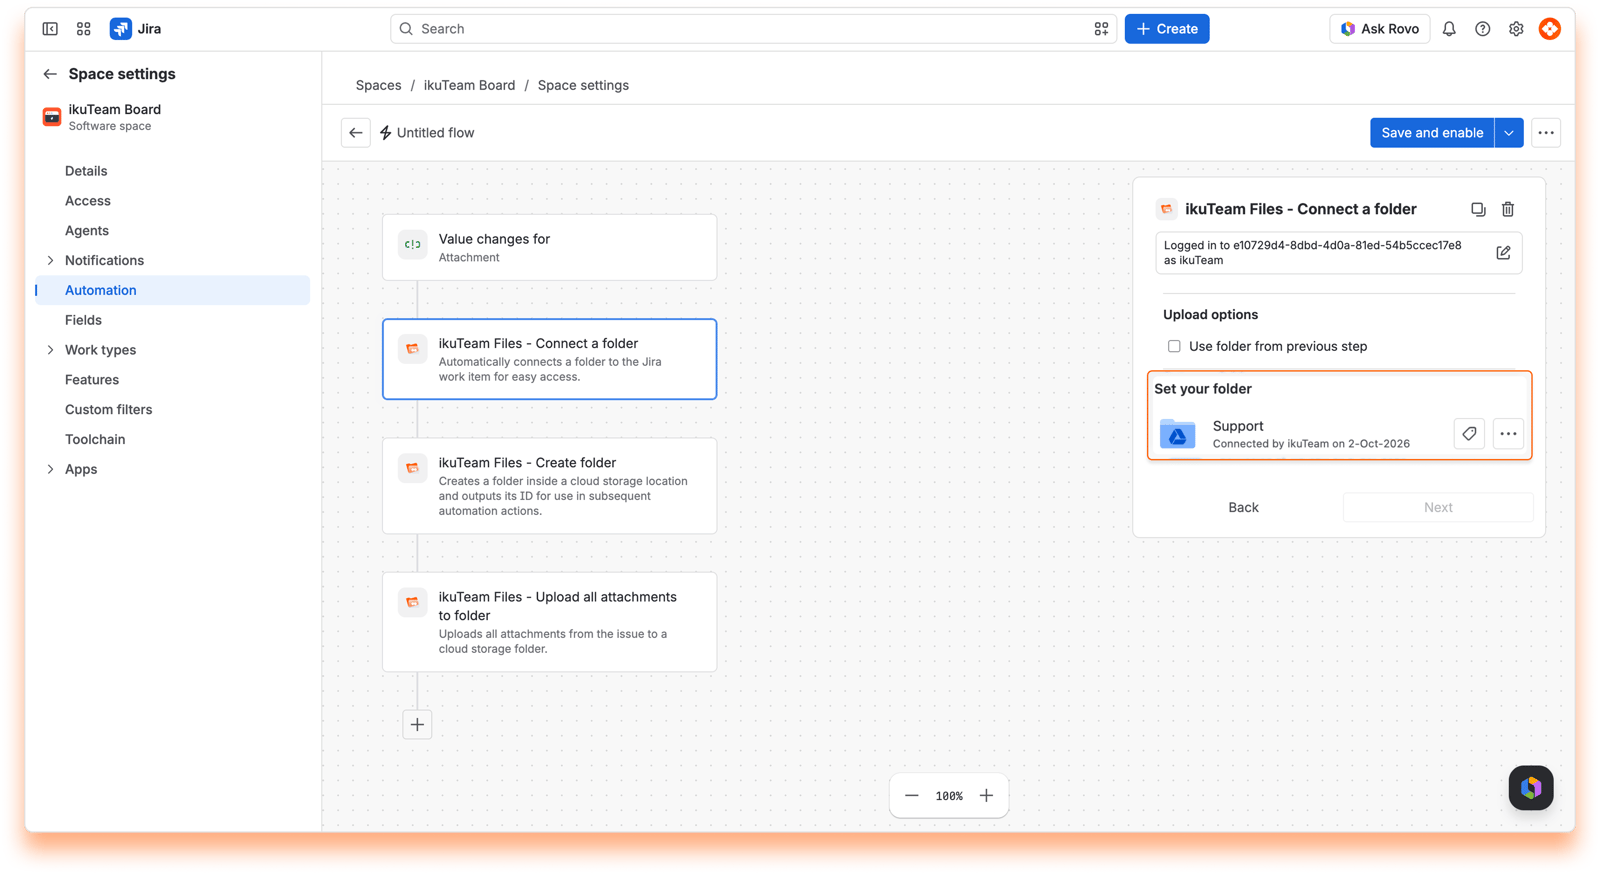
Choose the base folder: Add the Google - Create folder action, click Connect and select the support base folder in Google Drive, for example, Support Cases 2026. Every case folder is created inside it.
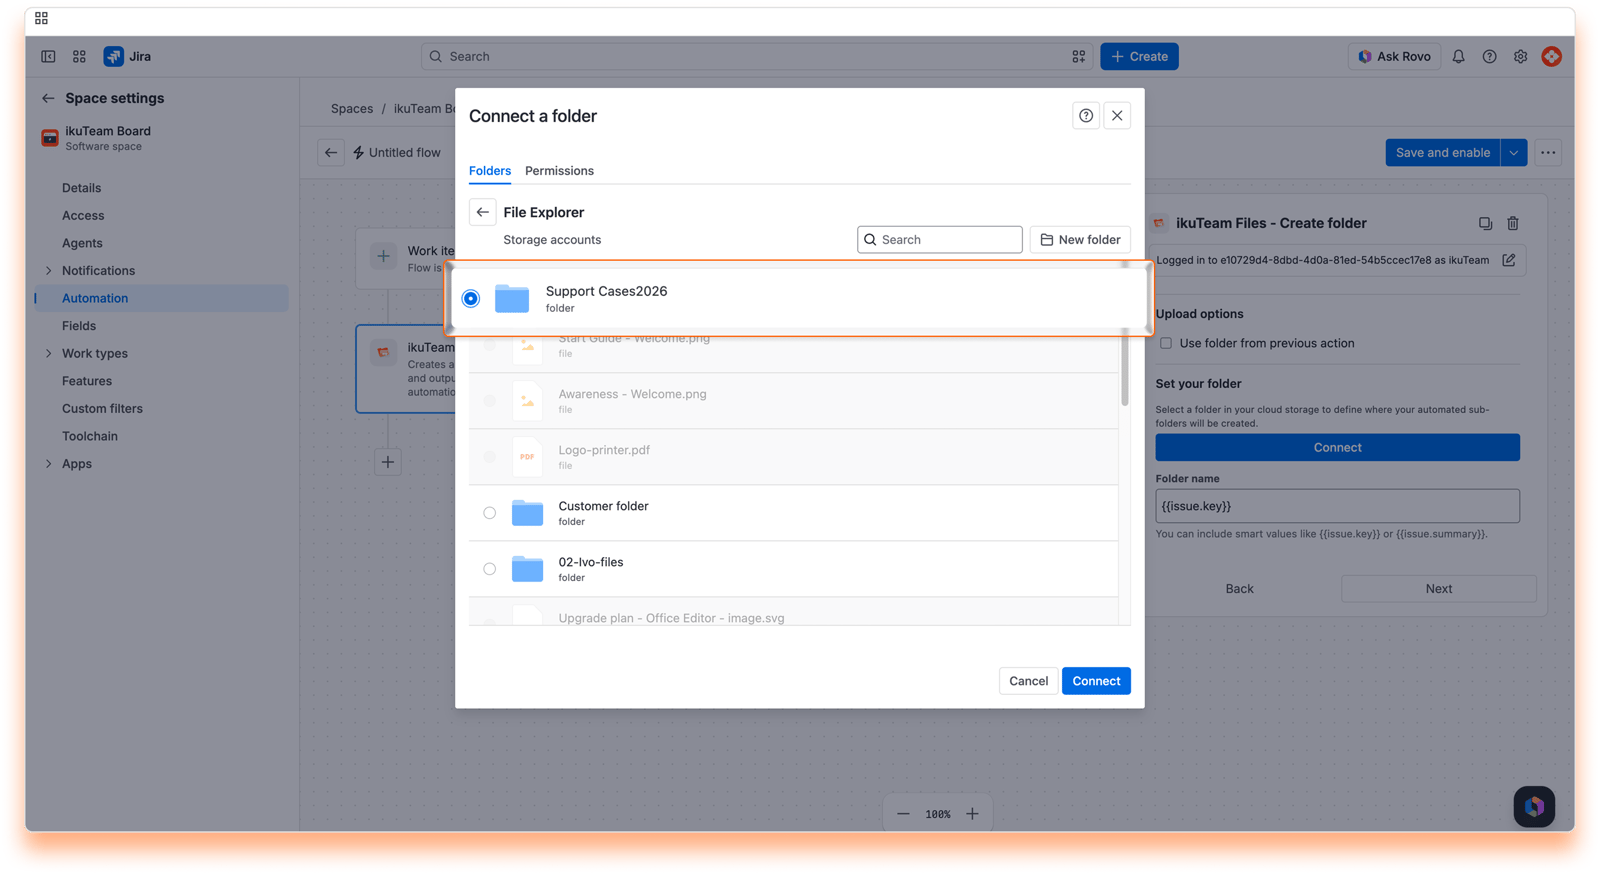
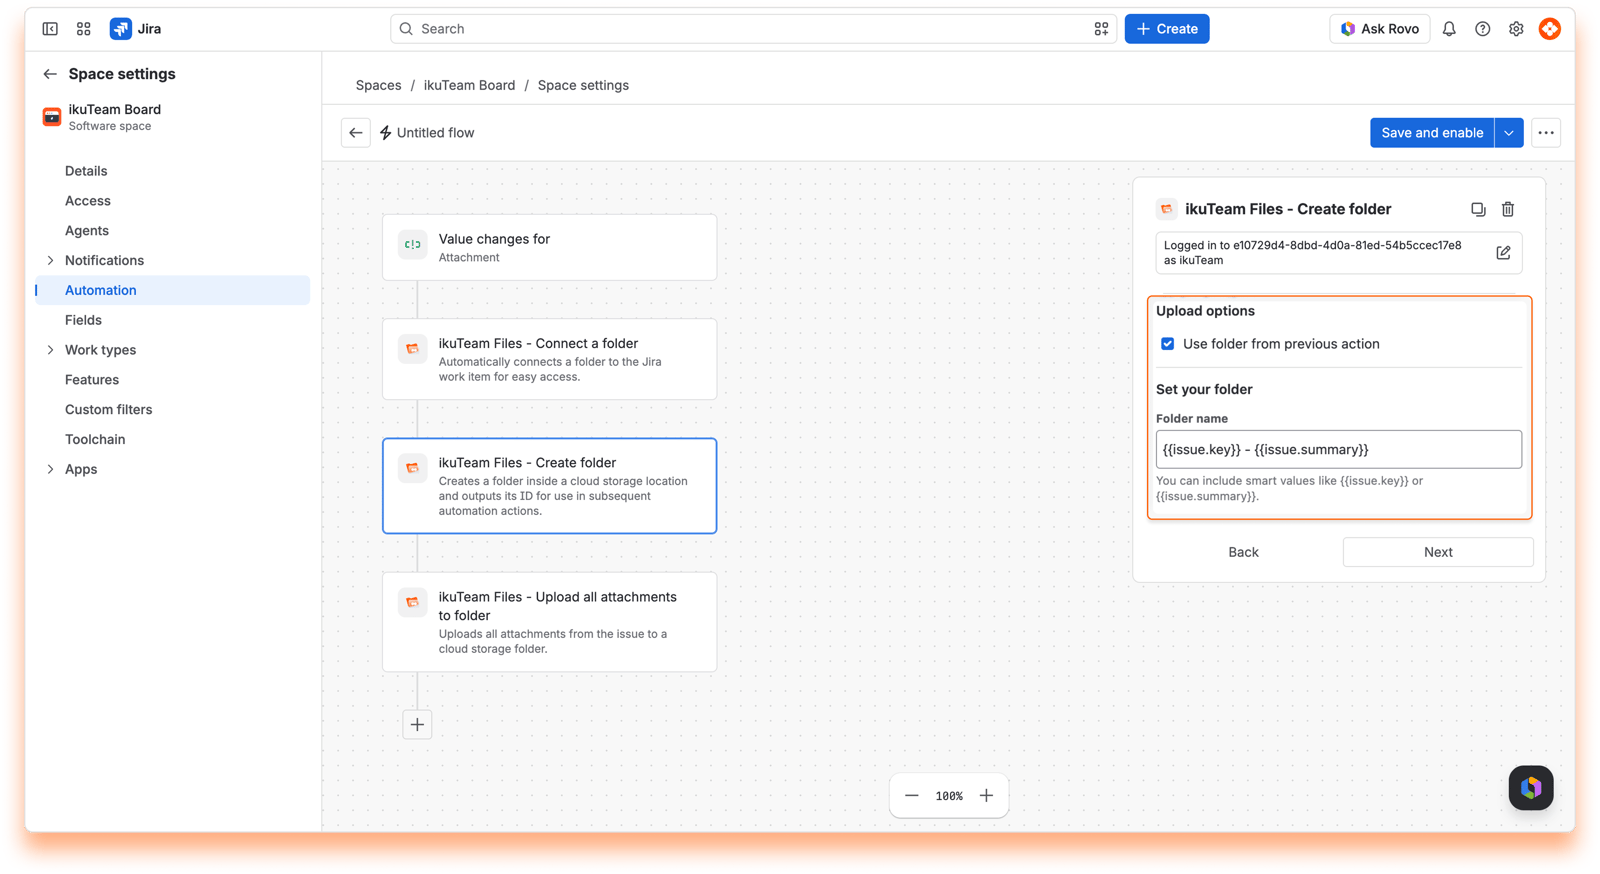
Create a folder: In the same action, use smart values to name the folder dynamically, for example, {{issue.key}} - {{issue.summary}}. We suggest keeping the work item key, since the summary can be too long for a folder name.
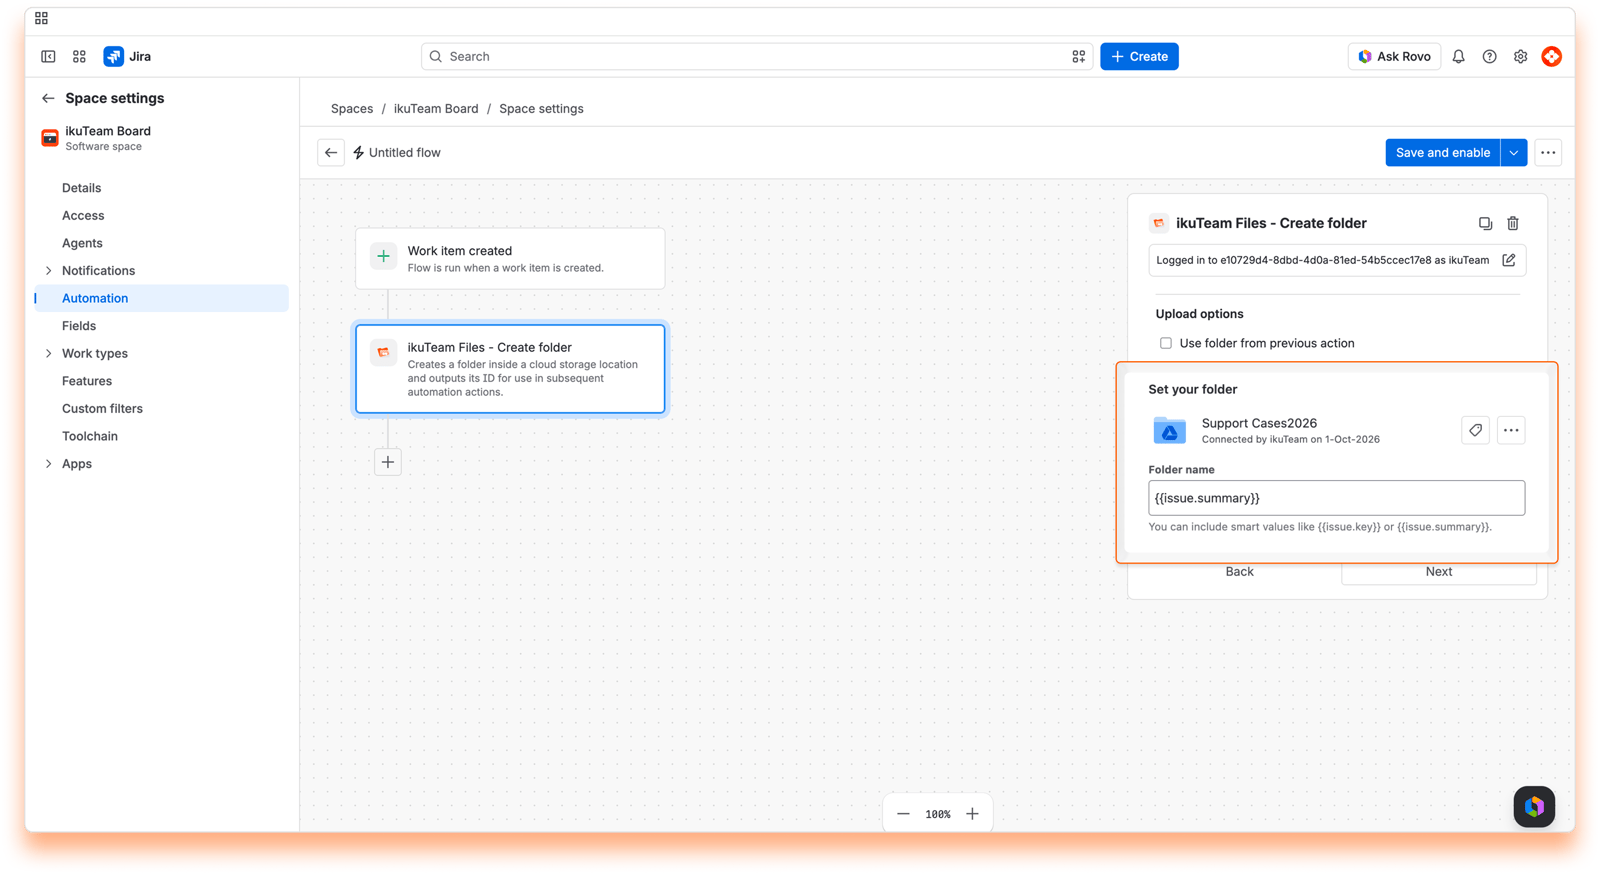
Connect the folder to the ticket: Add Google - Connect a folder and select "Use folder from previous step", so the new case folder shows on the ticket. Don’t select the base folder here, or the whole base folder would be connected to every ticket.
Add a case template (optional): Add Google - Copy file. Under Source file, select your pre-filled case template or SLA document, and under Folder options, select "Use folder from previous step", so a copy lands in the case folder. Add one Copy file action for each document.
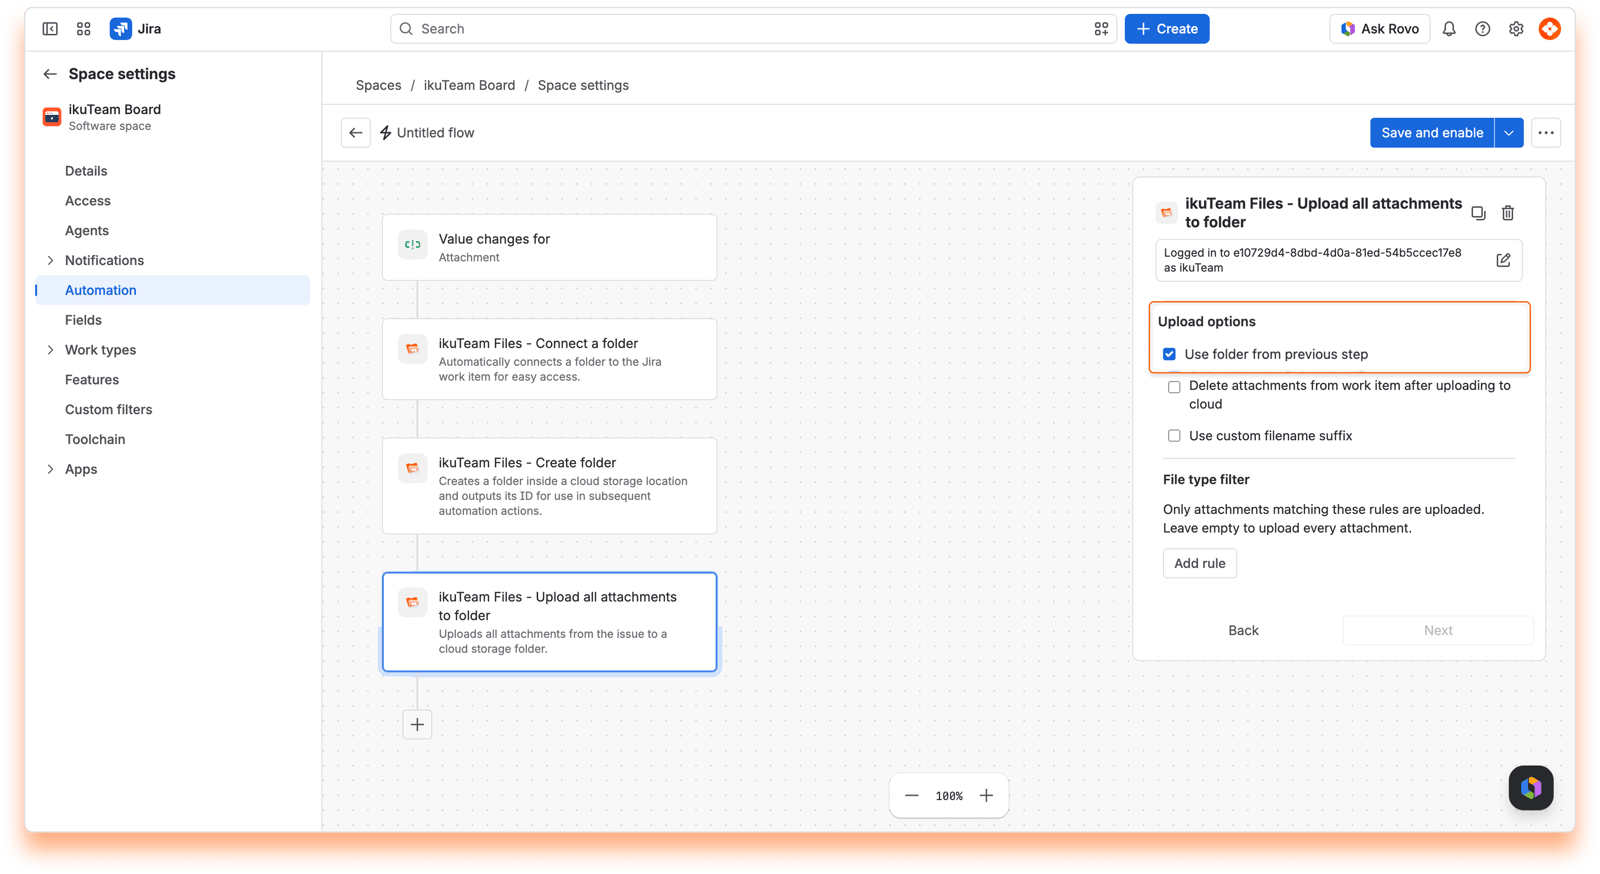
Upload the ticket’s attachments (optional): Add Google - Upload attachments to folder and select "Use folder from previous step" to upload the files attached to the ticket, such as logs and screenshots, into the case folder. The actions run one after the other, so you don’t need a delay before this one.
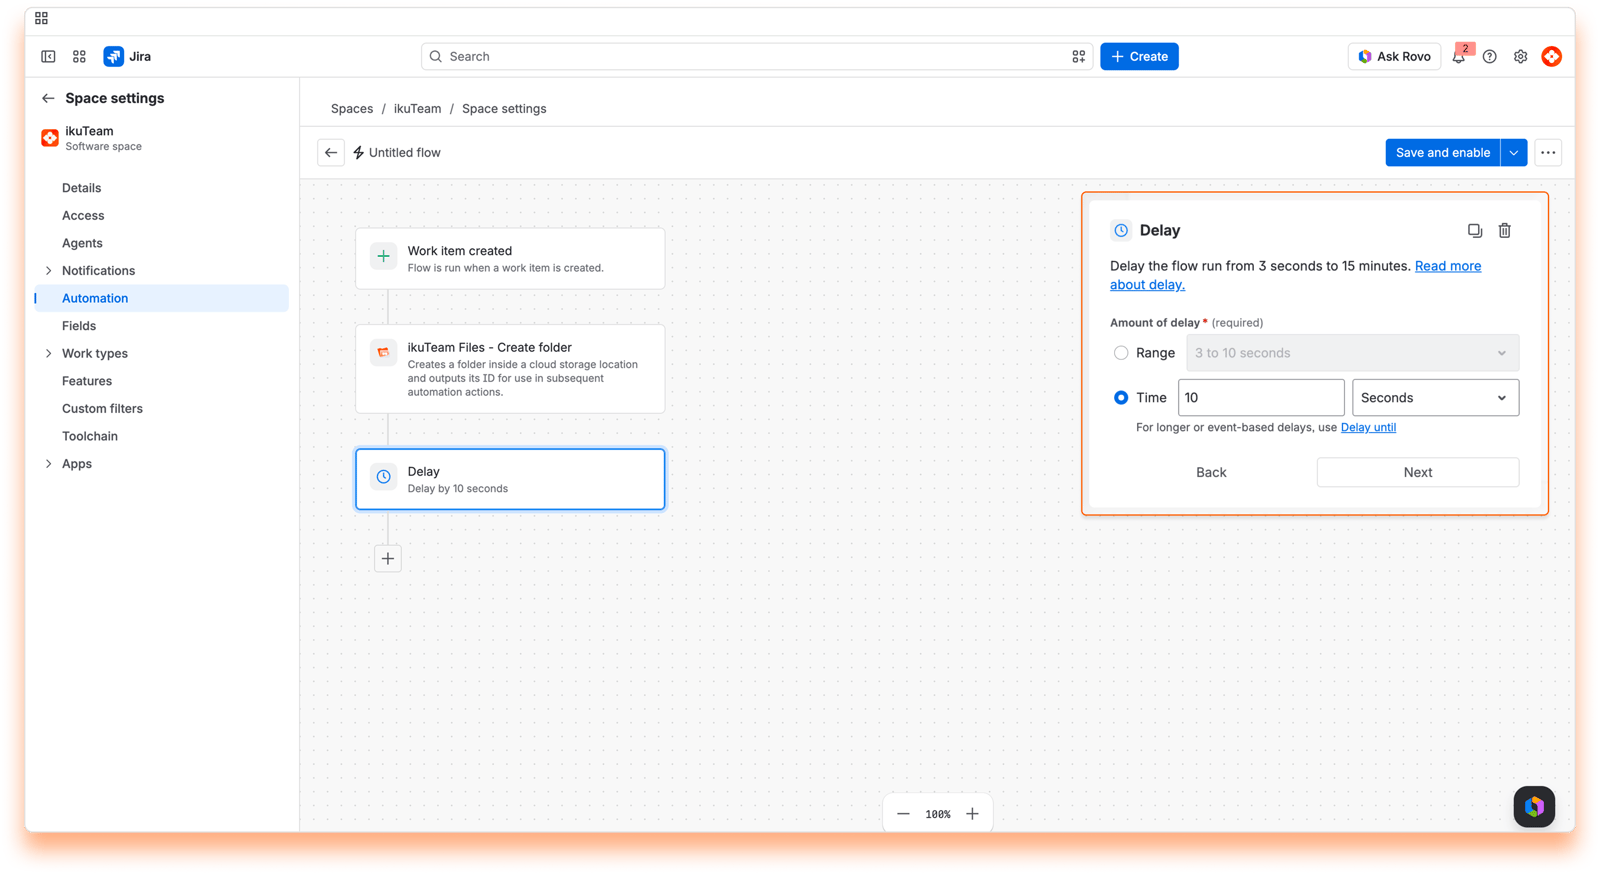
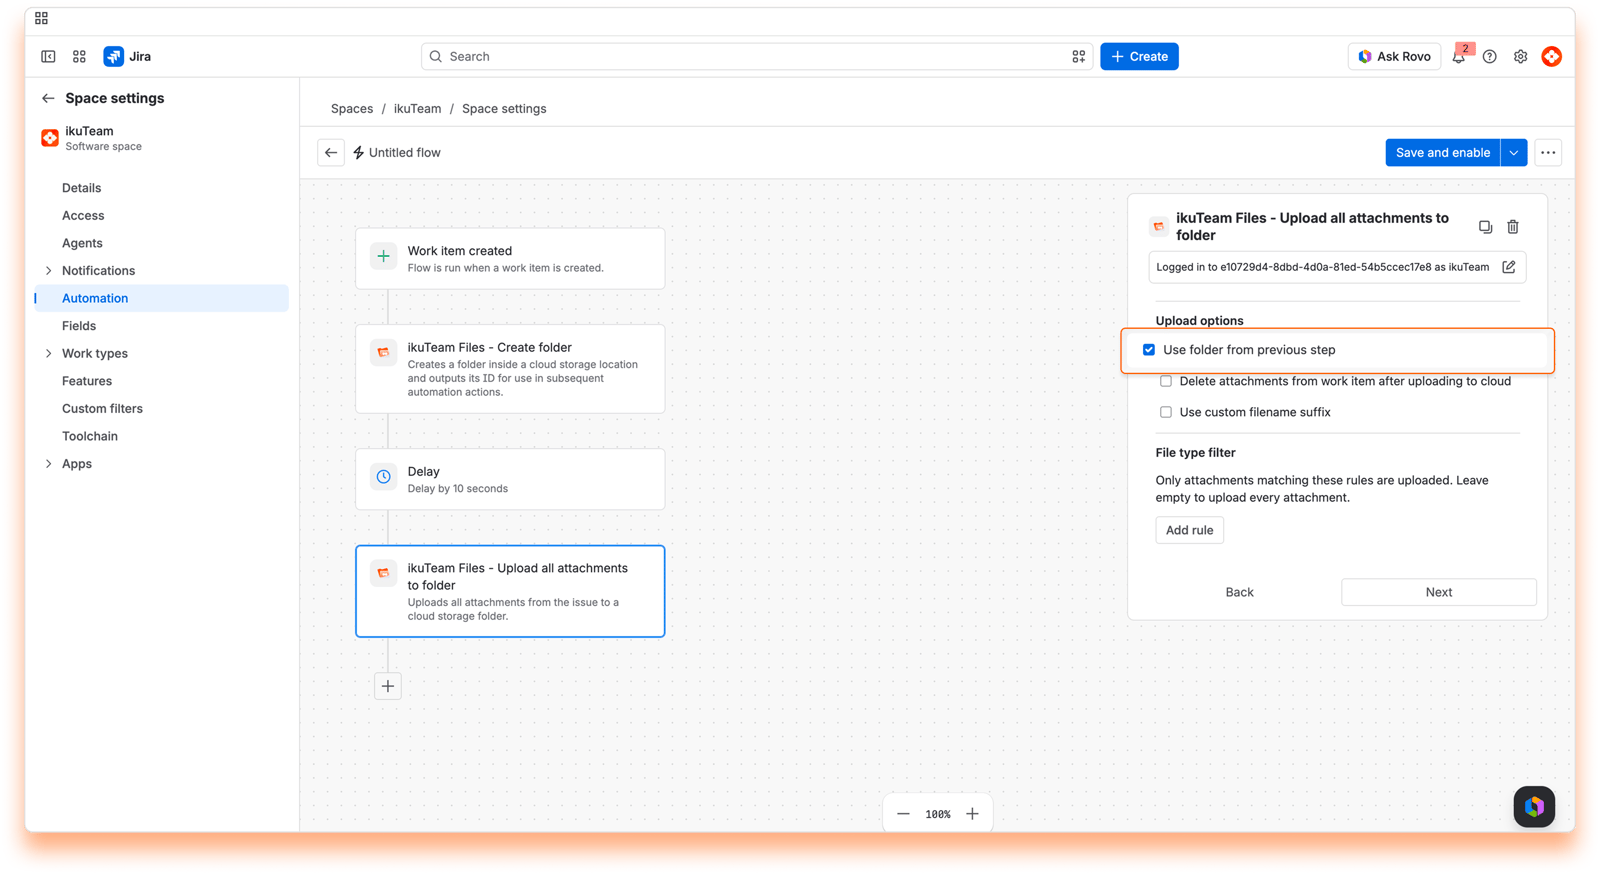
Select "Delete attachments from work item after uploading to cloud" to save Jira storage by moving the attachments to Google Drive.
Outcome: Every new support ticket automatically gets a dedicated folder in Google Drive, connected to the ticket and ready for logs, screenshots, and communication records.
Trigger: When an attachment is added to a work item in the Support space.
Steps:
Find the case folder: Add Google - Find folder. Click Connect and select the support base folder (the one from use case 1), then set Folder name pattern to {{issue.key}} -. It finds the ticket’s case folder even if the summary has changed, and the dash keeps SUP-1 from matching SUP-12.
Or create the folder when it might be missing: If some tickets don’t have a case folder yet, use Google - Create folder instead of Find folder. Click Connect, select the support base folder, name the folder the same way as in use case 1, for example, {{issue.key}} - {{issue.summary}}, and keep Use the existing folder selected. It uses the case folder when it’s there and creates it when it’s not.
Upload the attachment: Add Google - Upload attachments to folder, then select "Use folder from previous step" and "Upload only the latest attachment" to upload the newly added attachment to the remote folder.
Outcome: Every new attachment is automatically uploaded to the ticket’s case folder, giving the support team central access.
Trigger: When a work item is transitioned to Escalated status.
Steps:
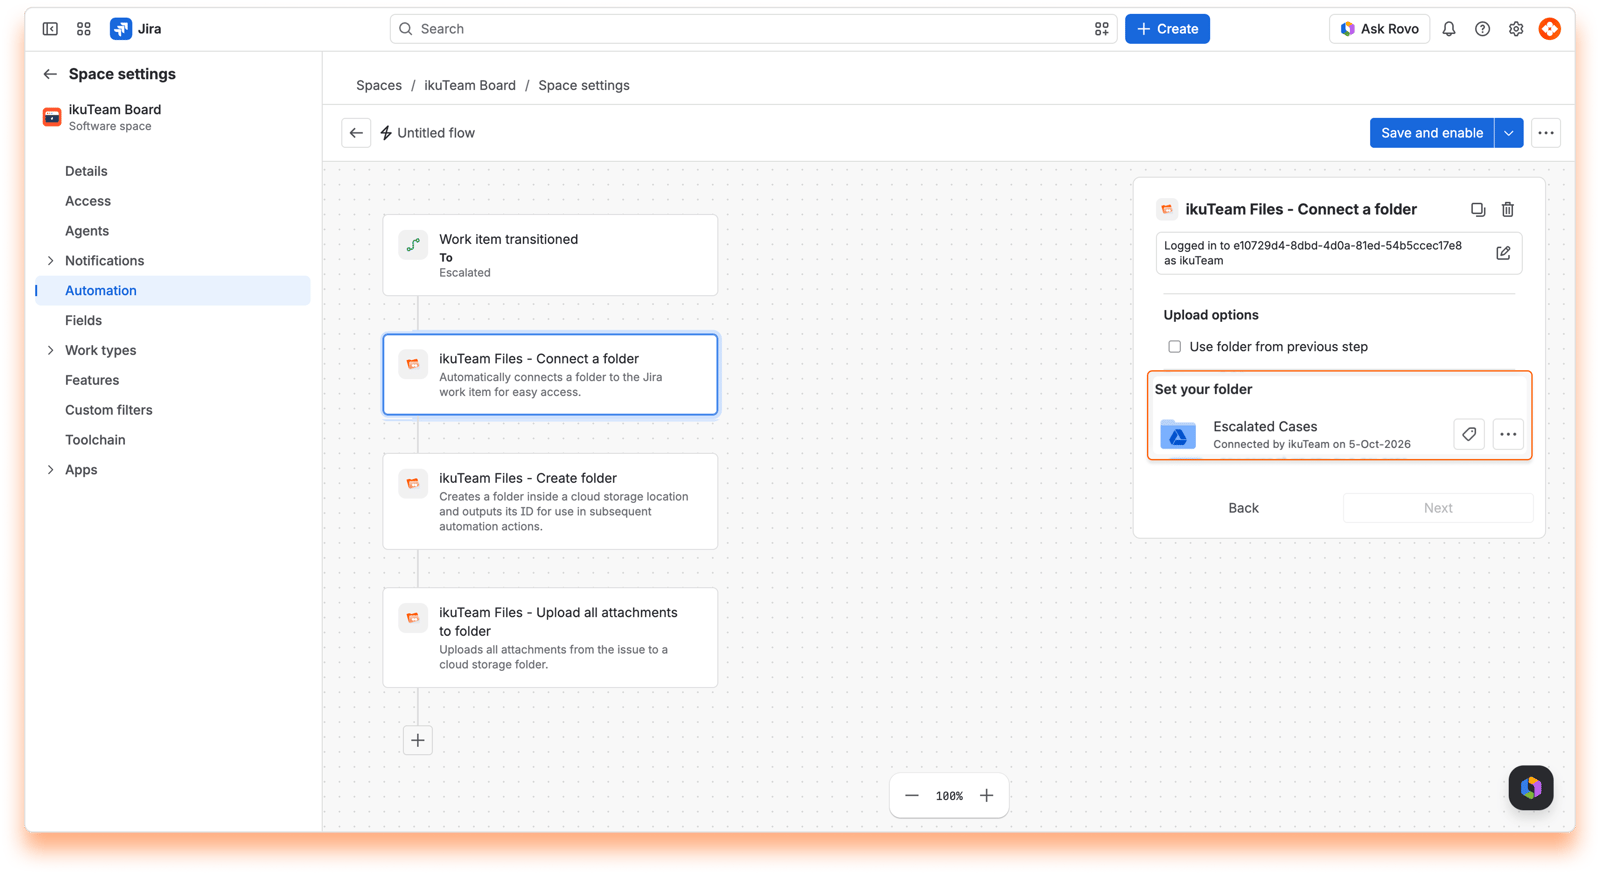
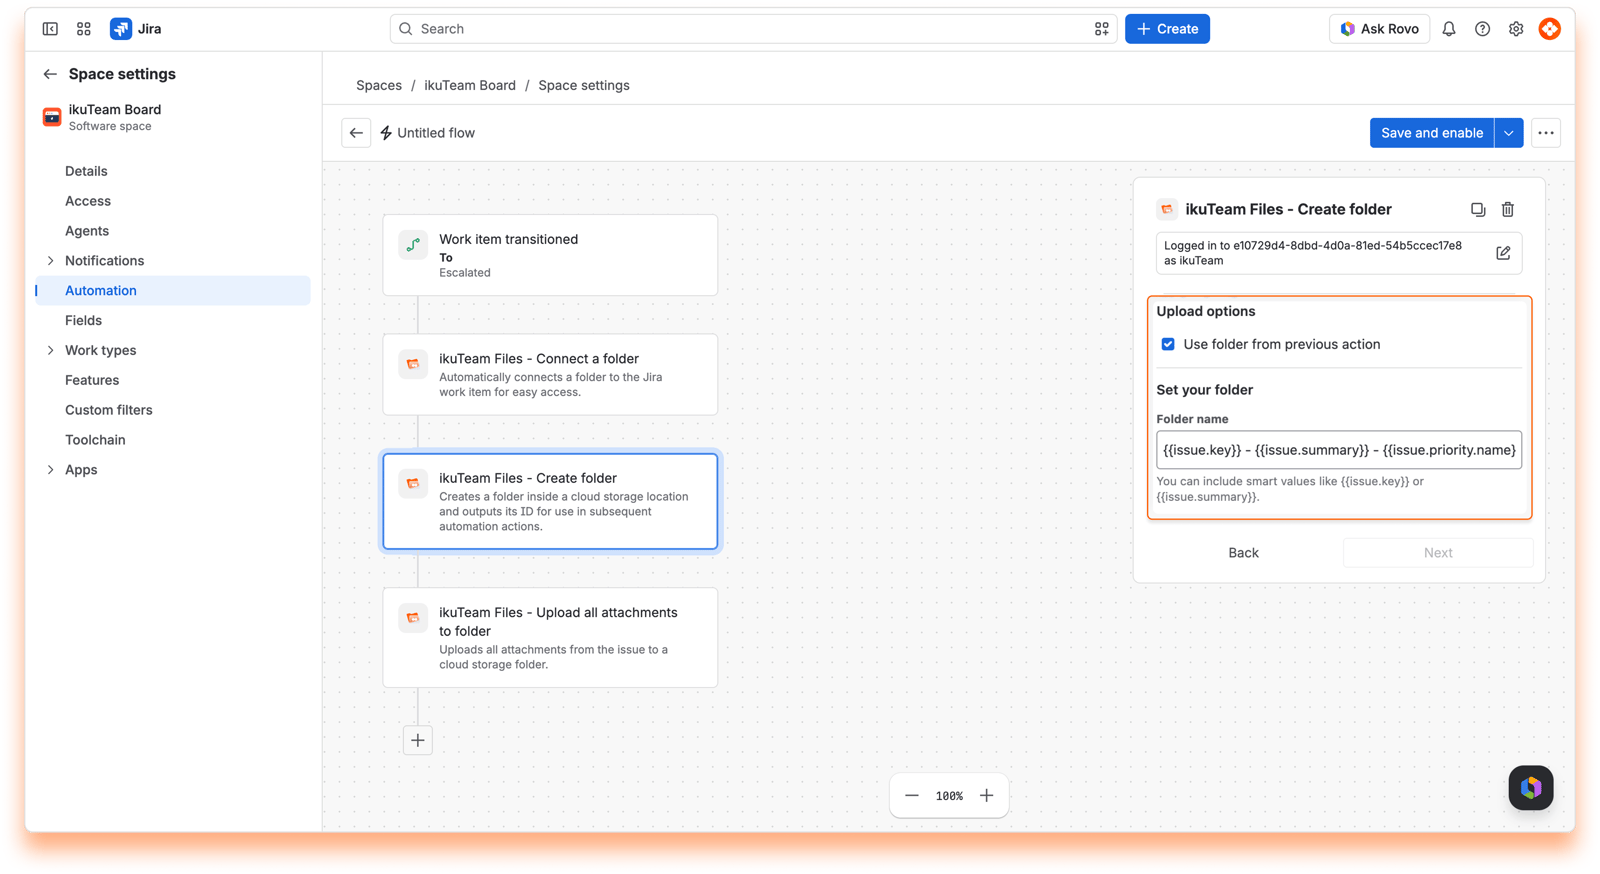
Choose the escalation folder: Add Google - Create folder, click Connect and select a dedicated Escalated Cases folder in Google Drive.
Create a subfolder: In the same action, name it using smart values {{issue.key}} - {{issue.summary}} - {{issue.priority.name}}.
Connect the folder to the ticket: Add Google - Connect a folder and select "Use folder from previous step", so the escalation team finds the folder on the ticket.
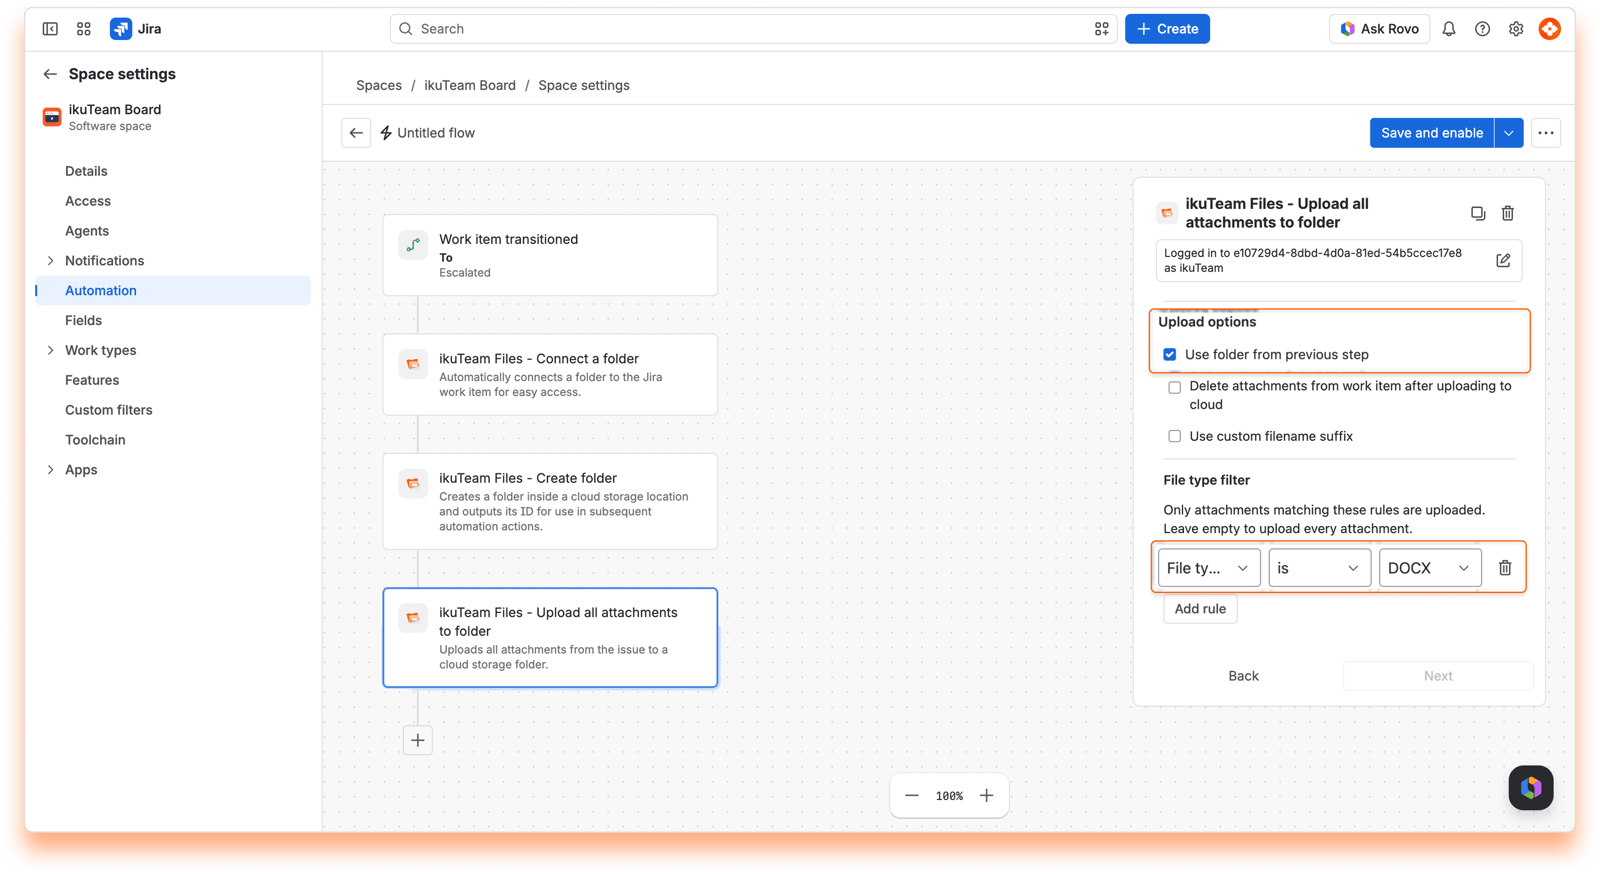
Upload relevant files: Add Google - Upload attachments to folder, select "Use folder from previous step", and use the File type filter to pick the attachments to keep, for example, PDF and DOCX for the case summary and internal notes attached to the ticket.
Outcome: Escalated work items are automatically organized in a separate location, making them easier to track and review.
Trigger: When a work item is transitioned to Resolved or Closed status.
Steps:
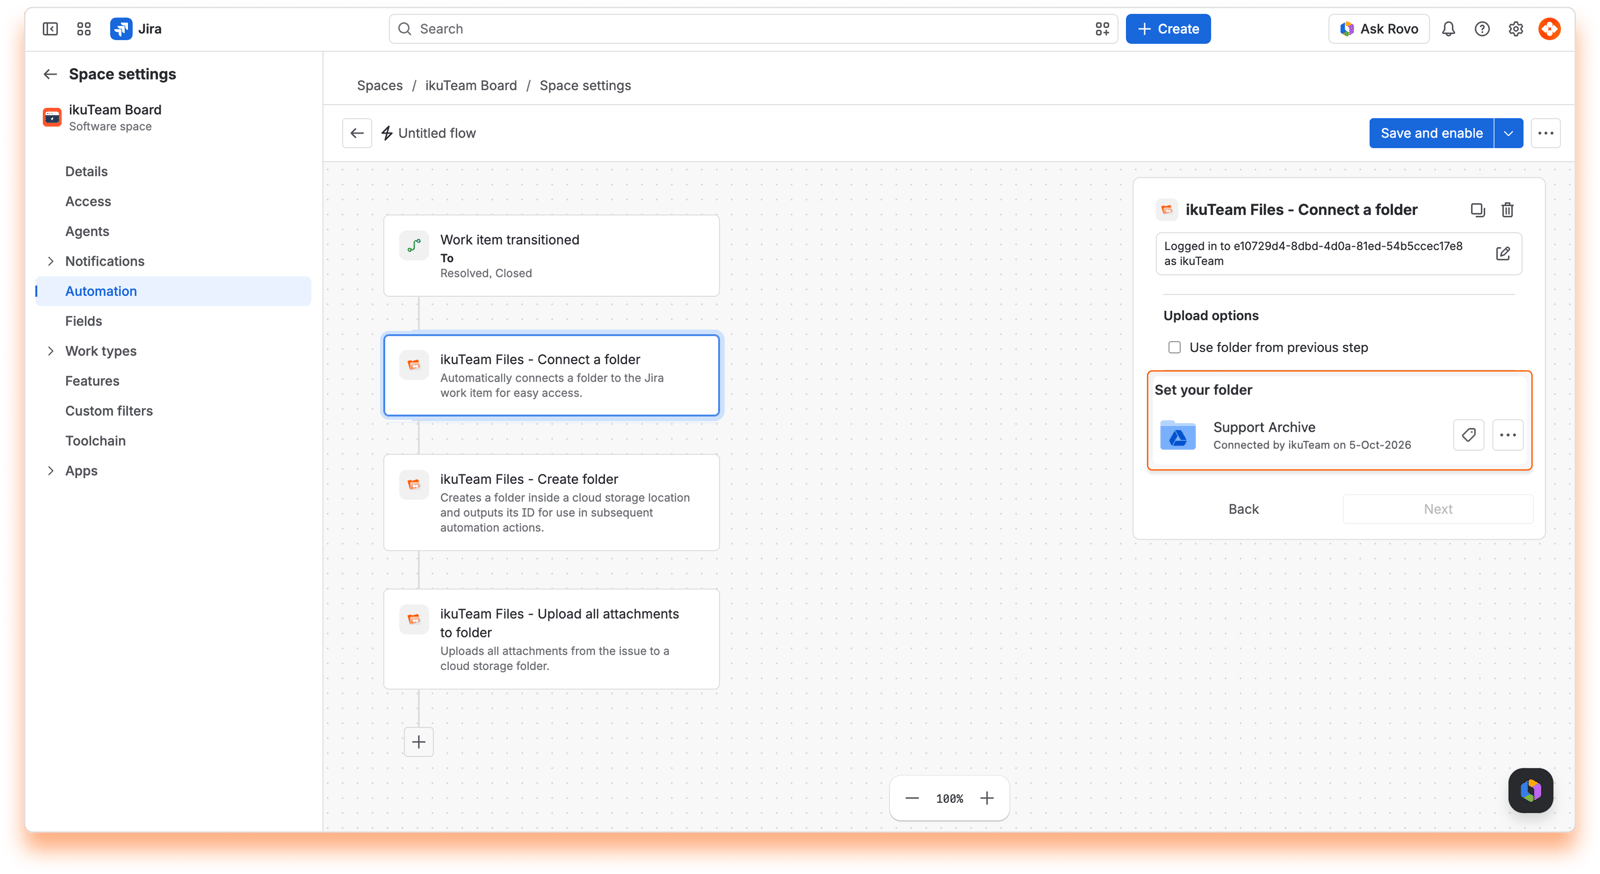
Choose the archive folder: Add Google - Create folder, click Connect and select the Support Archive folder.
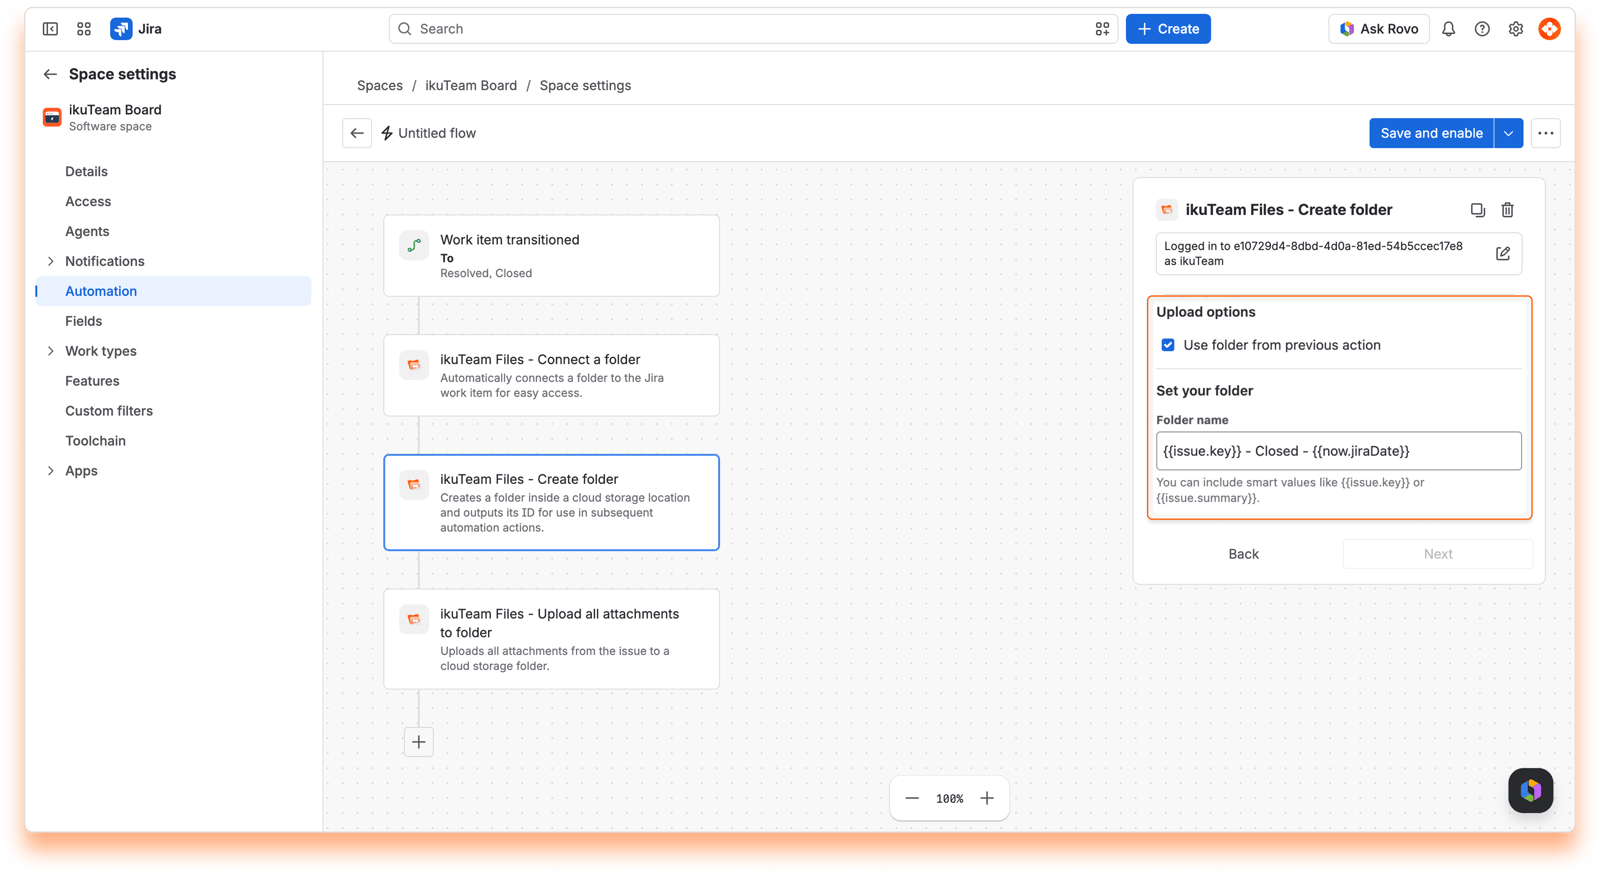
Create an archive folder: In the same action, use smart values for the work item key, the word "Closed", and the date, for example, {{issue.key}} - Closed - {{now.jiraDate}}.
Upload the final resolution report: Add Google - Upload attachments to folder, select "Use folder from previous step", and add a PDF File type filter, so the resolution report and other PDFs attached to the ticket are archived.
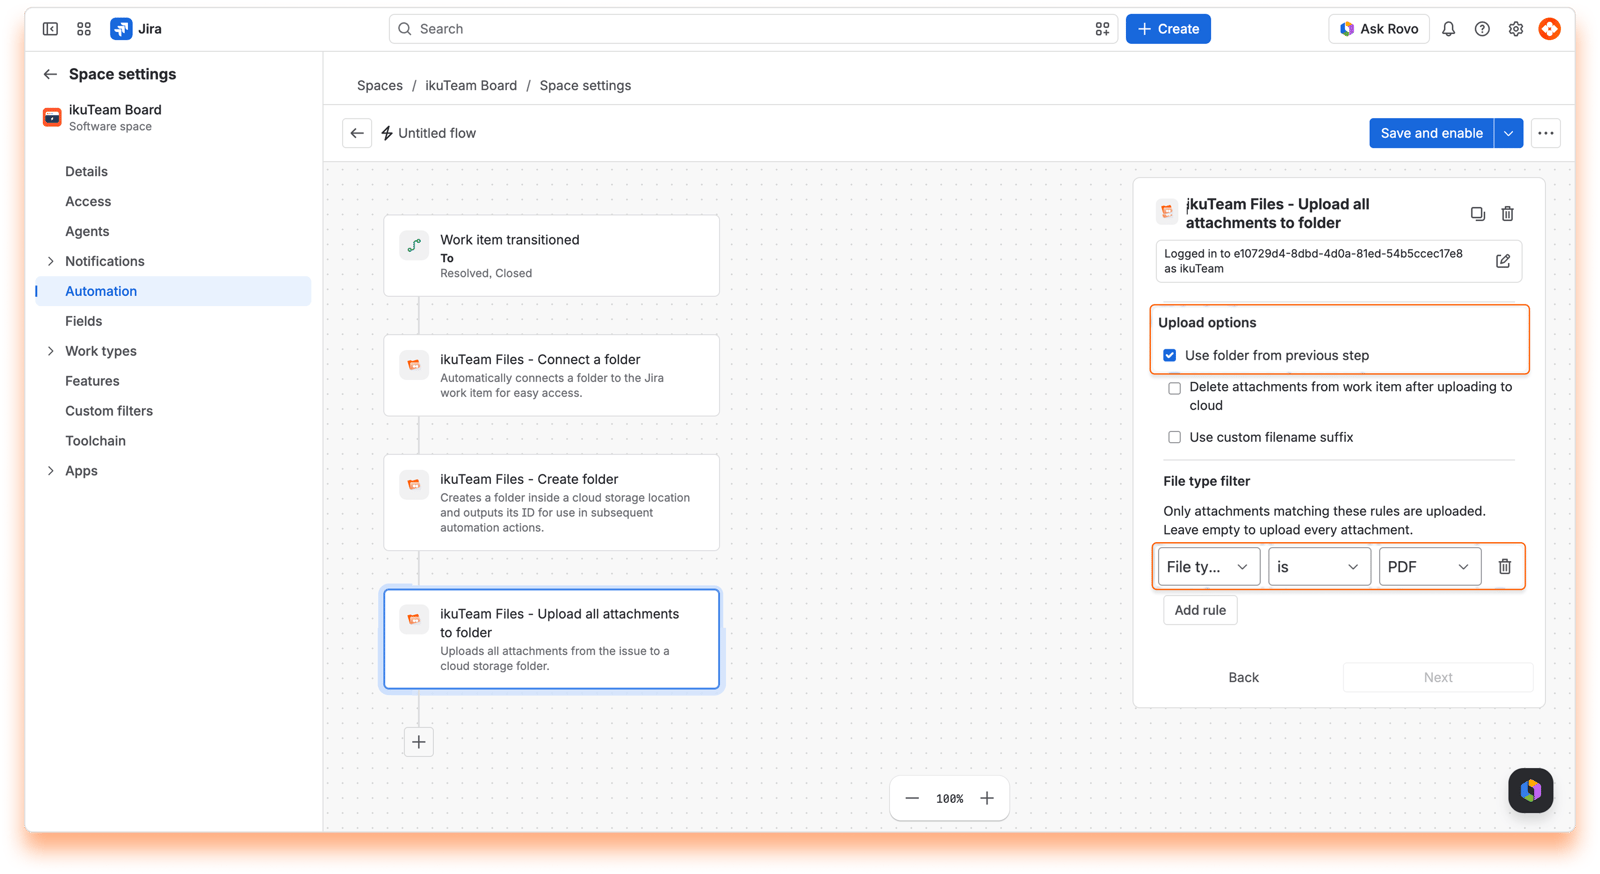
Outcome: Closed tickets are archived in an organized, date-stamped folder structure for compliance and future reference.
Tip | Description |
|---|---|
Use smart values | Use Jira smart values like |
Chain actions | In Connect a folder, Copy file and Upload attachments to folder, select "Use folder from previous step" to work with the folder created or found earlier in the same automation run. In Create folder and Find folder, the option is called "Use folder from previous action". |
Multiple accounts | You can connect several Google accounts and use different ones in different automation flows, based on your team’s needs. |
Conditions and branches | Combine folder creation actions with Jira automation conditions, for example, to trigger only for specific work types, priorities, or components. |
Refer to the docs | For advanced configurations, see the Jira Cloud Automation documentation. |


