

Confluence Google Drive Integration
Create a single source of truth with seamless syncing and real-time collaboration.
Read more


You can browse the folders shared with a Jira space, preview files, edit documents, and more on the file manager.
The file manager is the cornerstone of everything you can do with the Google Drive Connector for Jira app. When you attach files and folders to your work items, you'll also be using the file manager, and it works the same way.
This page covers everything related to using the Google Drive Connector for Jira app, from what you can do with your files and folders to managing connected folders. Let's start with the latter since you always need at least one connected folder to use the app.
The file manager is in the Google Drive tab at the top of your Jira space. In Jira Service Management spaces, it's in the space sidebar.
If you don't see the Google Drive tab, expand the menu at the end of the tabs to find it. You can also drag the tab to the position you prefer.
When you open the Google Drive Connector app, the first thing you'll see is a list of the connected folders. You can browse and use these folders to collaborate with your team.
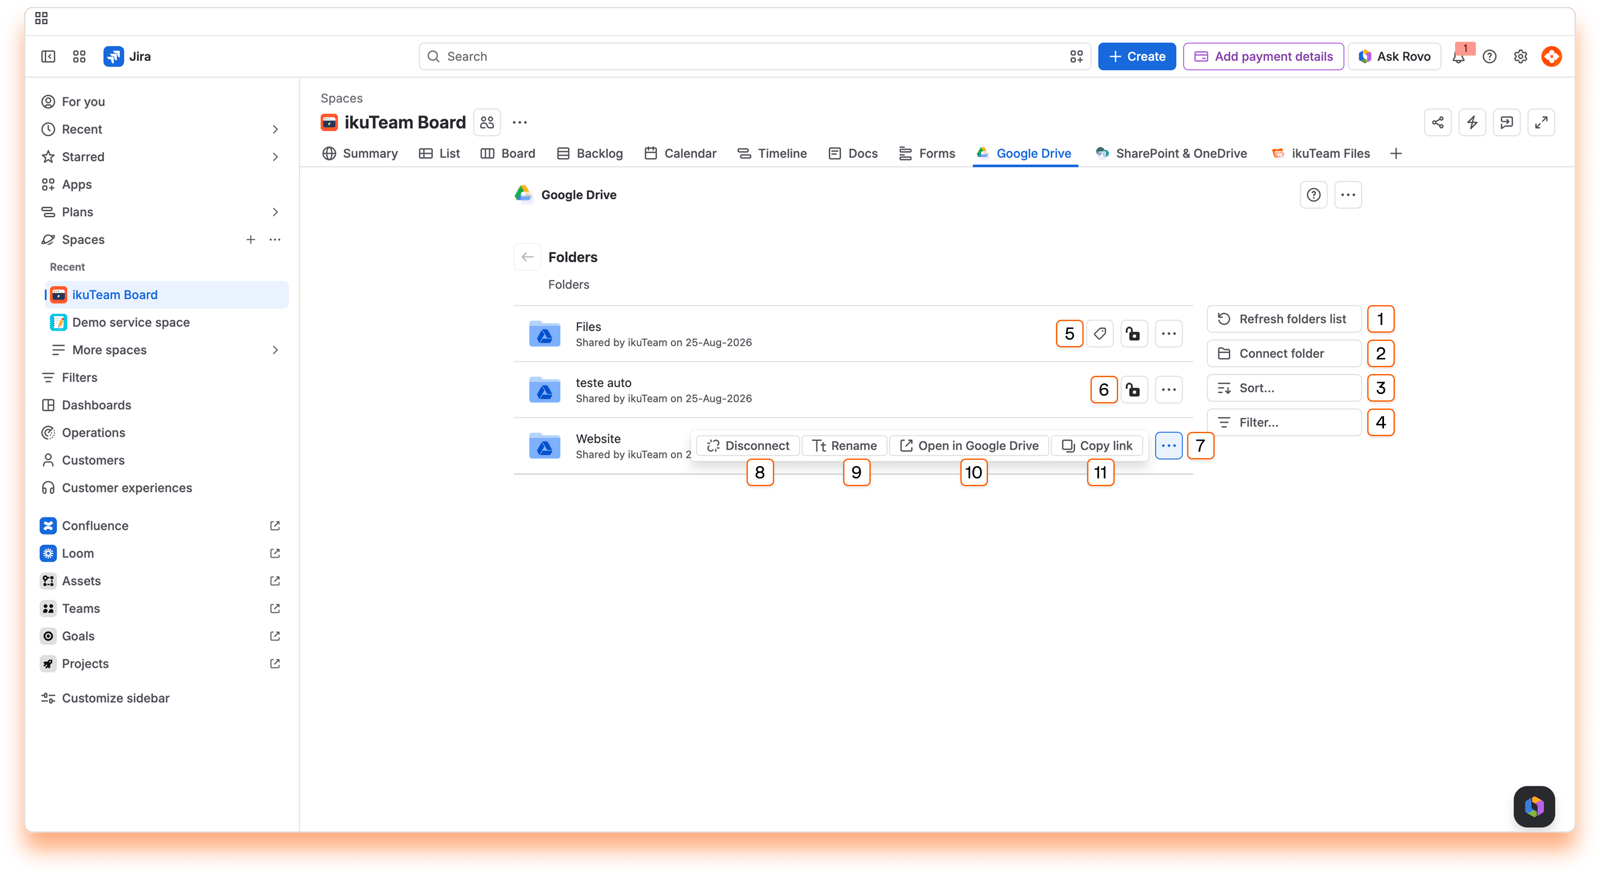
List of the folders connected to the current Jira space.
Refresh folders list button
Connect folder button
Sort connected folders button
Filter connected folders button
Folder tag button
Folder permissions button
Context menu button
Disconnect folder option
Rename folder option
Open in original storage option
Copy Link option
Use the "Refresh folders list" button to update the connected folders list and access folders your team shared with the latest permissions.
In the Getting started page, we covered how to connect your first folder. The empty screen makes it easy to see how to do it, but you can connect as many folders as you need.
Click the "Connect folder" button.
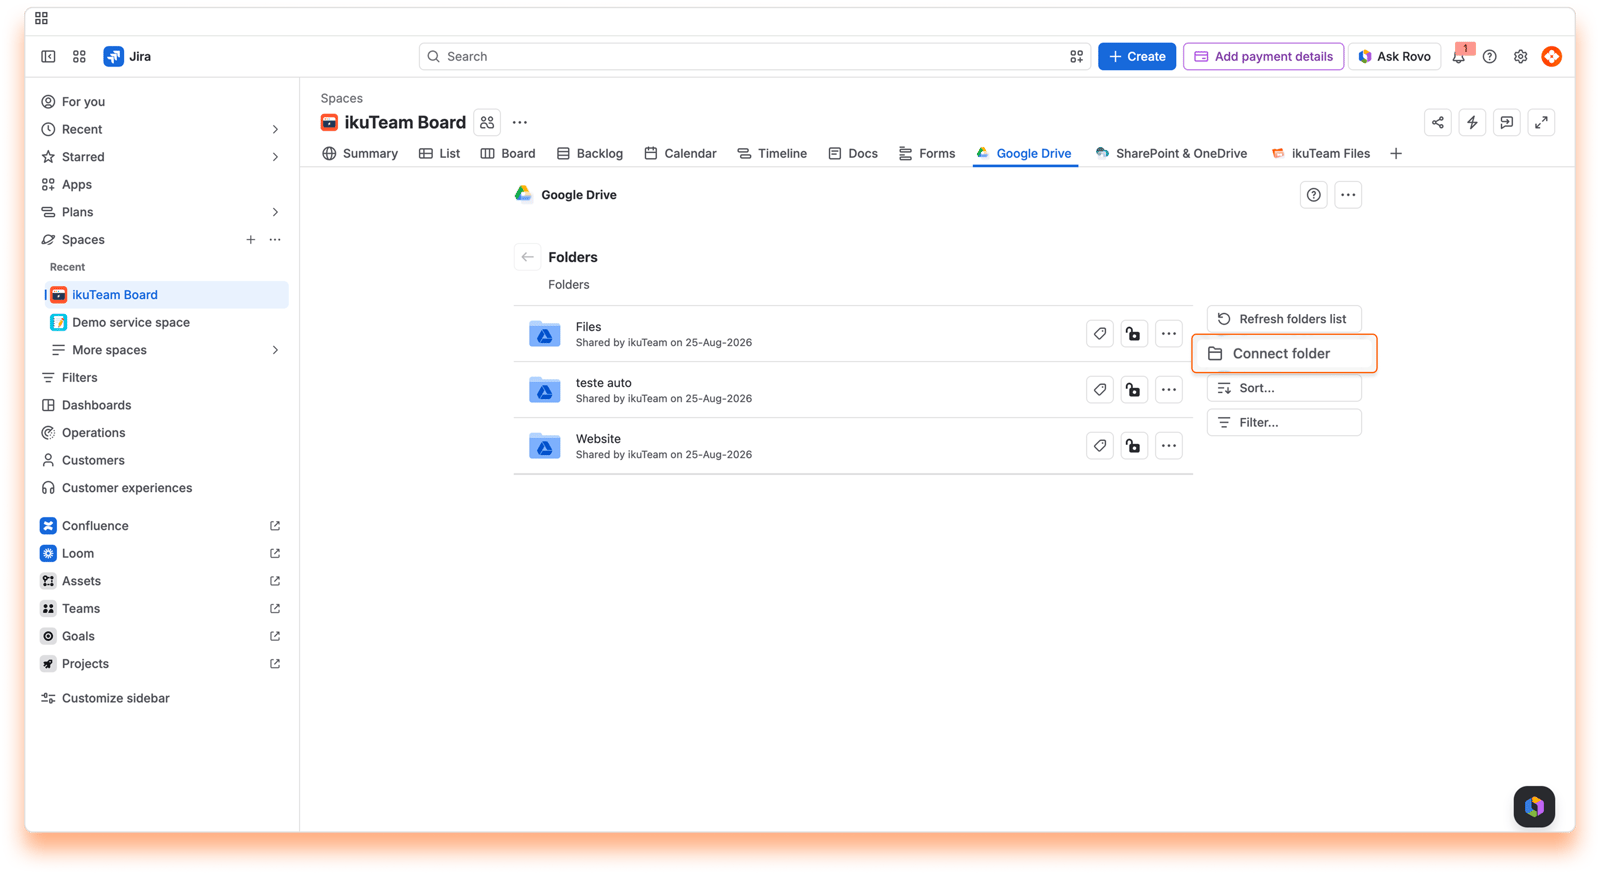
Select the Google account where the folder is, or connect a new one if needed.
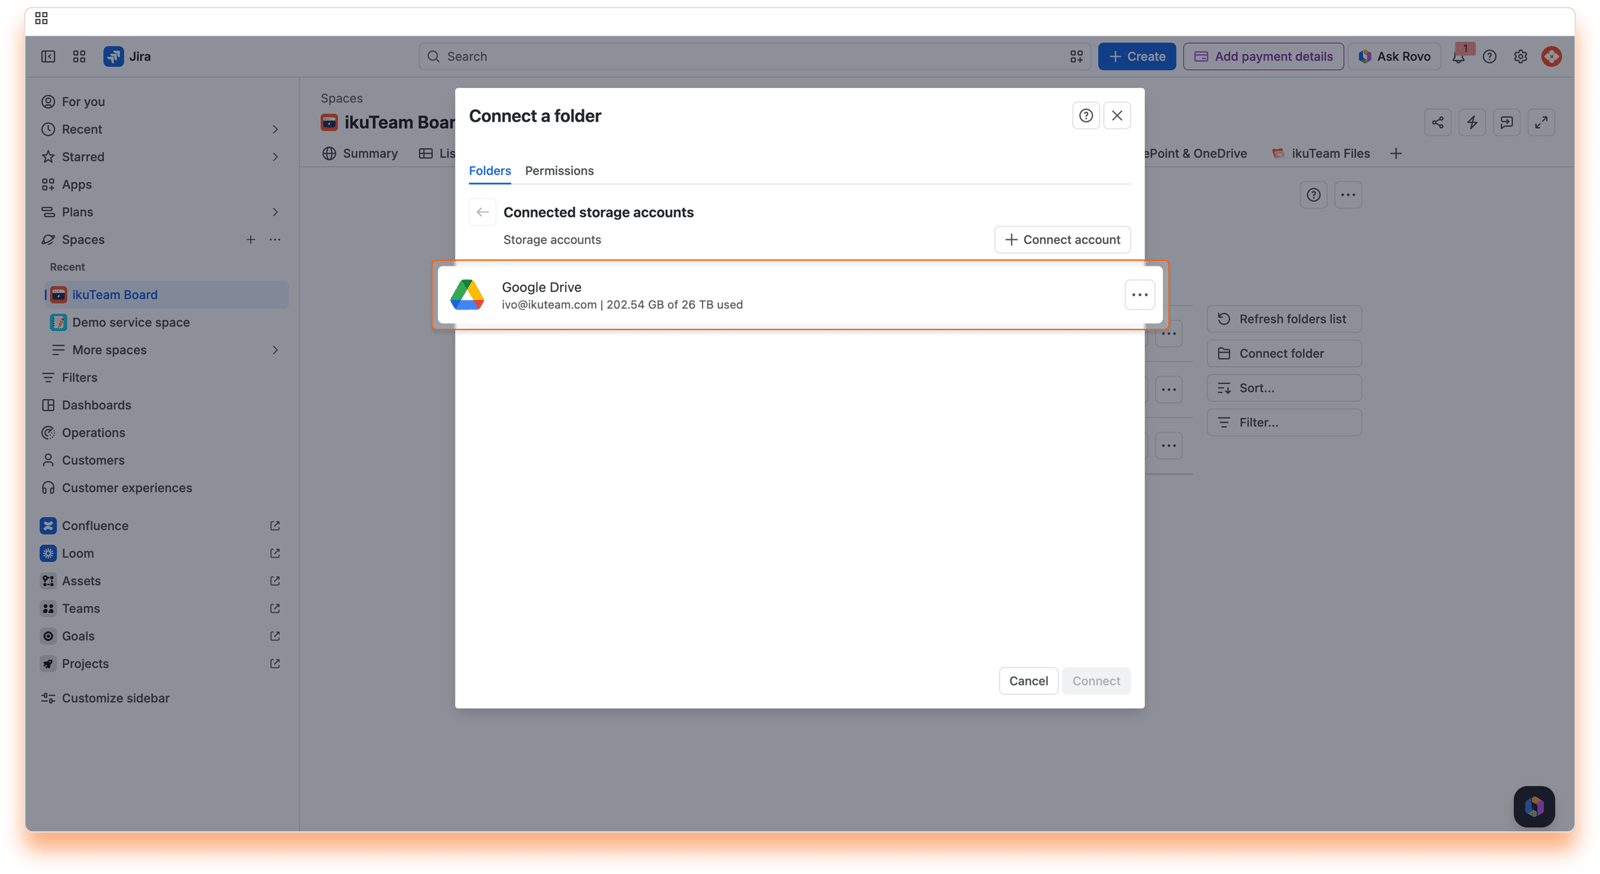
Navigate to where the folder you want to share with your team is.
Select the folders you want to connect by clicking the checkboxes.
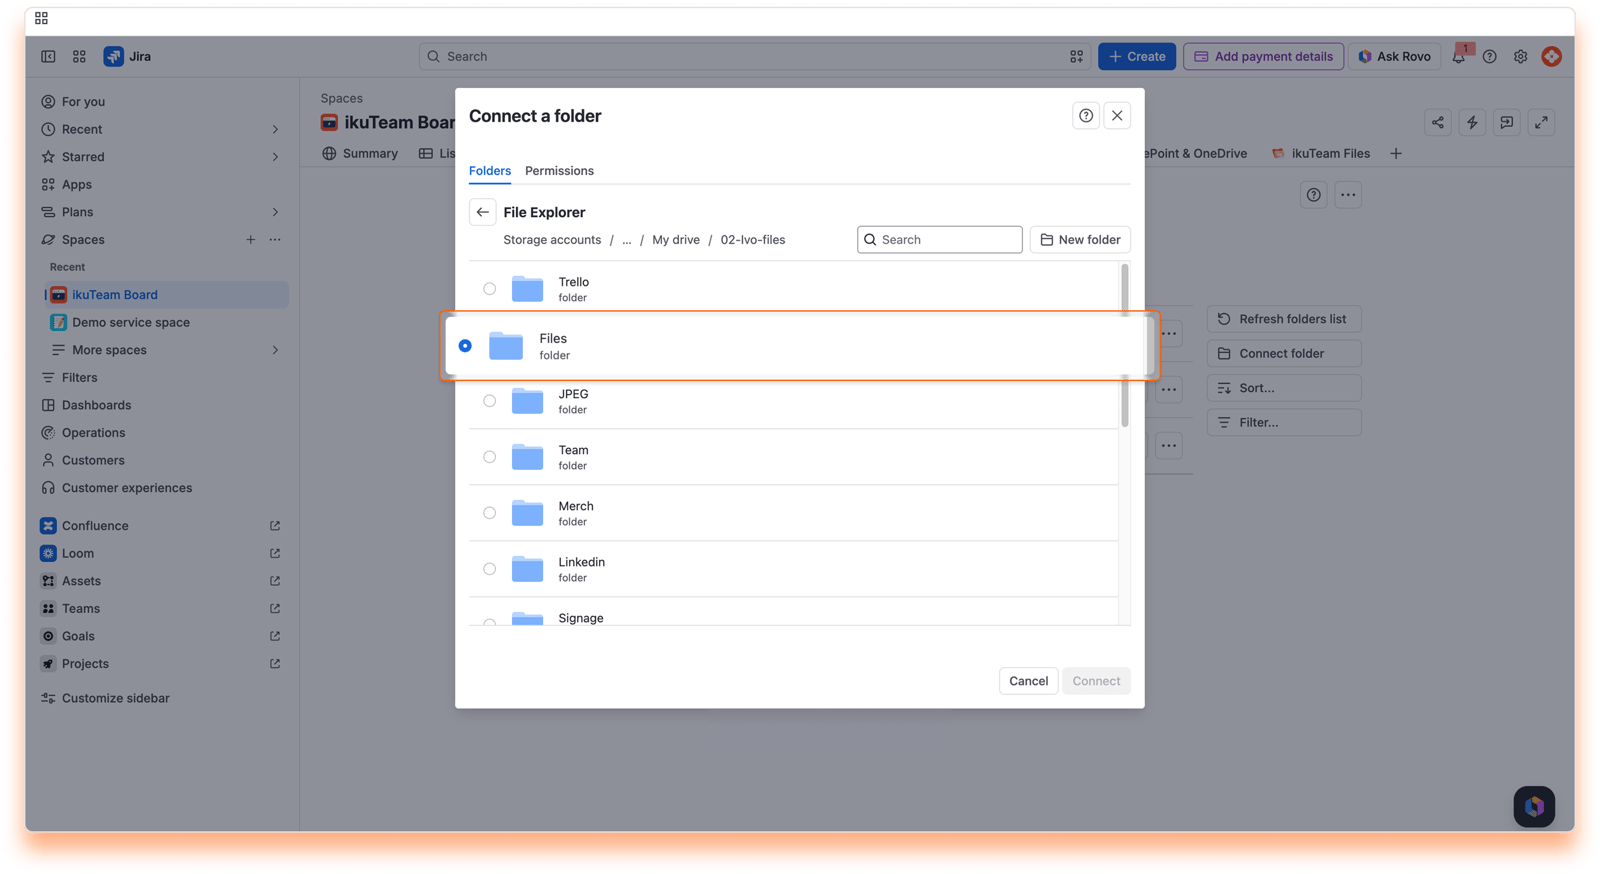
Optional: Click the "Permissions" tab to set advanced options. By default, your team will be able to see and edit any folder you connect. For more information, check the permissions page.
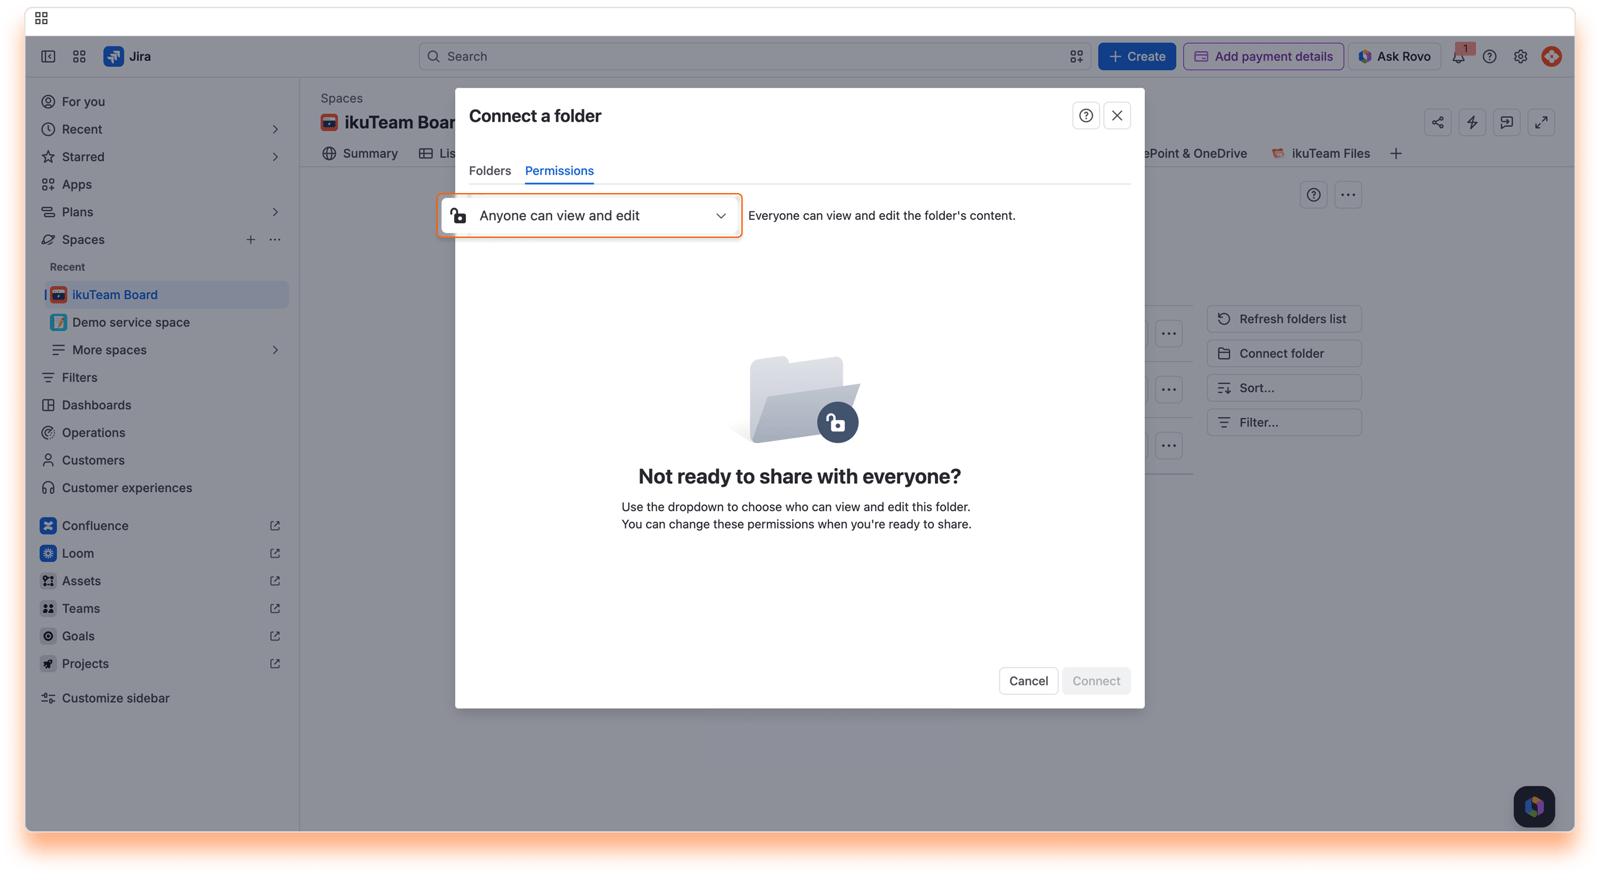
Click the "Connect" button.
We recommend connecting a folder where you and your team store your documents, but you can start with a new one by clicking the "New folder" button.
All done. You can now use your new folder or add more using the same process.
The connected folders are ordered alphabetically by default.
You can change this by clicking the "Sort..." button and selecting a sort option and the order you prefer. You can sort them by name or date added.
By default, the file manager shows every folder connected to the space, including folders your teammates connected. Select “Connected by me” to narrow the list to the folders you connected yourself.
This is handy in spaces with a lot of connected folders. Instead of scrolling through the full list, you can jump straight to the folders you work with, and any search or browsing you do runs against that shorter list.
You can add a tag to your connected folders to help you keep them organized and easily accessible.
Anyone who can edit the folder can add and edit its tag.
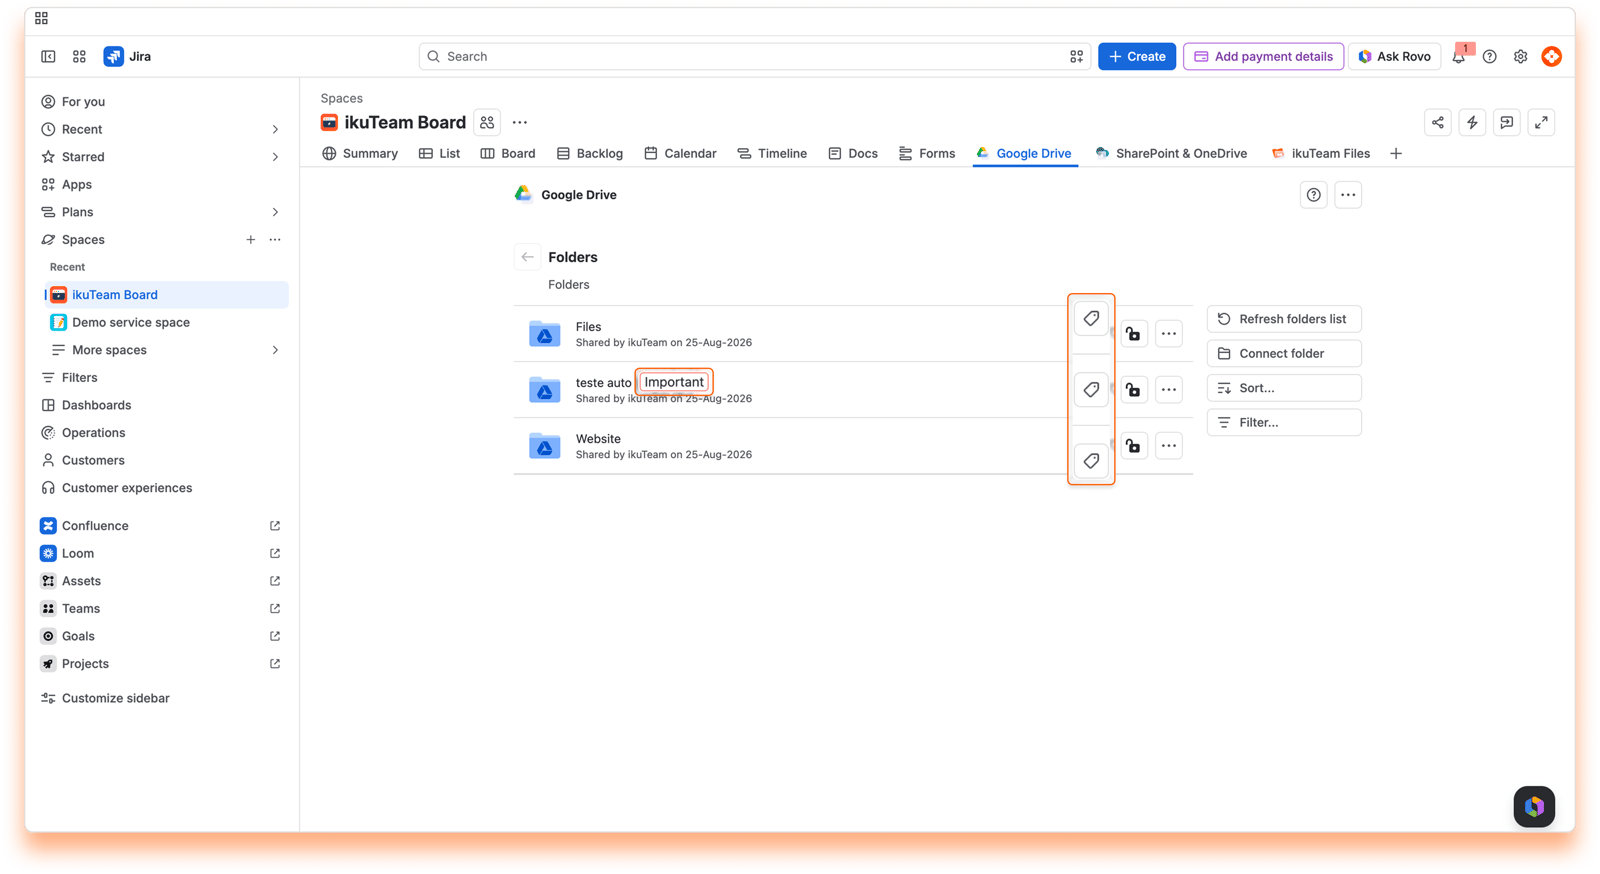
To add a tag:
Click the tag button.
Enter a name.
Pick a color.
Click Save.
All done.
To edit the tag, click the tag button again. You can change the name and color. When you’re done, click Save.
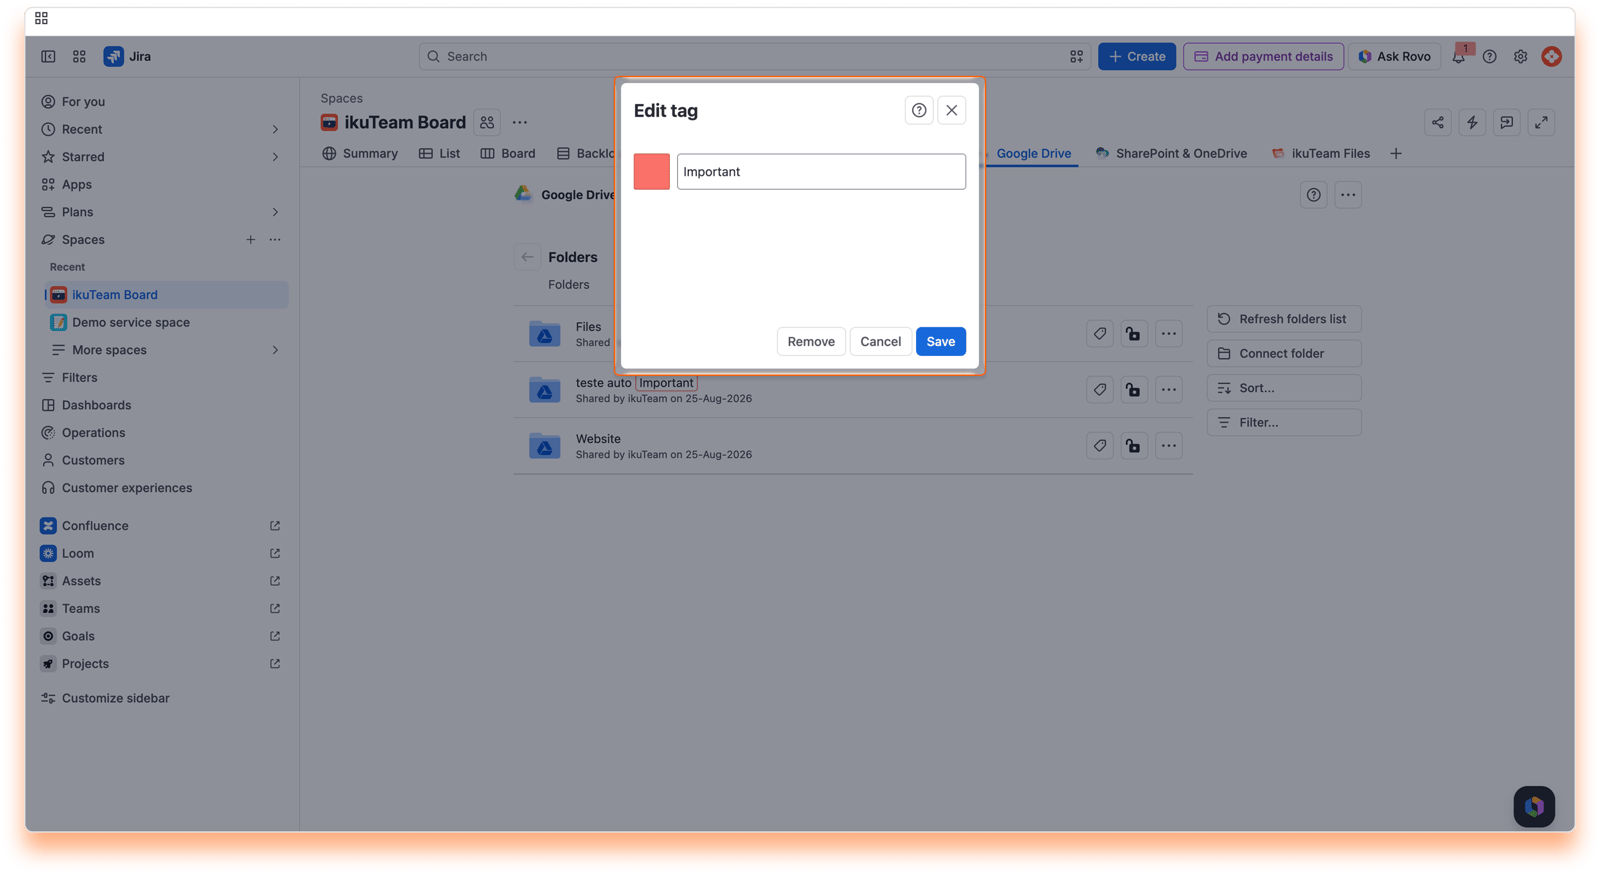
To completely remove a tag:
Click the tag button.
Click the Remove button.
Confirm the removal.
All done.
This action can’t be undone, but you can add a tag again at any moment.
The folder owner or a Jira admin can set permissions for a connected folder at any time, from the lock icon or with Edit permissions in the folder's menu. For more information, check the permissions page.
It's also possible to disconnect folders you no longer need. Before getting into how to do it, it's relevant to know that you're only breaking the link in the Google Drive Connector for Jira app to the original storage when you disconnect a folder. All your content is safe, but any files and folders you or your team attached to Jira work items from the disconnected folder also lose the link to the original storage and become unavailable.
If you accidentally disconnect a folder, the same owner can connect it to the same space again within 30 days to restore the attachments. After this period, it’s no longer possible to restore the existing attachments.
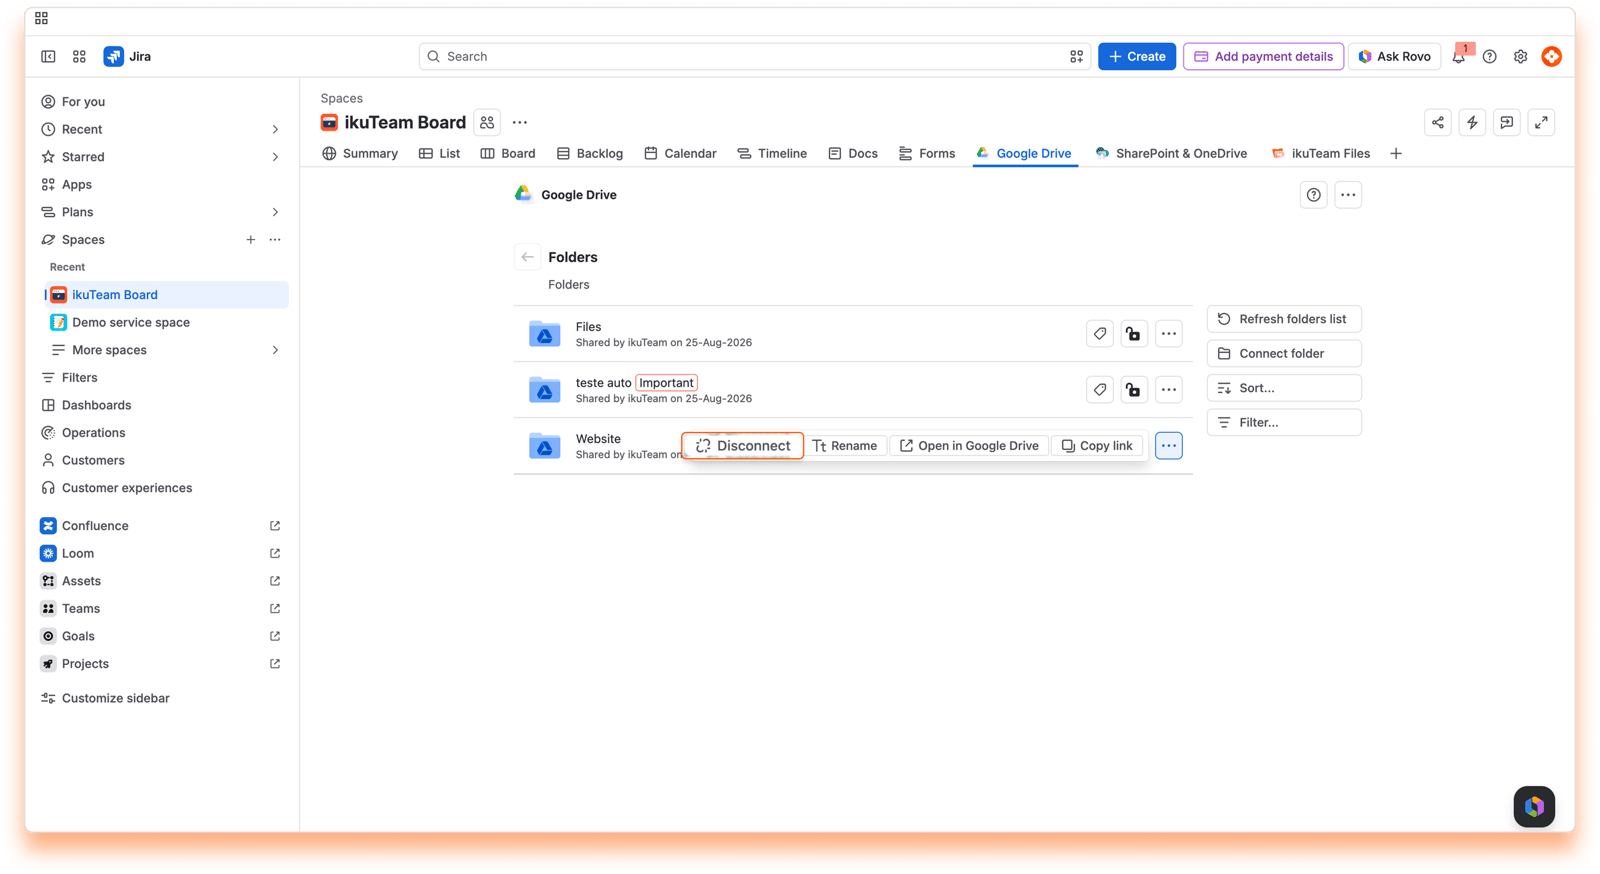
Click the context menu button (look for the ··· button) on the right side of the folder you want to disconnect.
Click the "Disconnect" option.
Confirm by clicking the "Disconnect" button.
All done. Your folder is safe and sound, but your team can't use it anymore in the Google Drive Connector for Jira app.
Keep in mind that you can only disconnect the folders you connected. Jira admins can disconnect any folder.
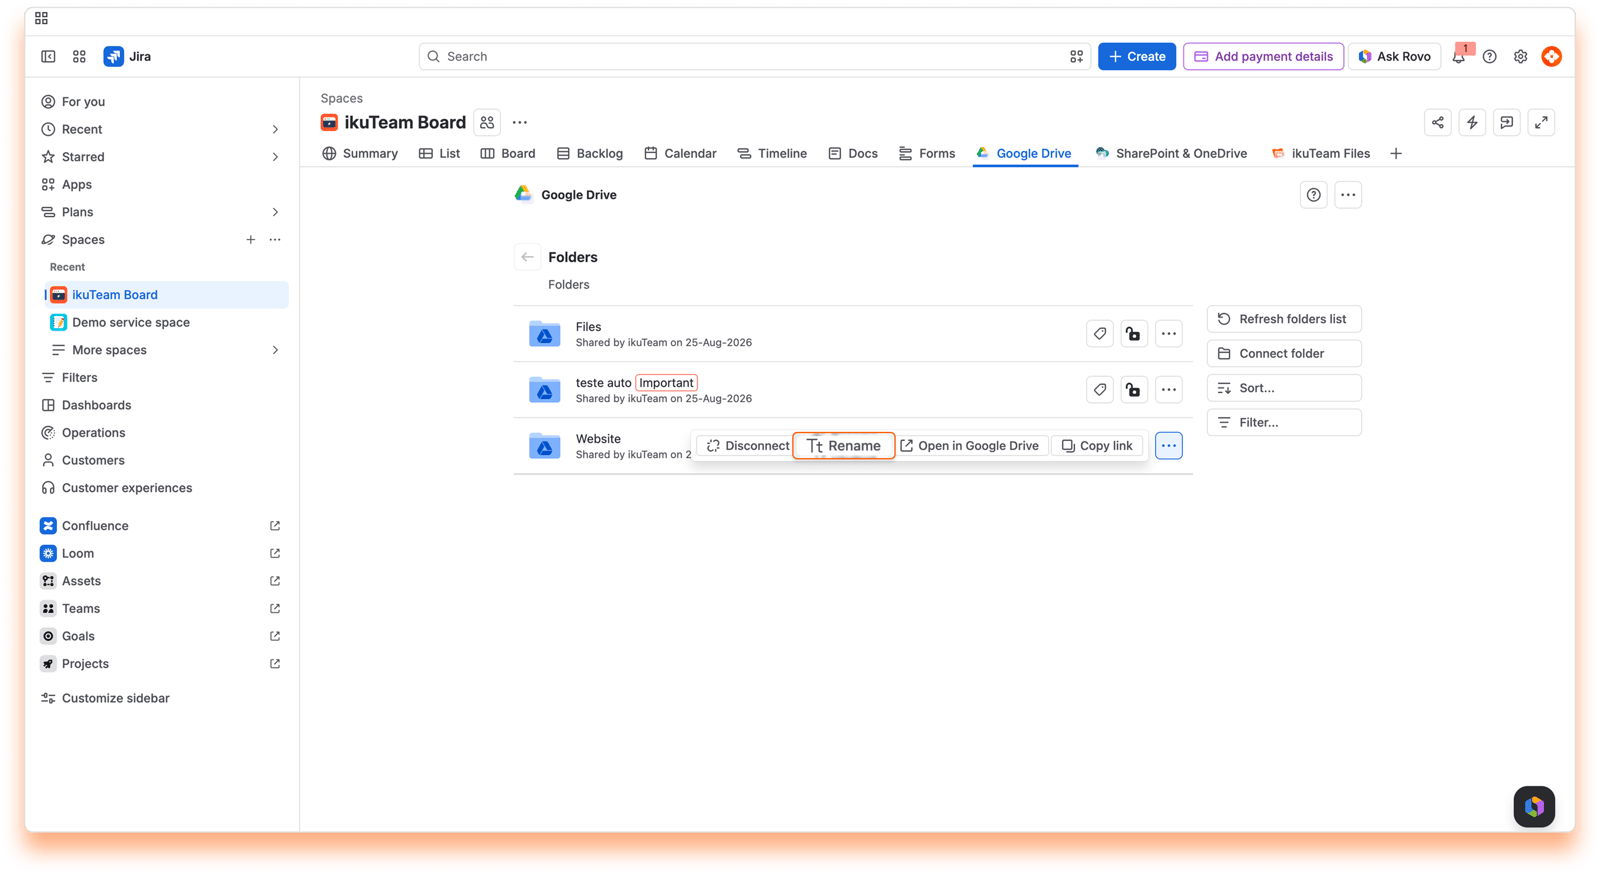
Click the context menu of the connected folder you want to rename.
Click the "Rename" option.
Enter the new name in the dialog window.
Click the "Rename" button. All done.
When you change the name of a folder, it's updated in the connected storage, too.
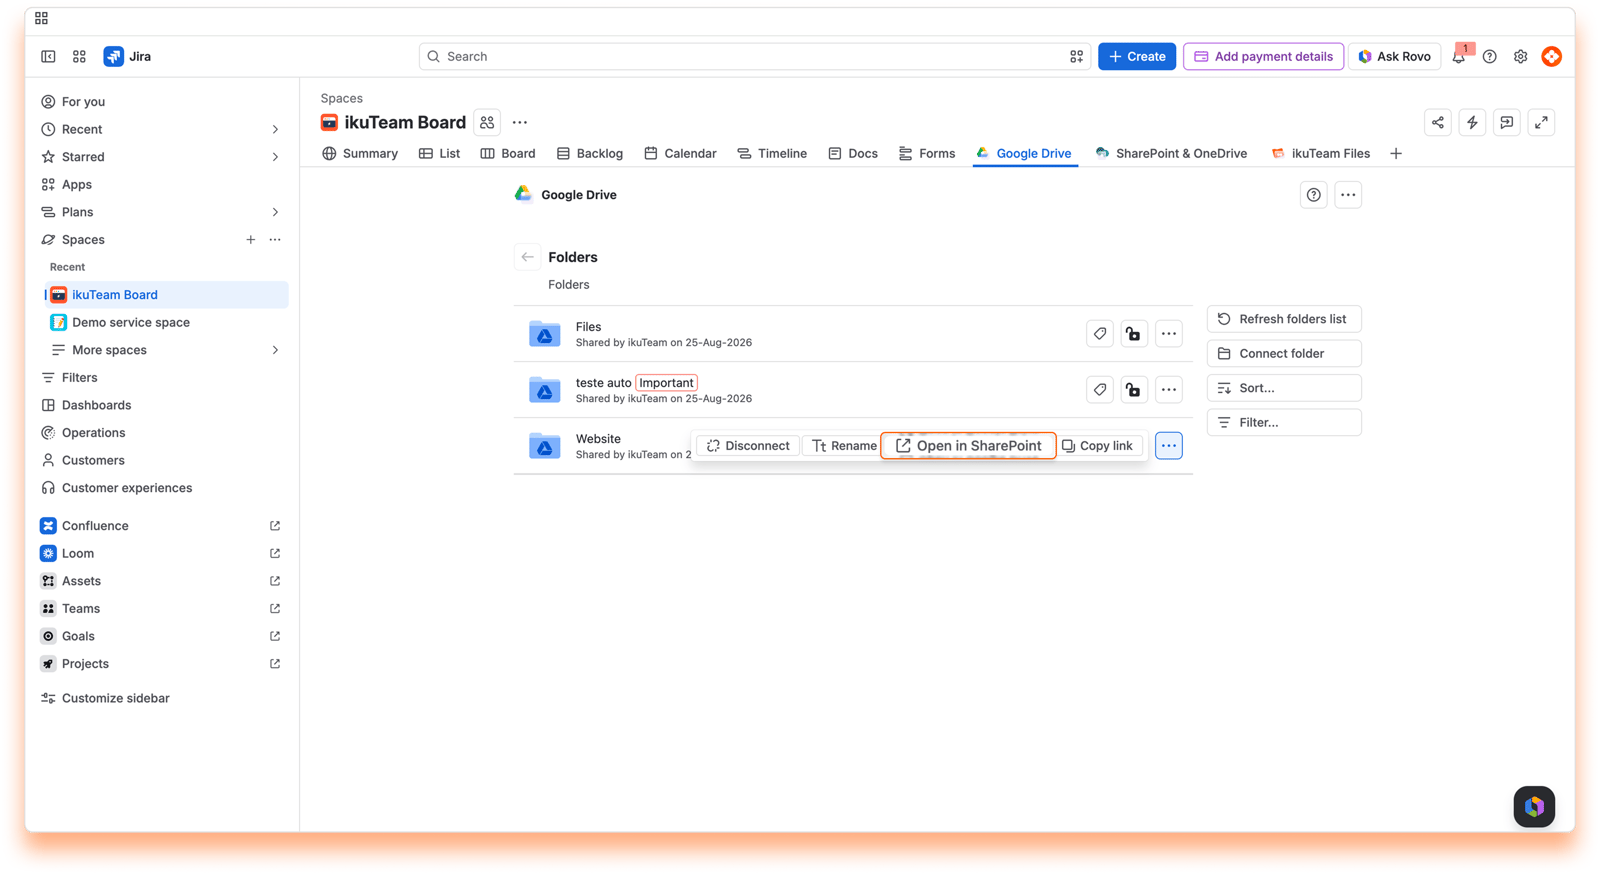
Click the context menu of the connected folder you want to open.
Click the “Open in Google Drive” option.
The folder opens in a few seconds on the original storage site.
This option lets you copy the link of the folder or file in Google Drive.
With Mirror Storage Permissions ON, select Sign out in the folder's menu to sign out of a connected folder. This is useful when you need to use a different account.
When a folder needs you to sign in before you can open it, its menu shows Authenticate. Select it, choose one of your connected Google accounts (or click Connect account), and use an account that can access the folder. Once you're signed in, the folder opens as usual.
Space admins and Jira admins can take over a connected folder, for example when its owner leaves the team. Select Transfer ownership in the folder's menu and confirm. You become the owner, and the previous owner's access then follows the folder's permissions. If you haven't authenticated the folder yet, authenticate it right away, so it keeps working for everyone who relies on the owner's account.
While using the Google Drive Connector for Jira app, you can connect folders stored in Google Drive. You only need to authorize the app to access that storage place first. You're in control of your storage places: only you can see the places you allowed, and you, and only you, can disconnect them.
You can view your connected places when you connect a new folder or from the settings page.
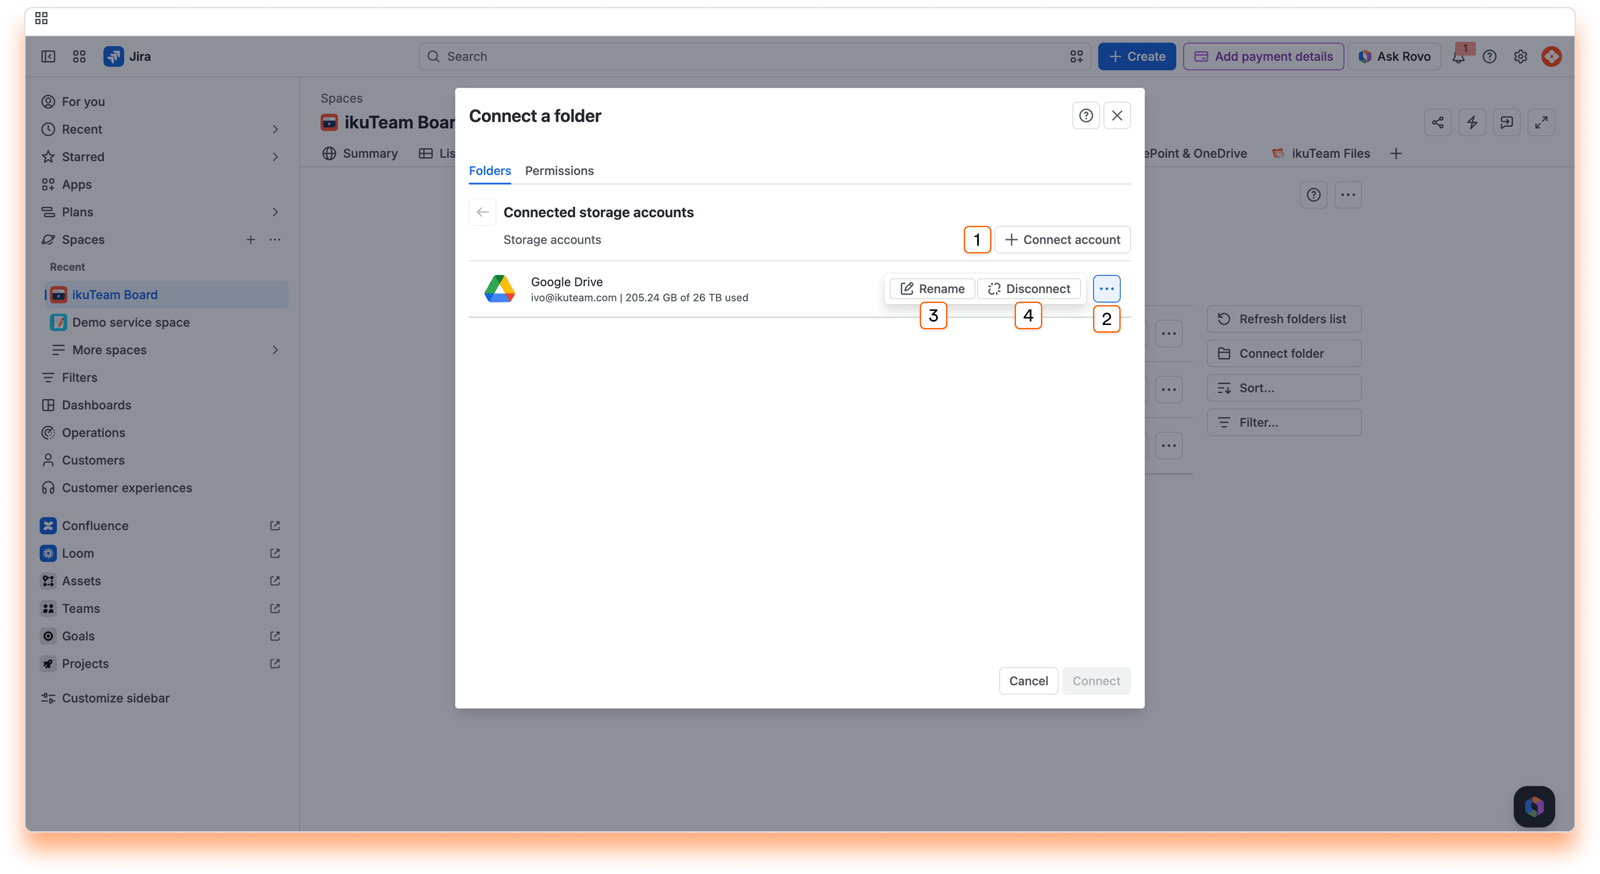
List of your connected places.
Connect account button
Context menu button
Rename place option
Disconnect place option
Instructions:
Click on the "Connect folder" button from the list of connected folders.
If you have connected places before, they will appear on the list. Click the "Connect account" button (1). If you haven't, you'll see a list of all the places you can connect directly.
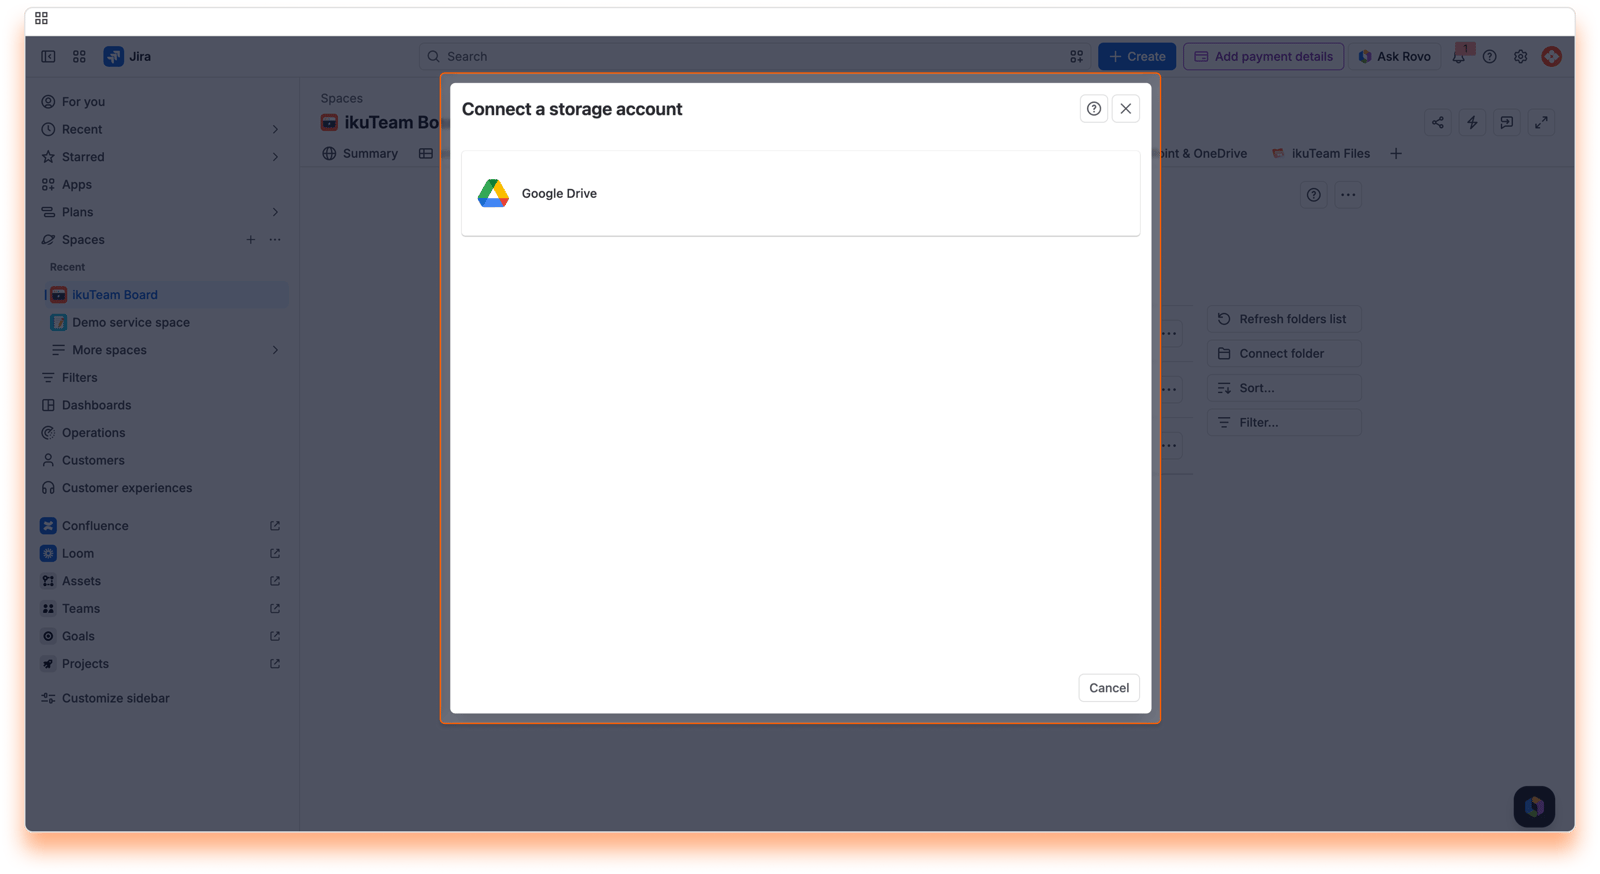
Select Google Drive and sign in to your Google account.
You can connect several Google accounts.
All done. Your new place is now connected. You can now browse it to connect a folder or return to the file manager.
You can connect several Google accounts. By default, each new account is named "Google Drive". To keep things organized, you can rename your accounts to something more meaningful to you.
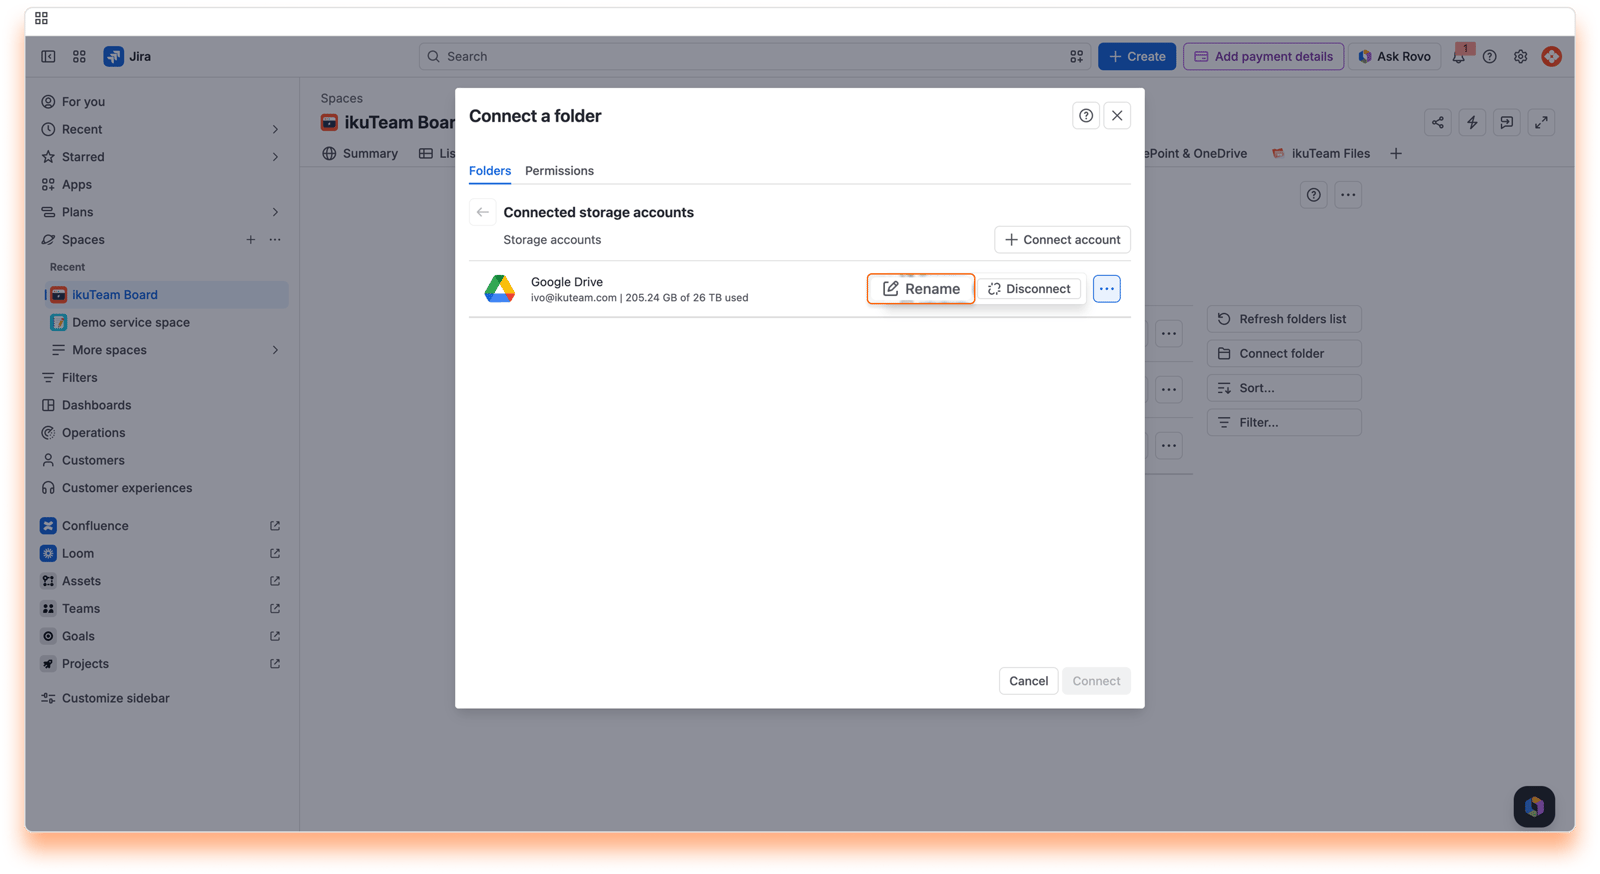
Instructions:
Click on the "Connect folder" button from the list of connected folders.
Click the context menu button on the right side of the place you want to rename.
Click the "Rename" option.
Enter the new name and click the "Rename" button.
That's it. It just takes a few moments to update the name, and it's ready to use.
You can also rename and manage your places from the settings page.
Disconnecting a place in the Google Drive Connector for Jira app removes only your account connection. It doesn't delete any data in your Google Drive, and the folders connected from that place stay connected. With Mirror Storage Permissions ON, you're signed out of those folders and need to authenticate again to use them. With Mirror Storage Permissions OFF, the folders connected with that account, and the files and folders attached from them, are temporarily unavailable until the account is connected again.
If you accidentally disconnect a place, connect the same account again to get access back to its connected folders and attachments.
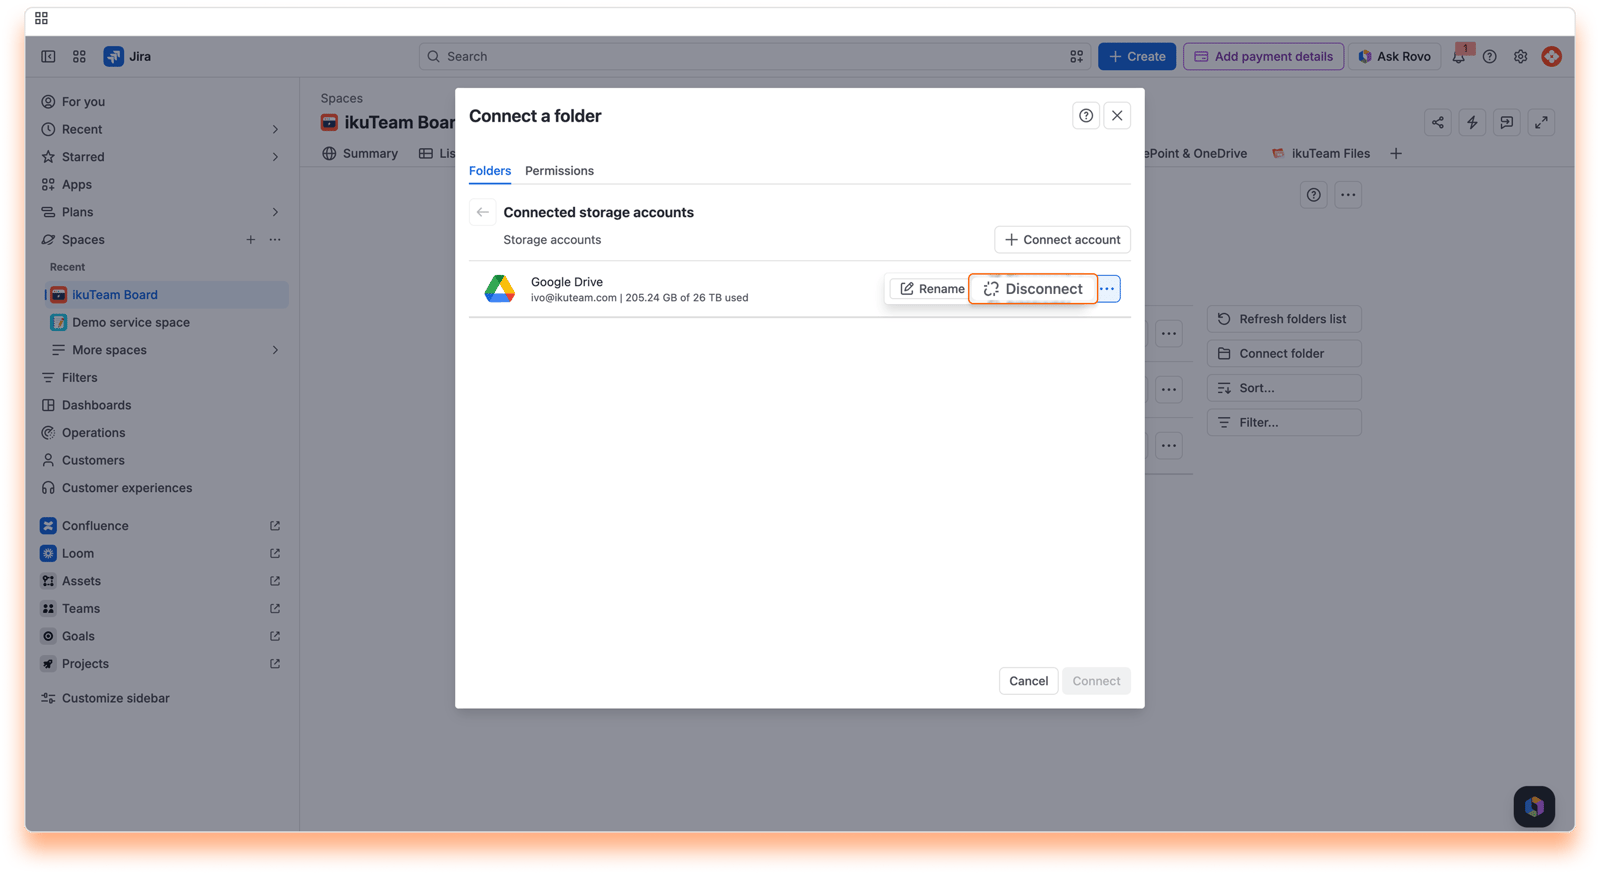
Instructions:
Click on the "Connect folder" button from the list of connected folders.
Click the context menu button on the right side of the place you want to disconnect.
Click the "Disconnect" option.
Confirm by clicking the "Disconnect" button.
All done. Your storage place is safe and sound but no longer accessible in the Google Drive Connector for Jira app.
You can also disconnect and manage your places from the settings page.
Now that we know how to connect folders, it's time to learn how to make the most of the Google Drive Connector for Jira app. This section will cover what you can do with files and folders and how to add content to your connected folder.
Click a connected folder to view its content. The navigation is at the top, your content is in the center, and extra options are to the right.
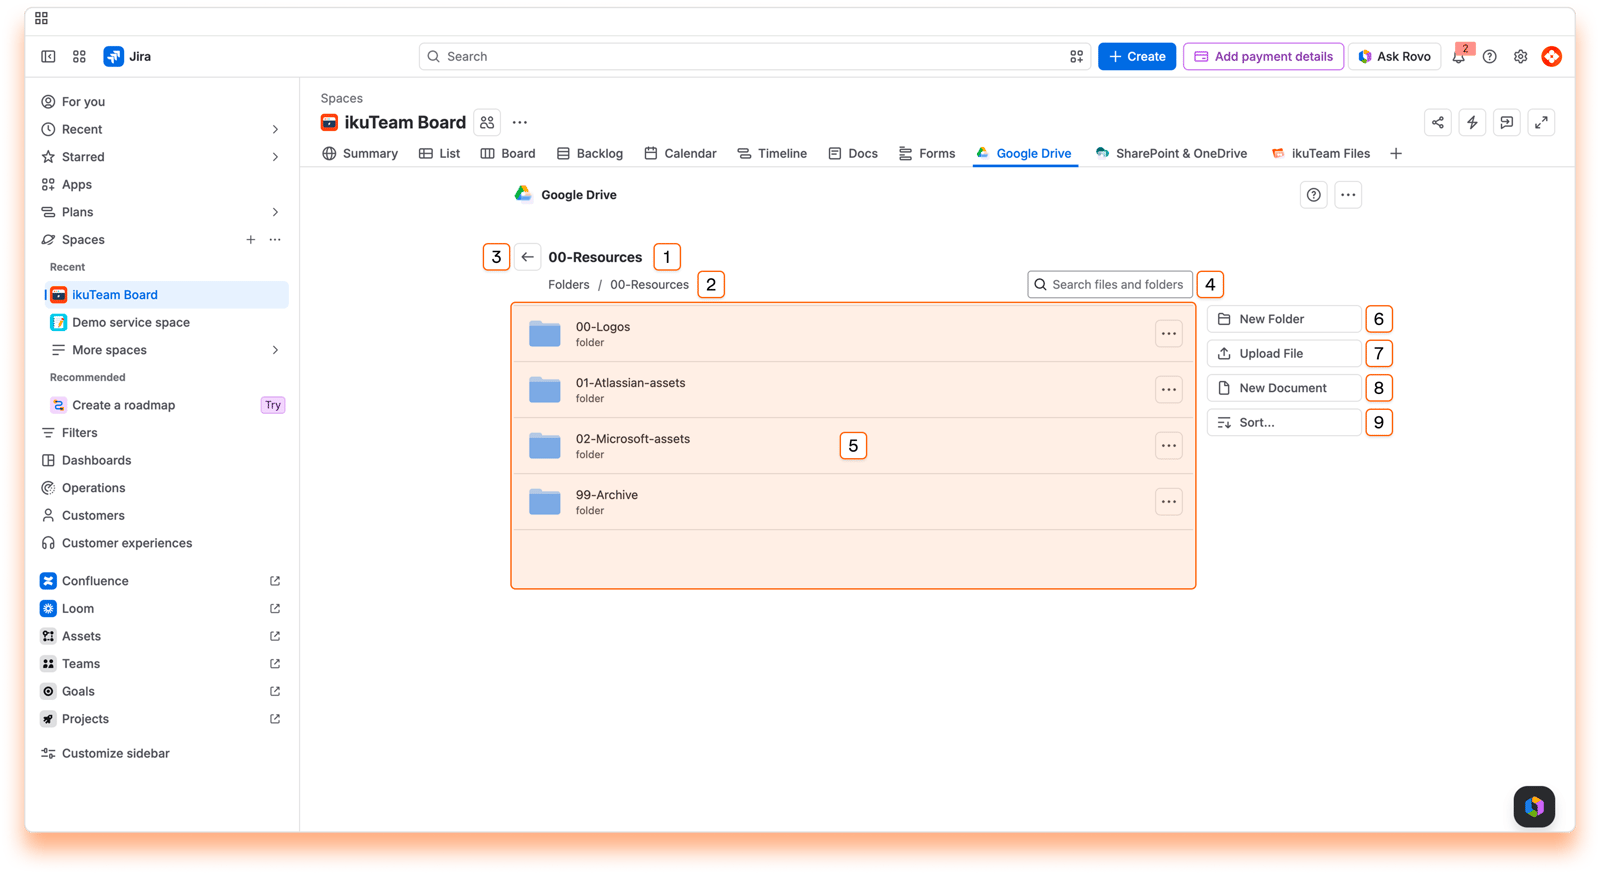
Current folder name
Path: you can click in any section to return there
Back button: return to the previous folder
Search field
Content area
New folder button
Upload file button
New document button
Sort button
If your window is too narrow, the right section is hidden, but all the options are available in the context menu next to the navigation.
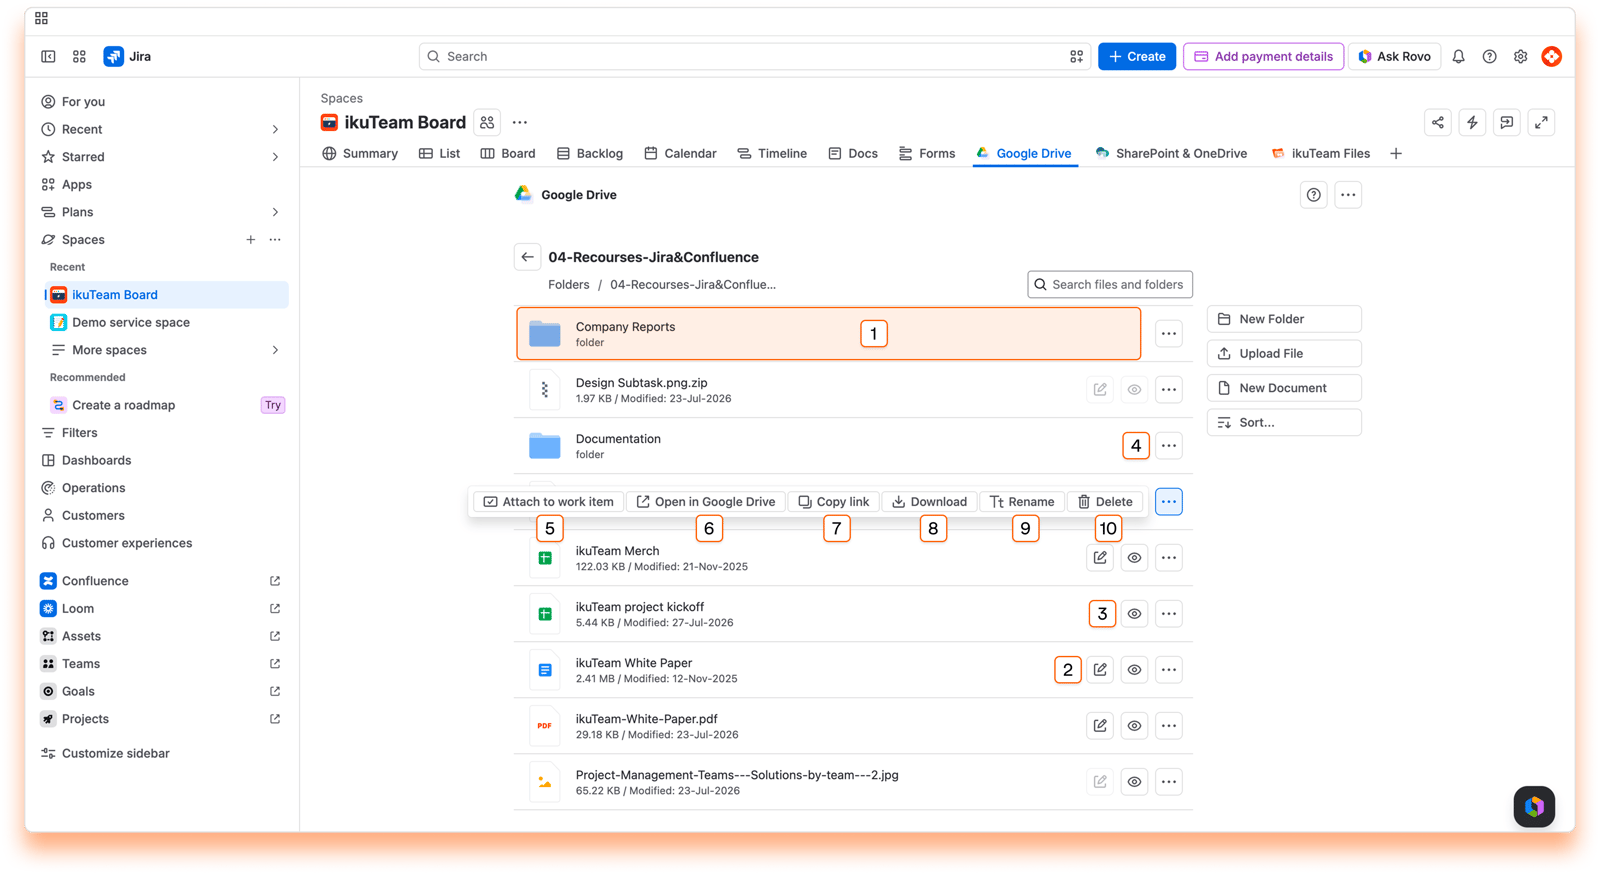
Preview click area
Edit button
Preview button
Context menu
Attach to work item
Open in Google Drive
Copy link
Download file
Rename file
Delete file
You can preview the content of your files by clicking the name of the file you want or the preview button. You can preview images, PDFs, Microsoft Office, and Google Docs files. For more details, check the preview and edit documents page.
You can edit Microsoft Office and OpenOffice files from the file manager by clicking the Edit button. The ikuTeam Office engine opens on the same tab, right inside Jira, and it's ready for editing. It supports real-time collaboration, so there are no file lockdowns. There's an autosave feature, so when you finish, just close the editor. PDFs always open in the ikuTeam Office engine on the same tab.
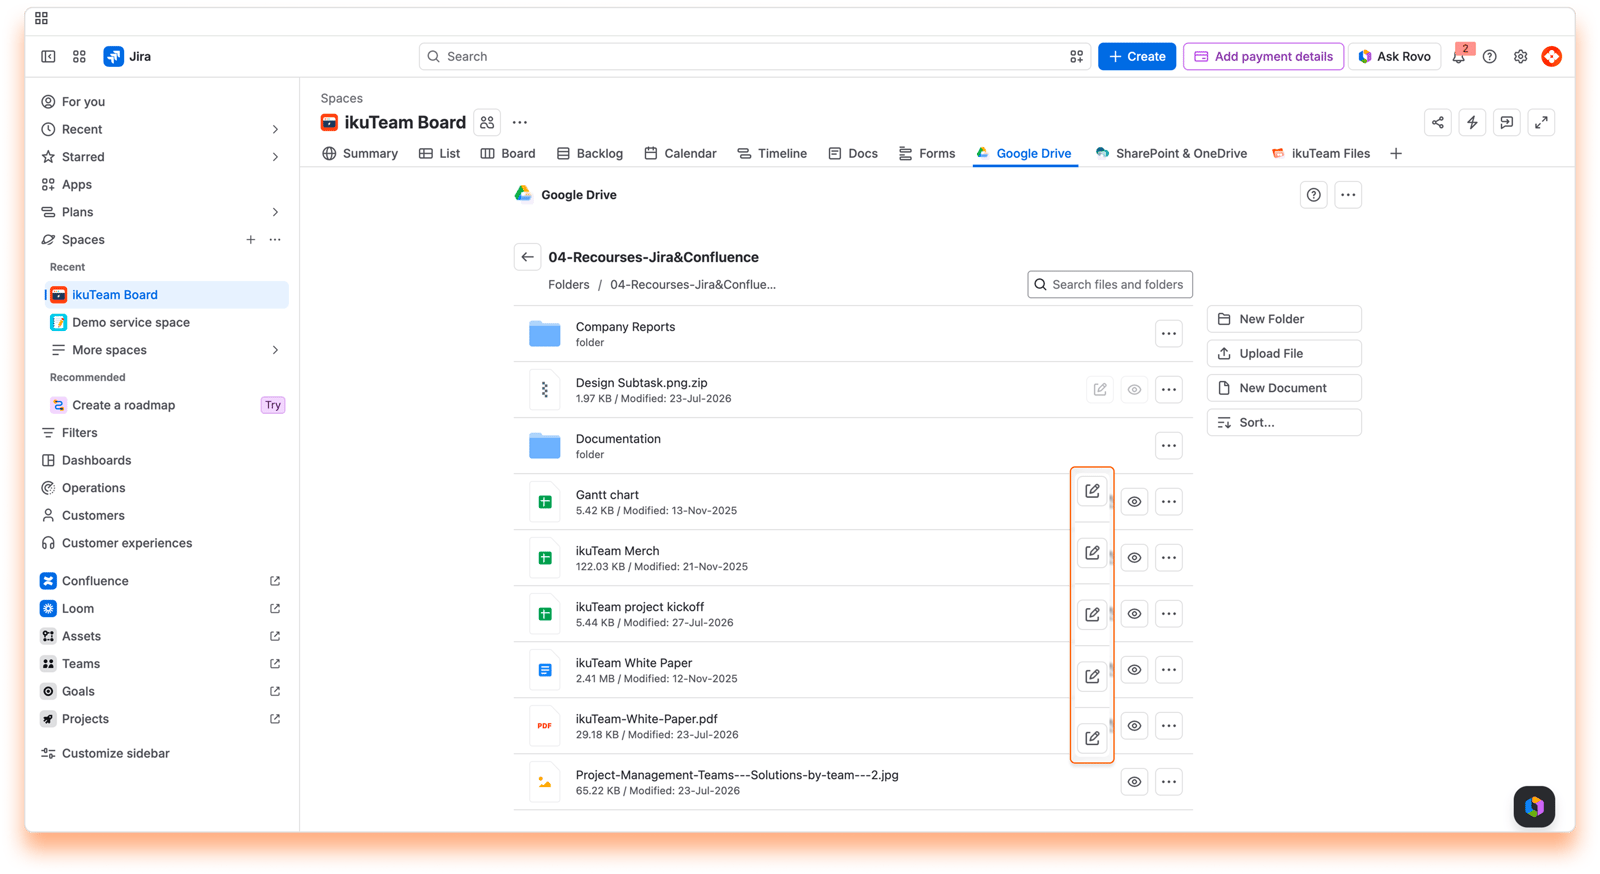
Click Edit on a Google Docs, Sheets, or Slides file to open it in Google's editor in a new browser tab. Google Docs also supports real-time collaboration and autosave.
You can edit, annotate and sign PDF files with the Advanced Edition of the Google Drive Connector for Jira app.
The edit option is also available when previewing the file (check 2.4 Preview files) and when you attach the document to a work item.
For more details, check the 2.5 Edit documents page.
In Jira, you can attach files and folders to your work items directly from the file manager.
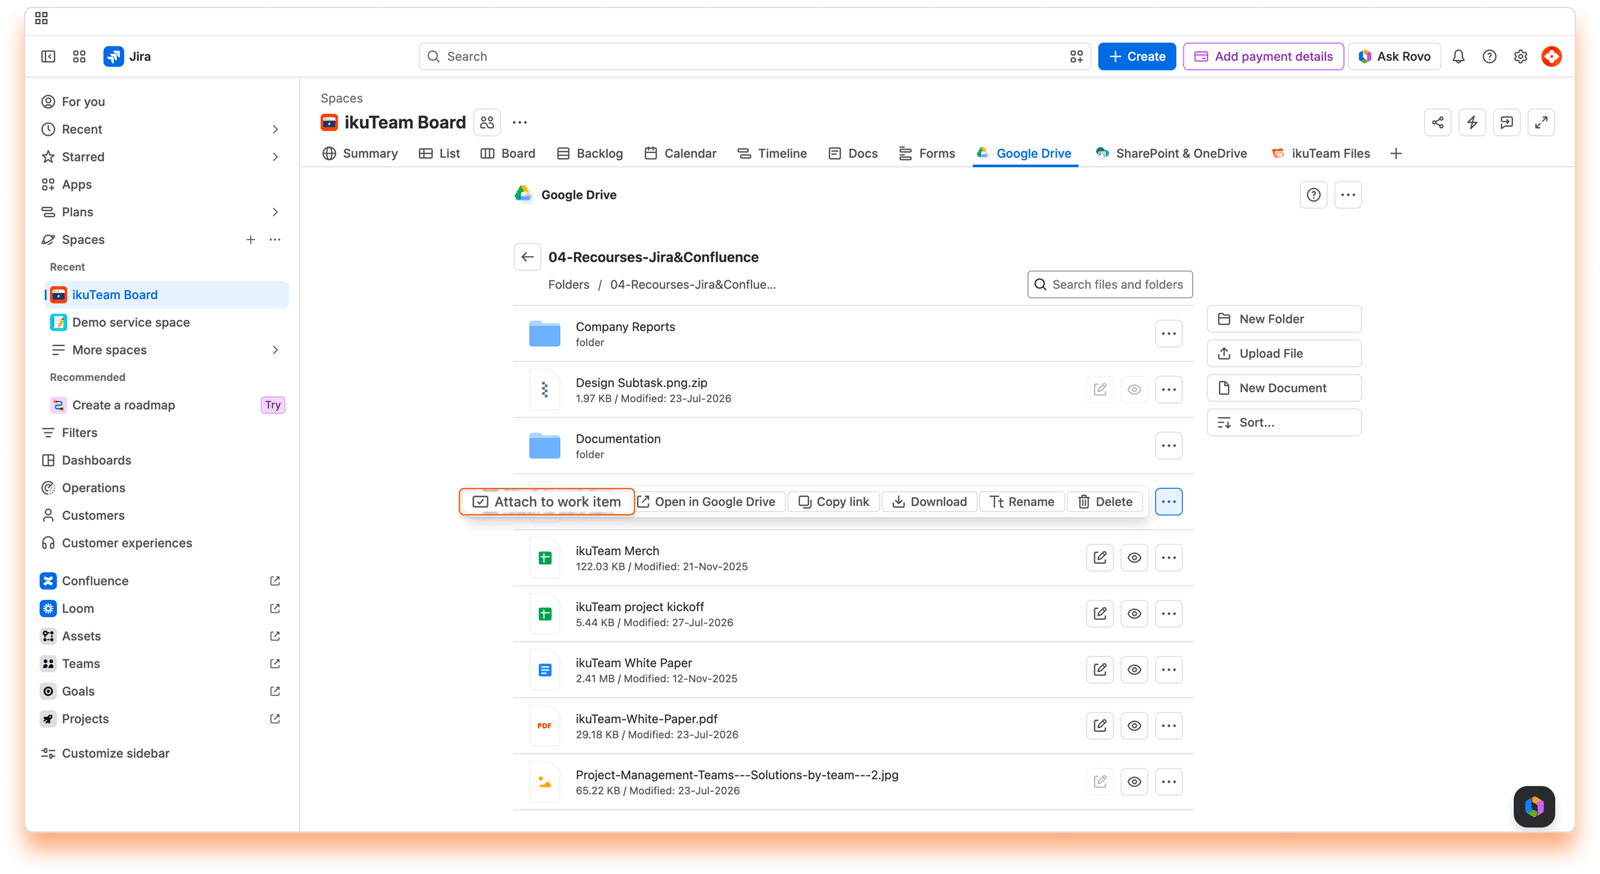
Open the context menu of the file to attach.
Click the "Attach to work item" option.
Select the work item where you want to attach the file or folder. You can use the search field to look for a particular work item or even use the JQL search.
Click the "Attach" button.
All done. Your file is now attached to the work item, and a confirmation message shows the work item key.
You need to add the app to the work item page to view the attached files and folders from the file manager.
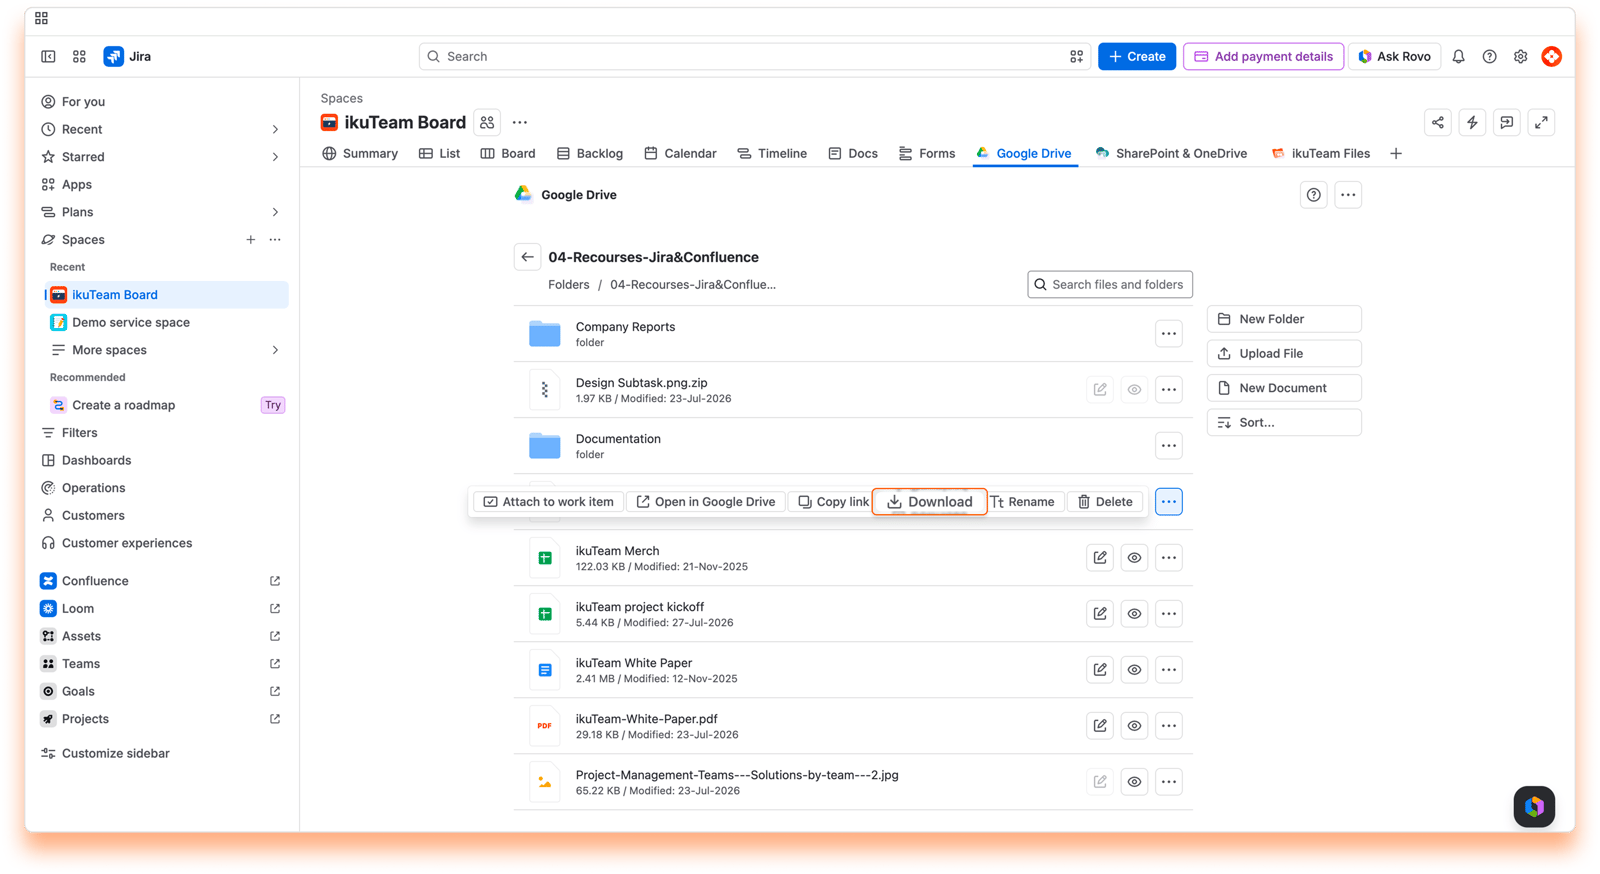
Click the context menu of the file you want to download.
Click the "Download" option.
Your browser will open a new tab to download the file automatically. Depending on the browser you're using, the tab closes itself when the download starts, or it might ask you permission to download the file (notably Safari), requiring that you click the "Allow" button.
Depending on its size, the file will be available in your default download folder after a few moments.
The download option is also available in preview mode (check 2.4 Preview files) and files attached to work items.
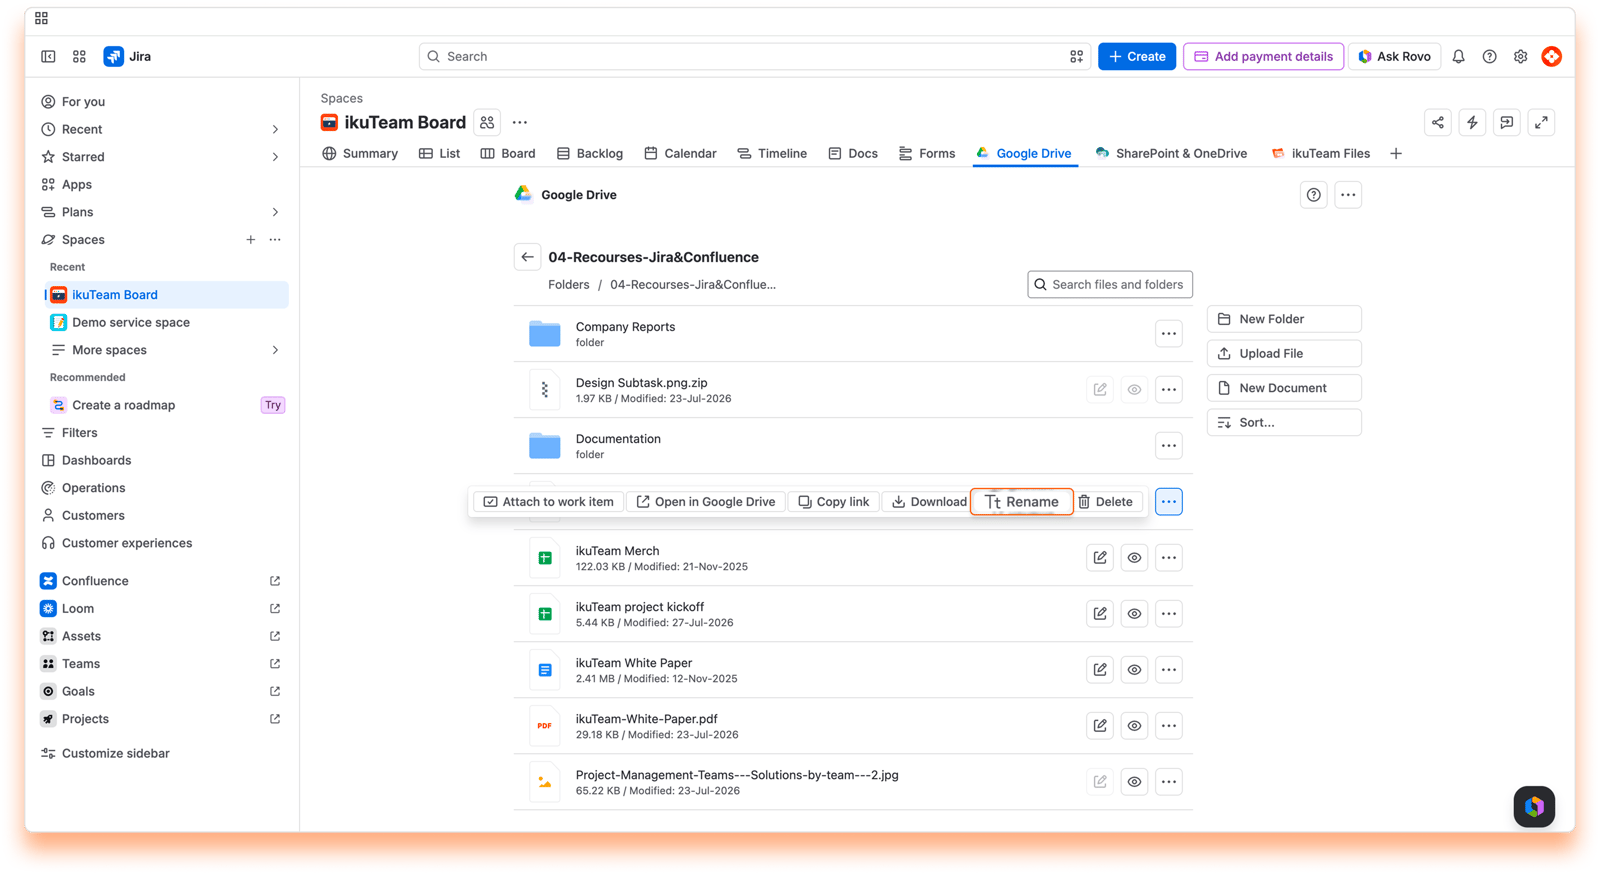
Click the context menu of the file you want to rename.
Click the "Rename" option.
Enter the new name in the dialog window.
Click the "Rename" button. All done.
When you change the name of a file, it's updated in the connected storage too.
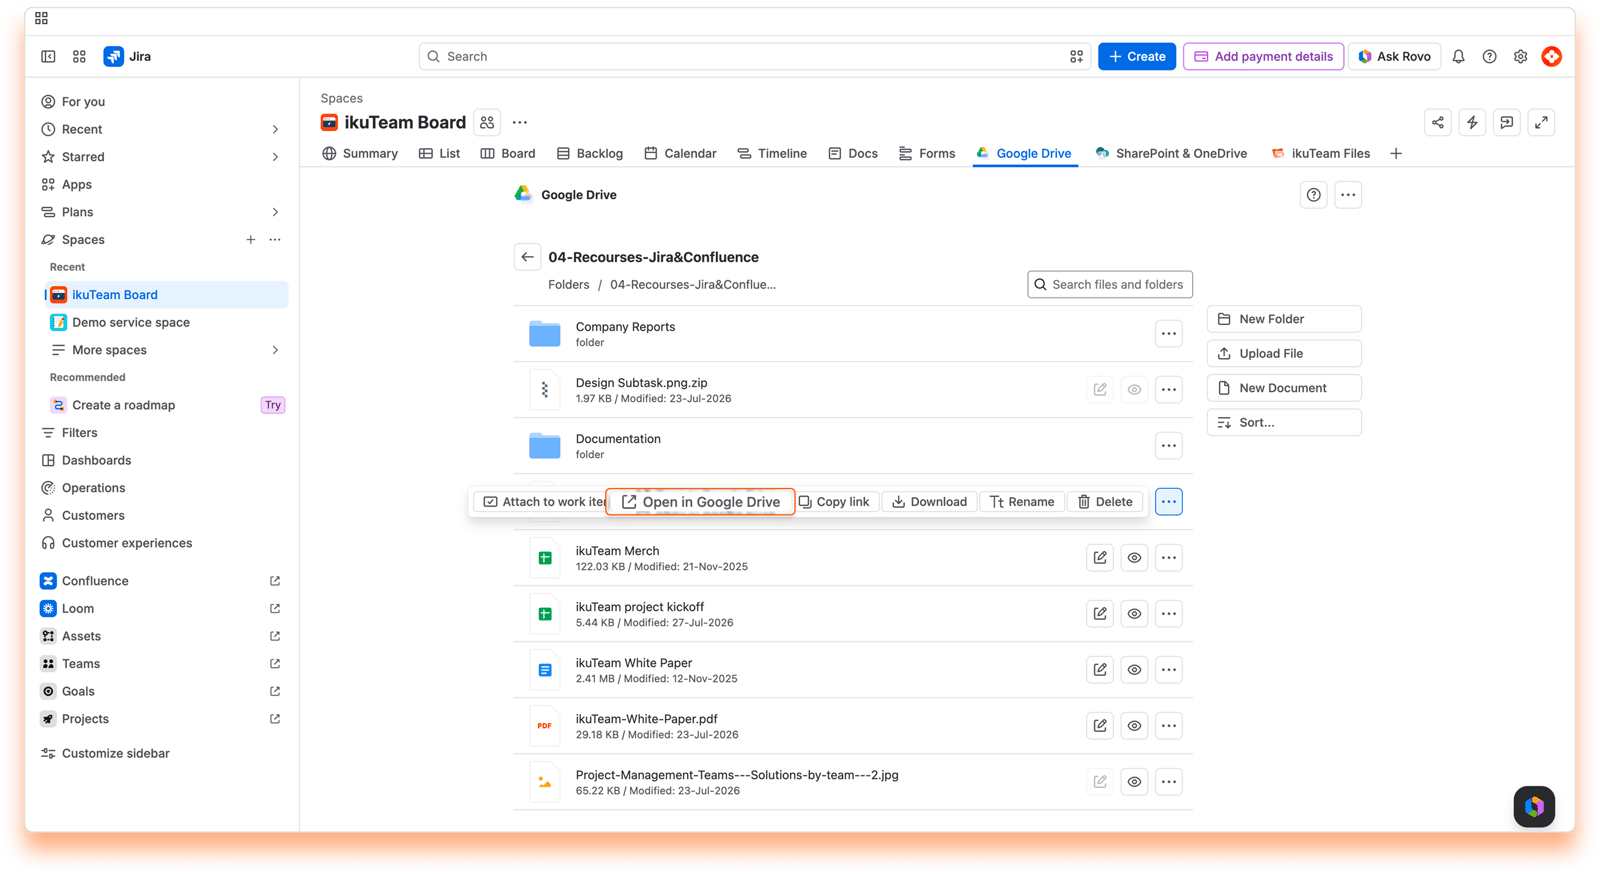
Click the context menu of the file you want to open.
Click the “Open in Google Drive” option.
The file opens in a few seconds on the original storage site.
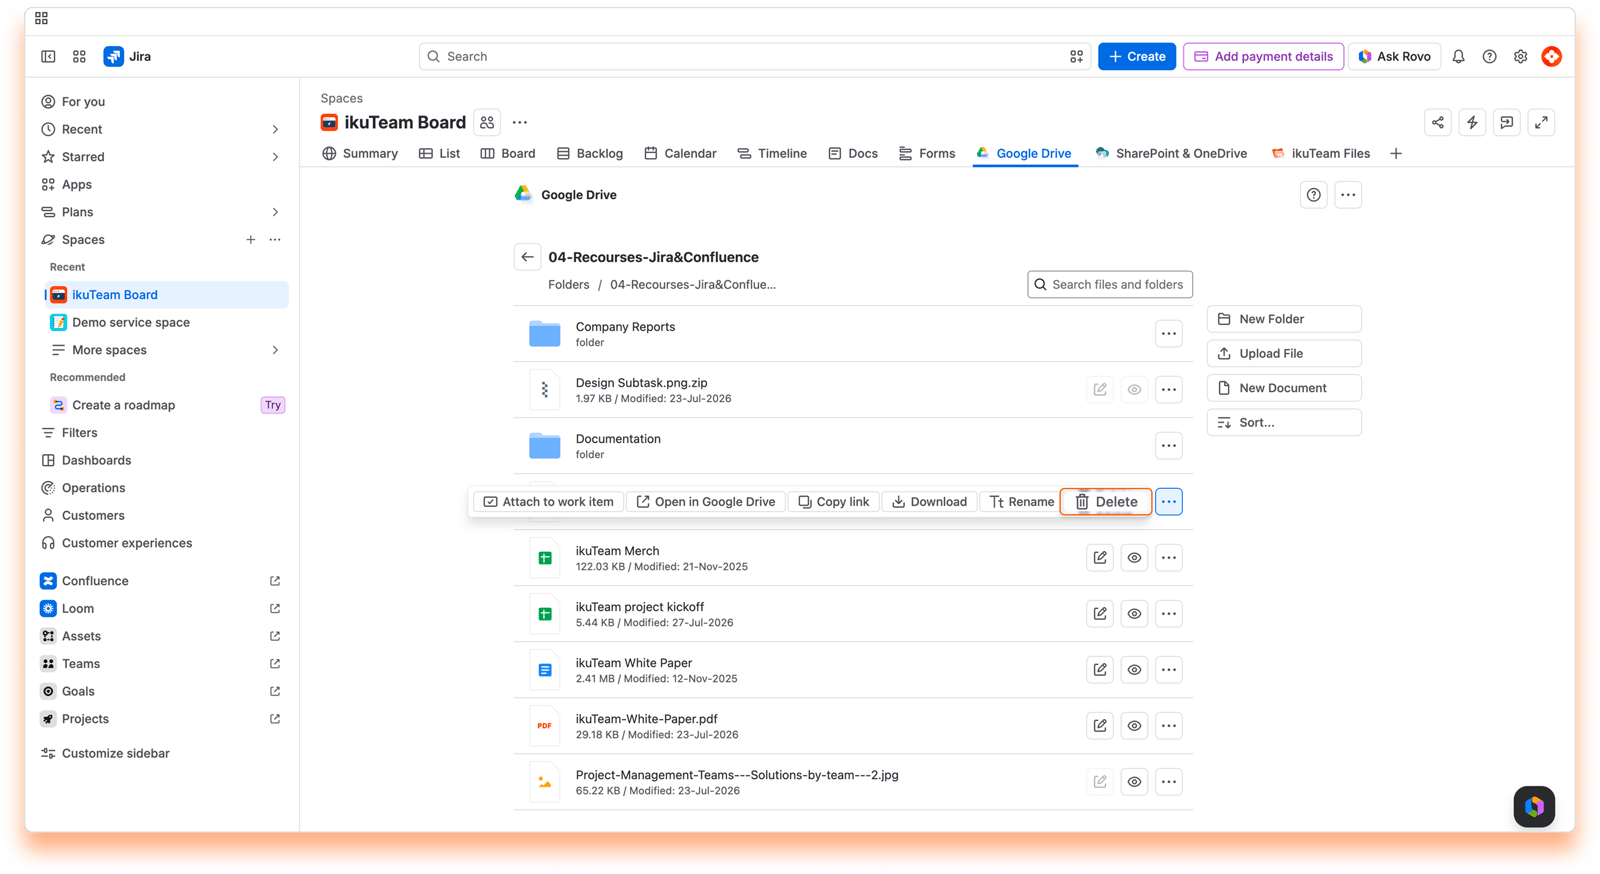
Click the context menu of the file you want to delete.
Click the "Delete" option.
Click the "Delete" button in the confirmation dialog. All done.
When you delete a file, it's also removed from Google Drive. This action can’t be undone in the Google Drive Connector for Jira app.
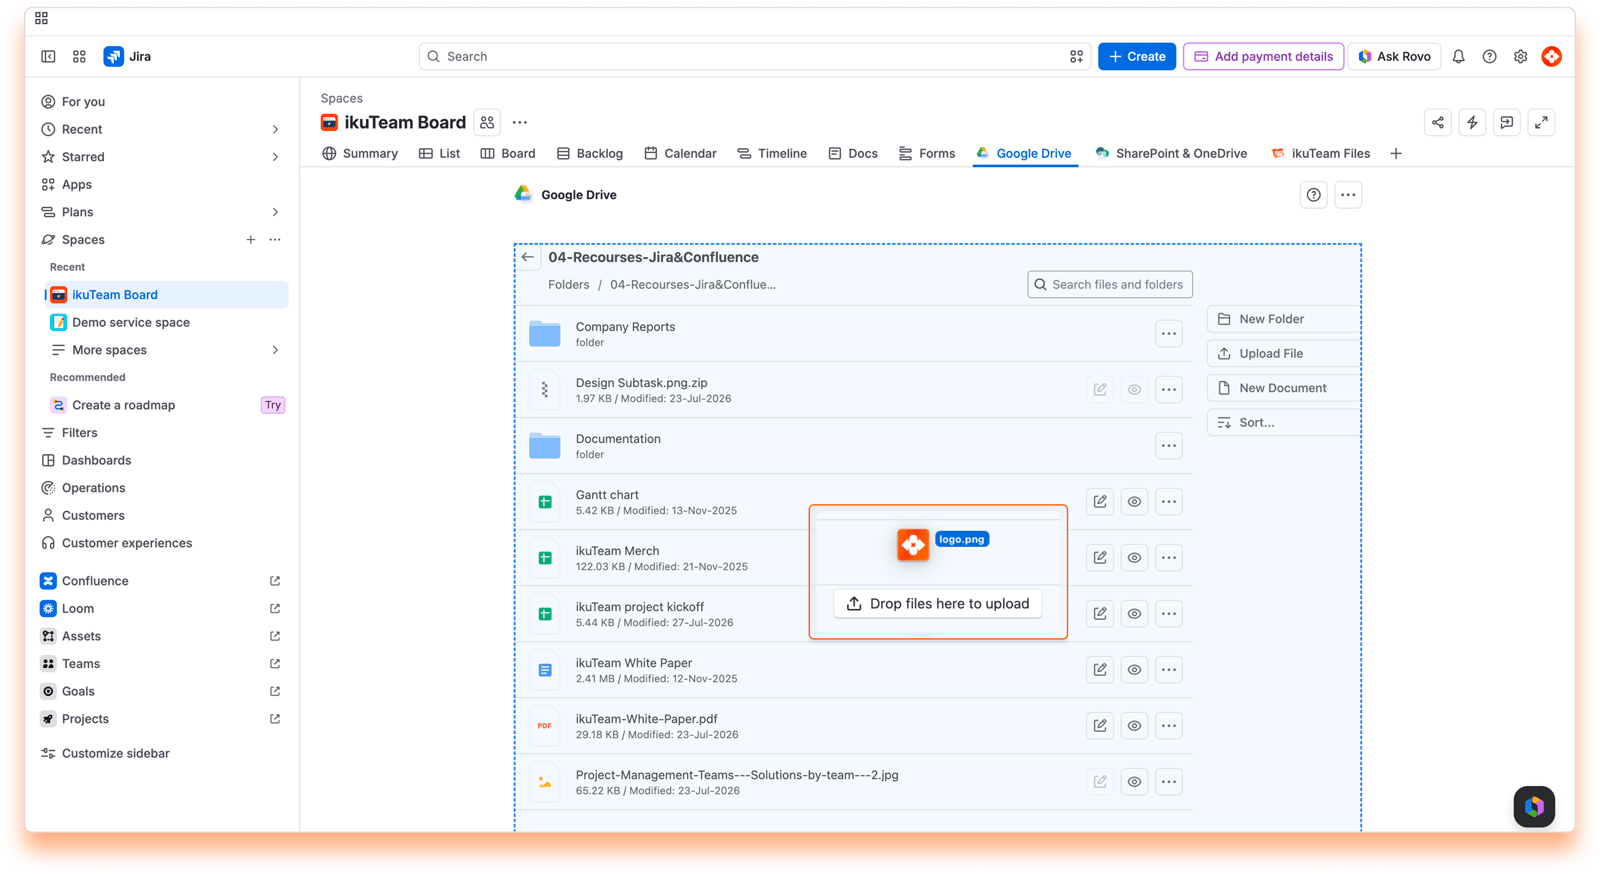
You can drag a file from a local folder and drop it in the folder you have open in the Google Drive Connector for Jira app to upload it there. Doing this will save the file in the storage place containing the connected folder, helping you build your single source of truth.
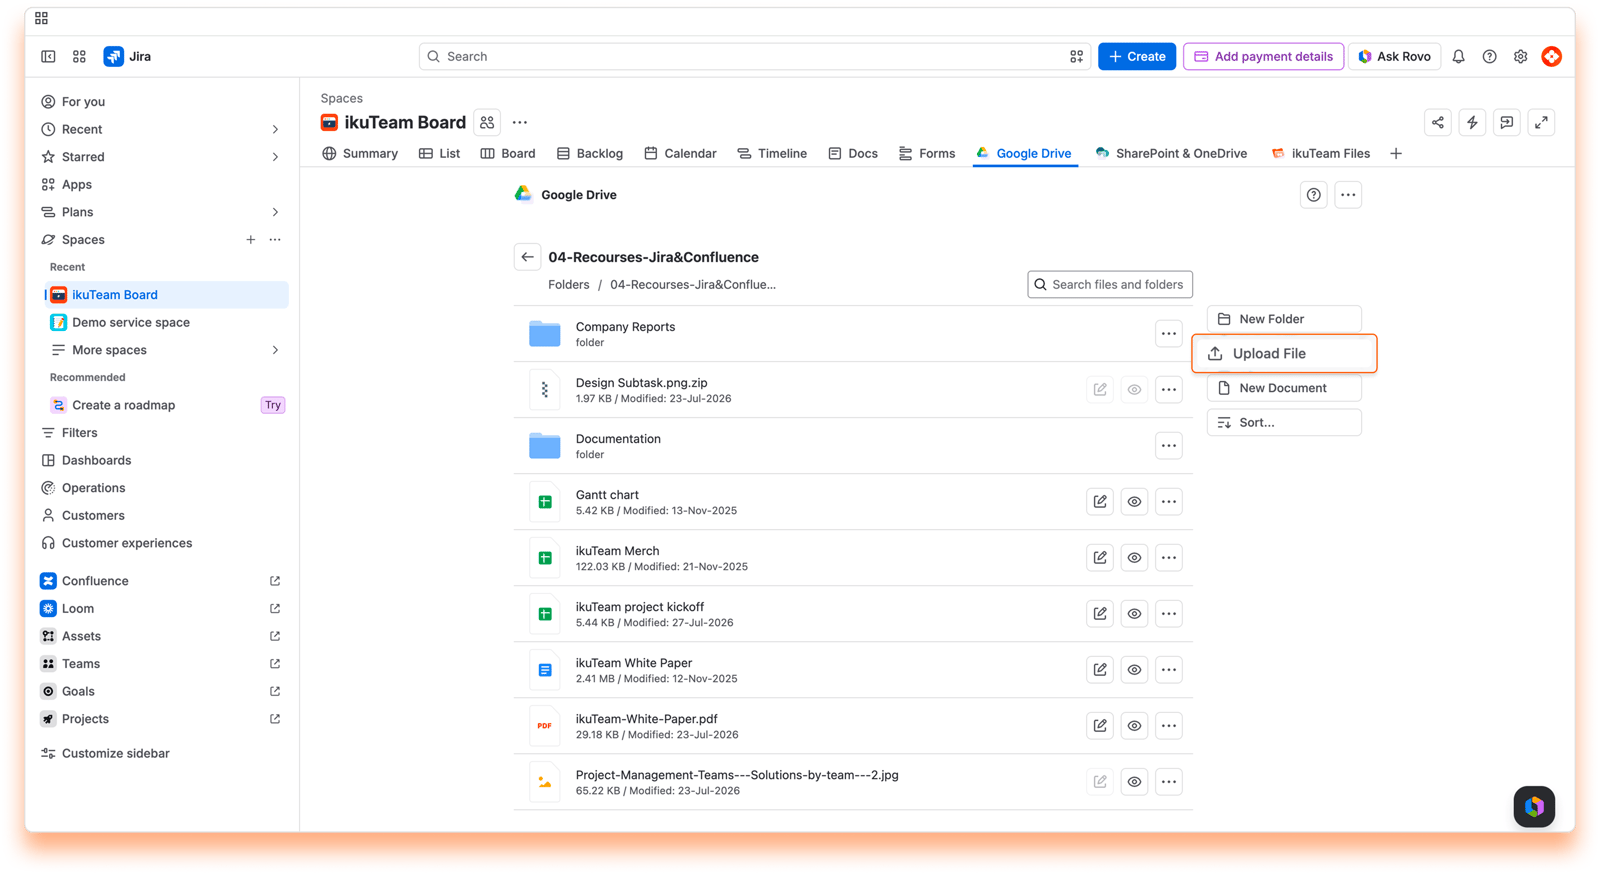
Click the "Upload file" button on the right or at the bottom of the open folder.
Look for the file you want to upload in the file picker.
Select the file and confirm.
Depending on the size of the file, it may take a few moments for it to become available in the app.
The upload option is also available when you attach a folder to a work item. You can drag and drop a file there to upload it.
With the Google Drive Connector for Jira app, you can create documents where needed. Microsoft Office documents open in the ikuTeam Office engine, ready for real-time collaboration with no file locks, and are saved back to the Google Drive folder you're in, avoiding duplicates.
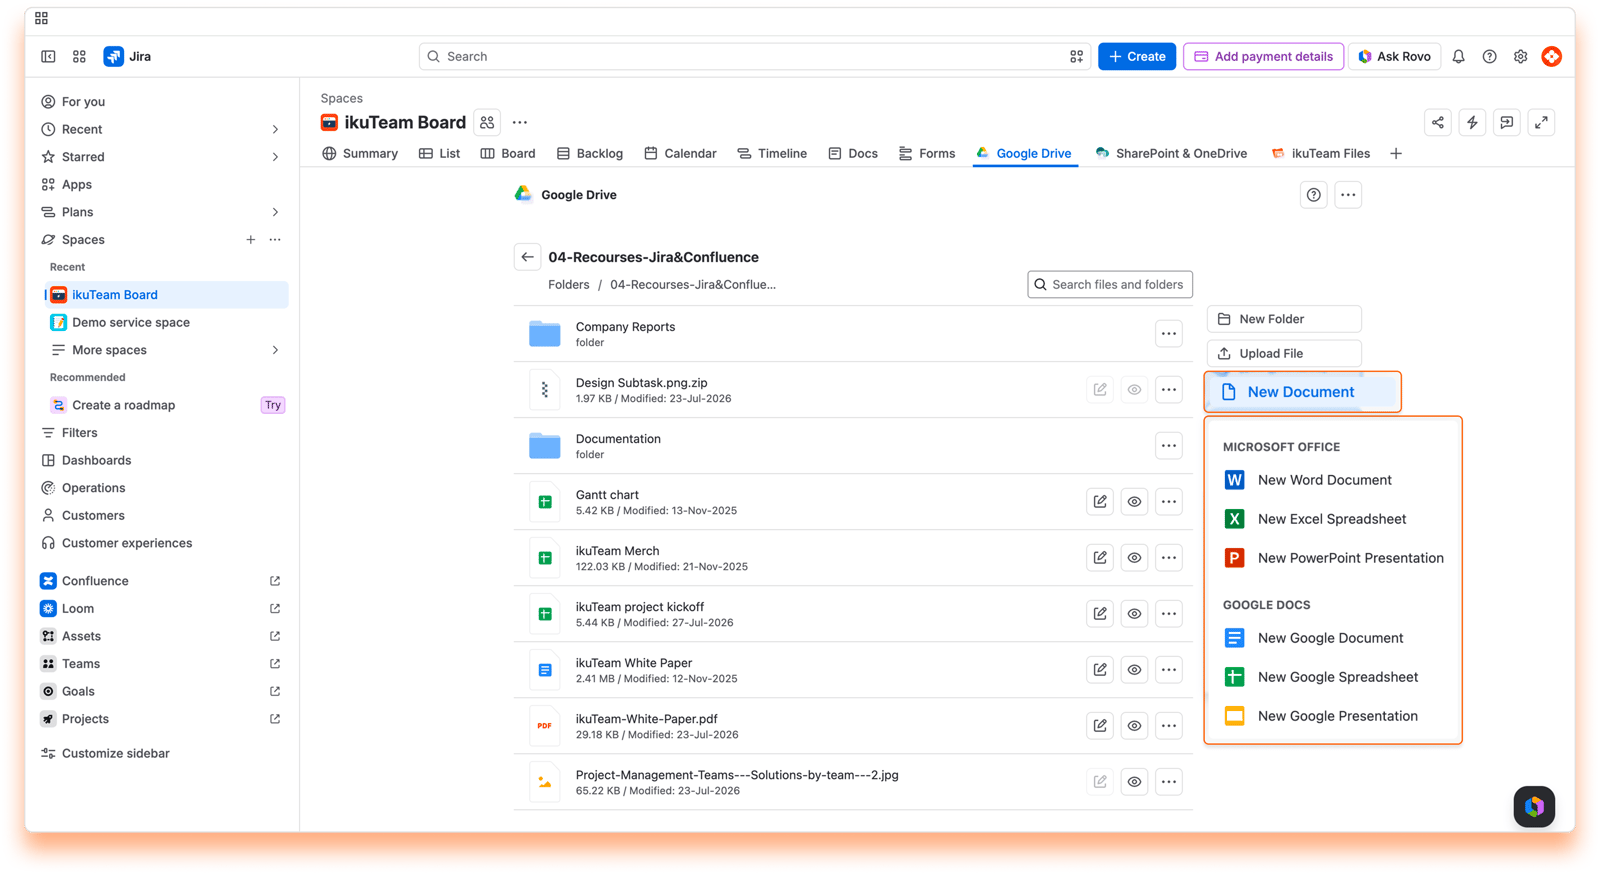
Click the "New Document" button.
Select the kind of document you want.
Type a name for your document and click the "Create" button.
After a few moments, your document appears in the folder, and you can edit it.
Click the "New Document" button.
Select the kind of document you want.
A new tab with the Google editor opens, and you can start editing your document.
You can close the tab when you finish your edits. Your new document will show in your folder when you reload the page.
You can create Microsoft Office documents and Google Docs, Sheets, and Slides files in any connected folder.
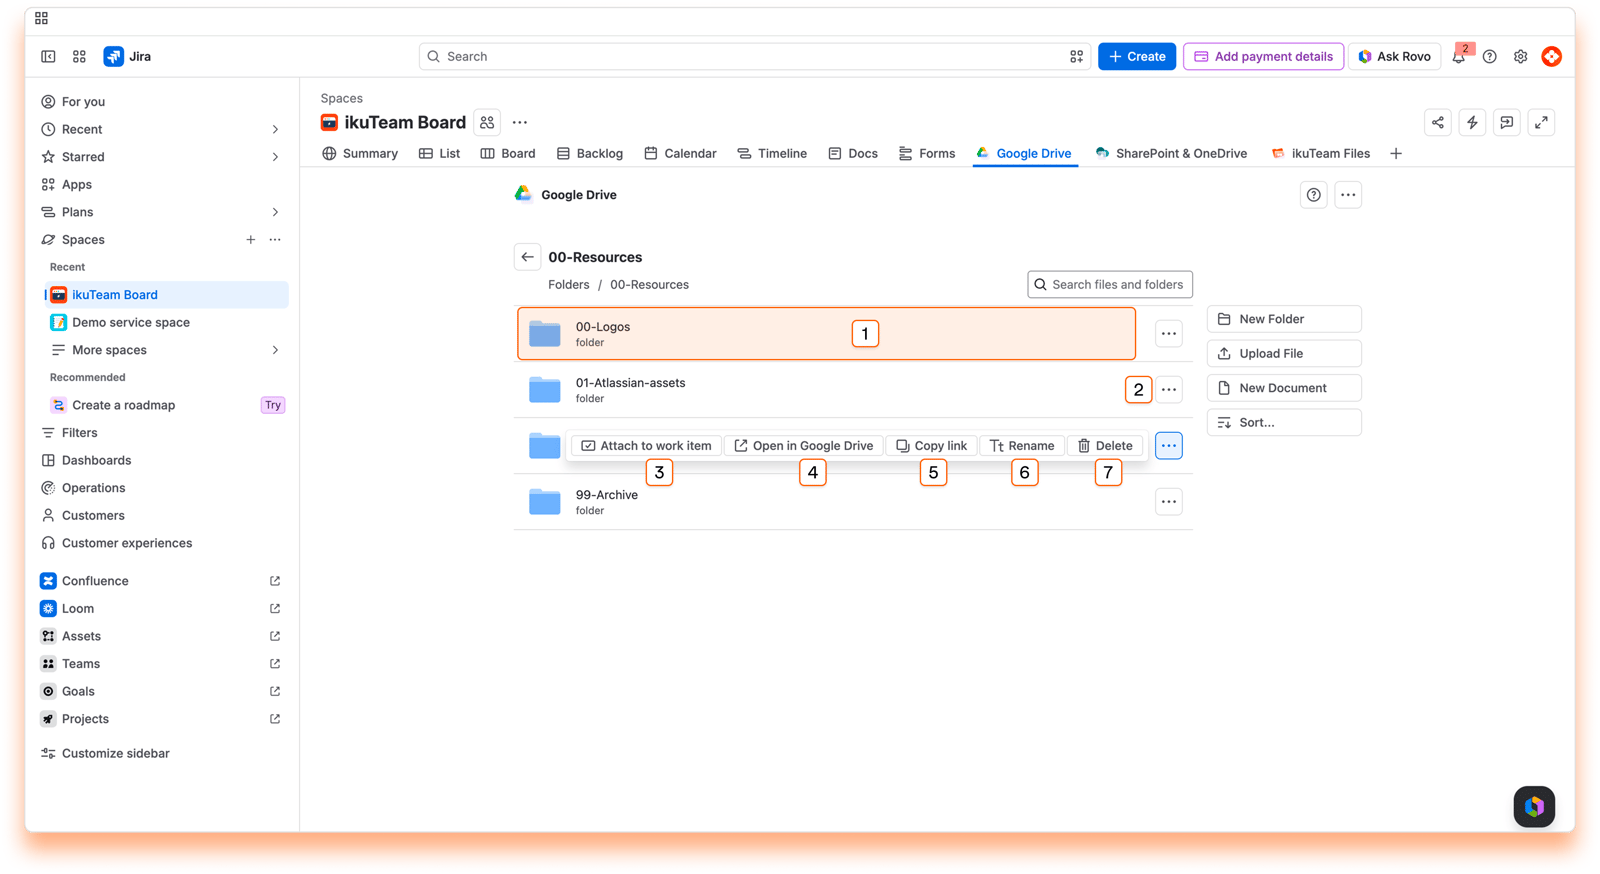
Preview click area
Context menu
Attach to work item
Open in Google Drive
Copy link
Rename folder
Delete folder
You can see the content of a folder by clicking on it. You can also click folders inside to view the content or click the back button to return to the previous one.
In Jira, you can attach files and folders to your work items directly from the file manager.
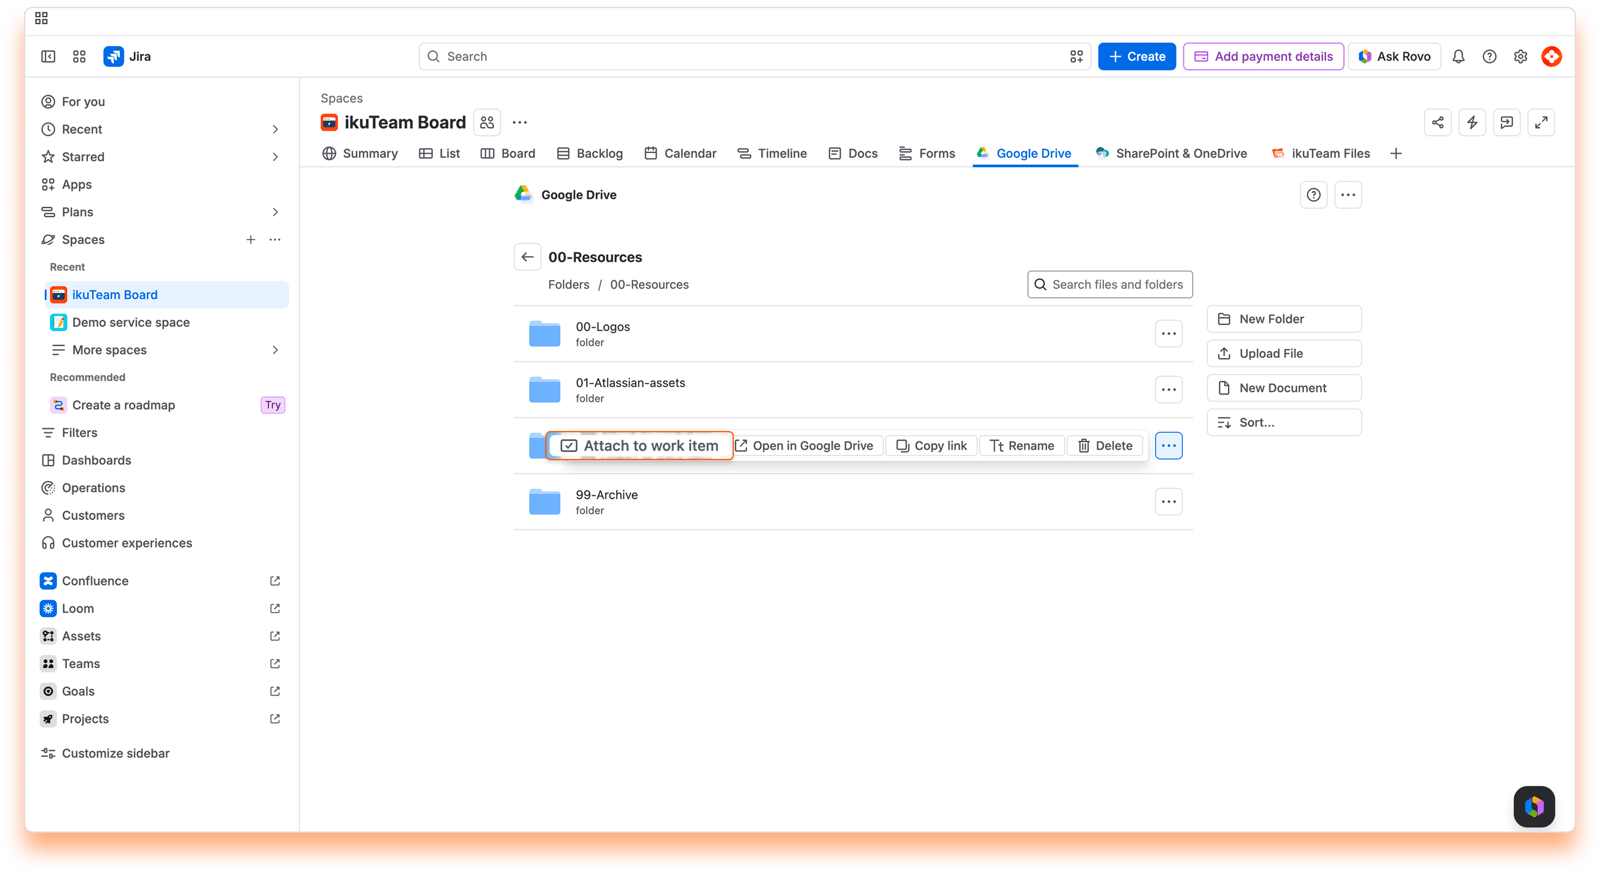
Instructions:
Open the context menu of the folder to attach.
Click the "Attach to work item" option.
Select the work item where you want to attach the file or folder. You can use the search field to look for a particular work item or even use the JQL search.
Click the "Attach" button.
All done. Your folder is now attached to the work item, and a confirmation message shows the work item key.
You need to add the app to the work item page to view the attached files and folders from the file manager.
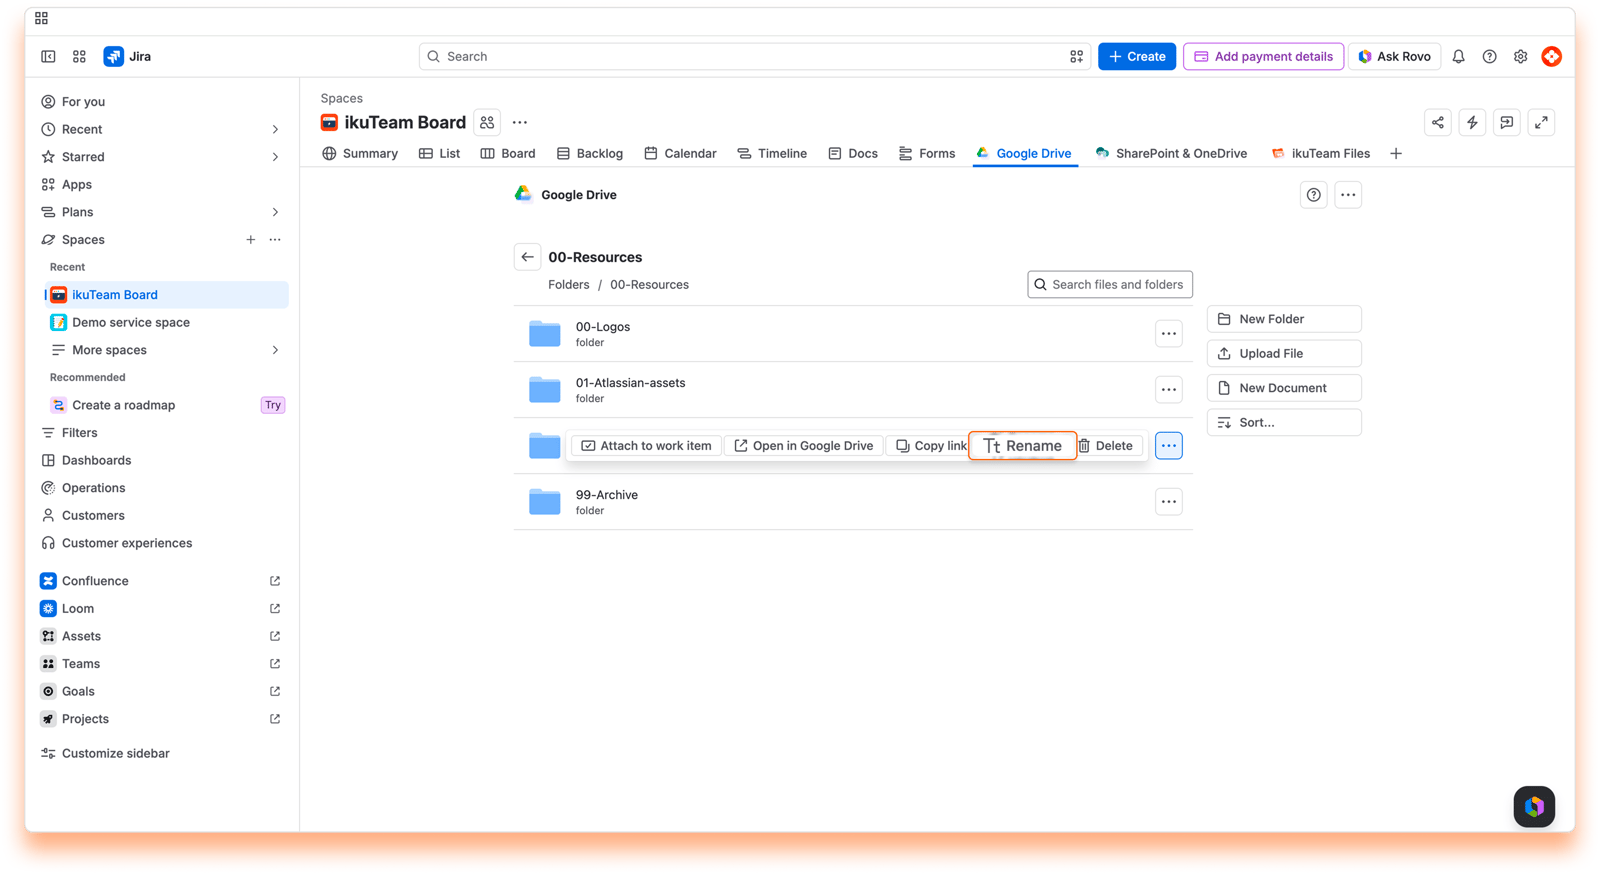
Click the context menu of the folder you want to rename.
Click the "Rename" option.
Enter the new name in the dialog window.
Click the "Rename" button. All done.
When you change the name of a folder, it's updated in the connected storage too.
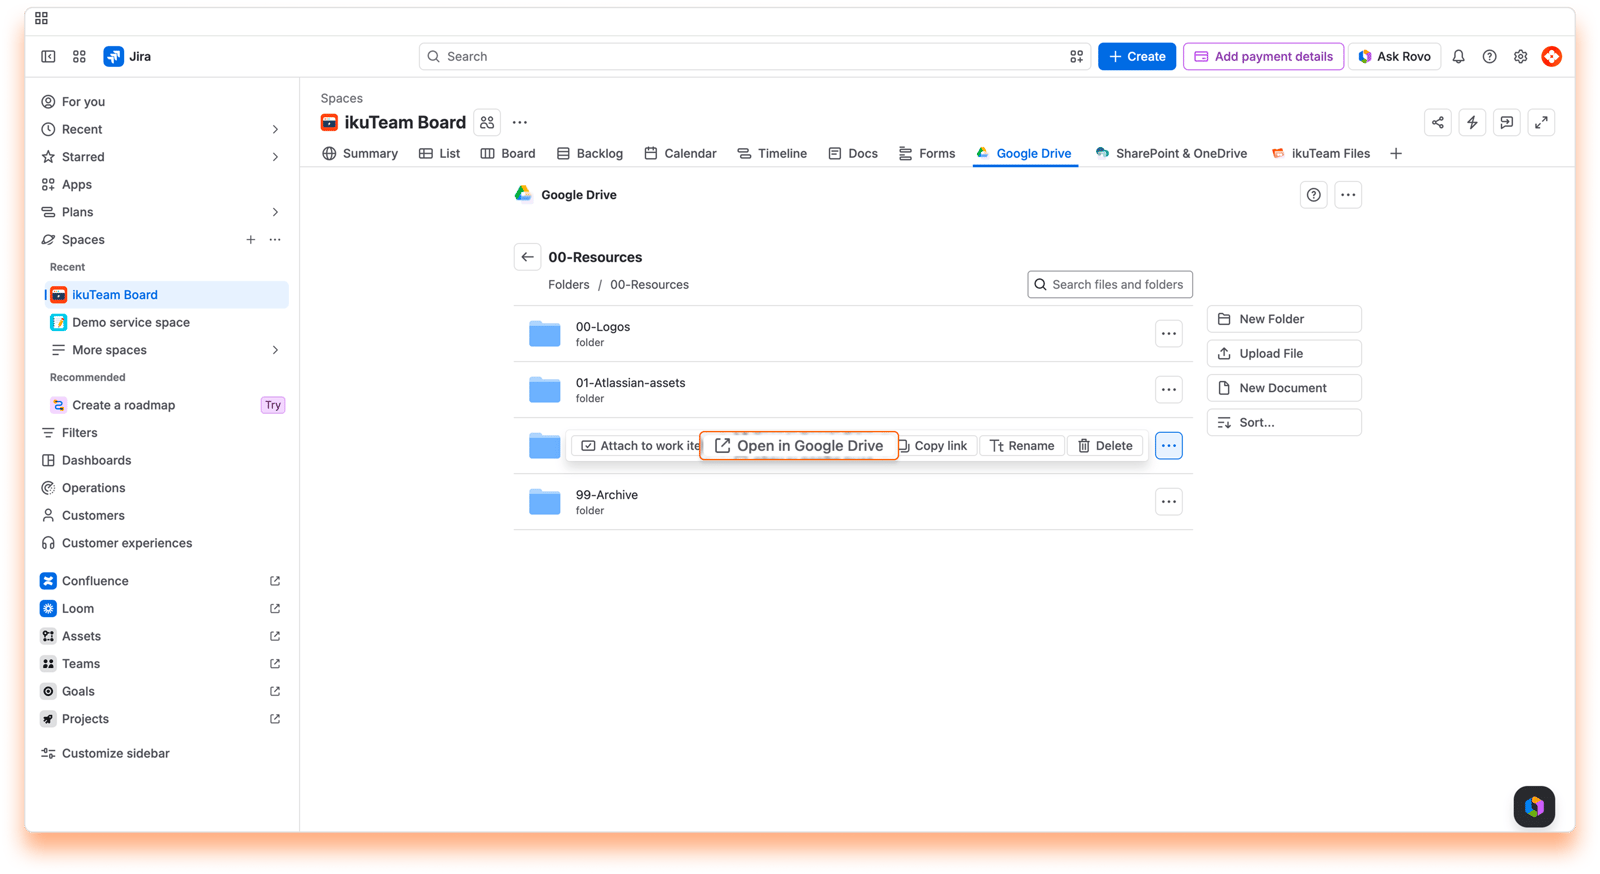
Click the context menu of the folder you want to open.
Click the “Open in Google Drive” option.
The folder opens in a few seconds on the original storage site.
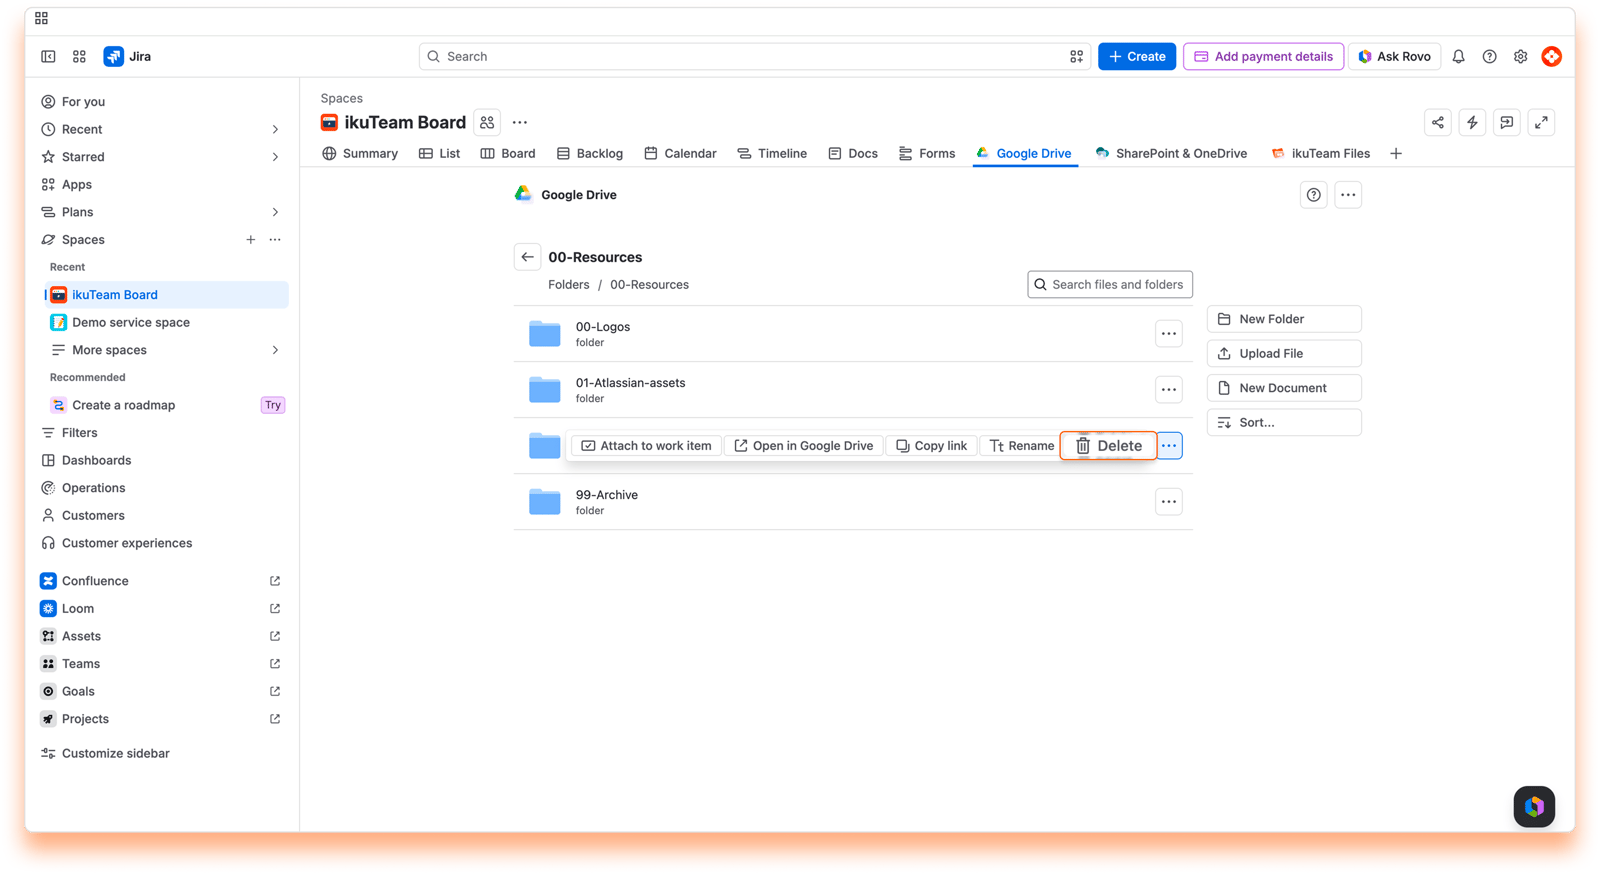
Click the context menu of the folder you want to delete.
Click the "Delete" option.
Click the "Delete" button in the confirmation dialog. All done.
When you delete a folder, it's also removed from Google Drive. This action can’t be undone in the Google Drive Connector for Jira app.
To help you keep things organized, you can create new folders whenever needed.
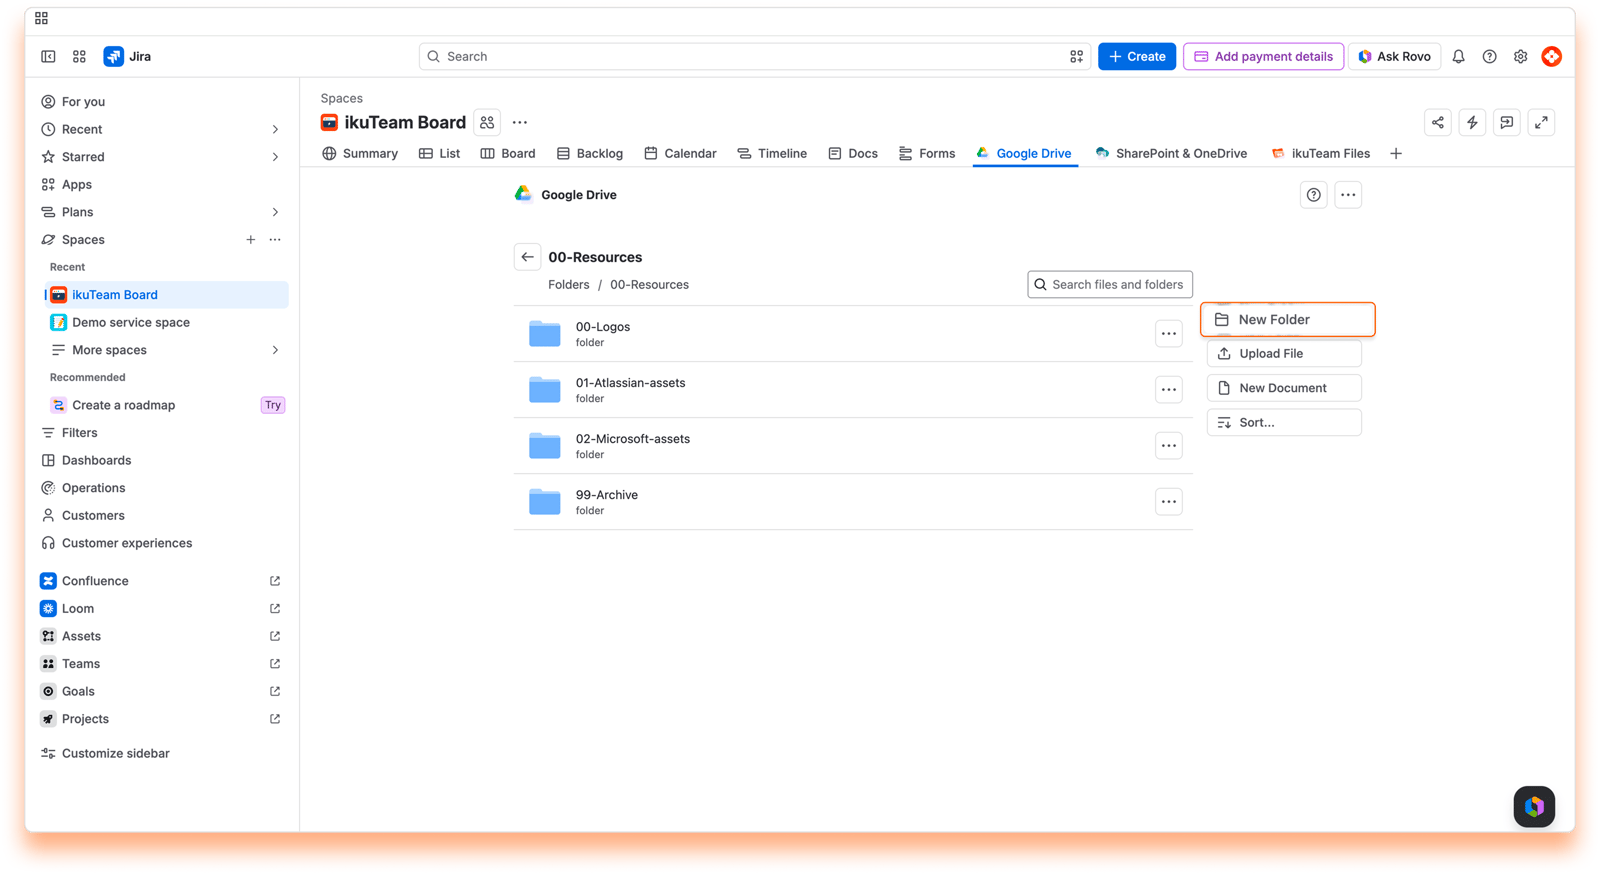
Click the "New Folder" button on the right side (or from the context menu in narrow views).
Enter the name in the dialog window.
Click the "Create" button.
After a few moments, the view reloads, and your new folder will be listed and ready to use.
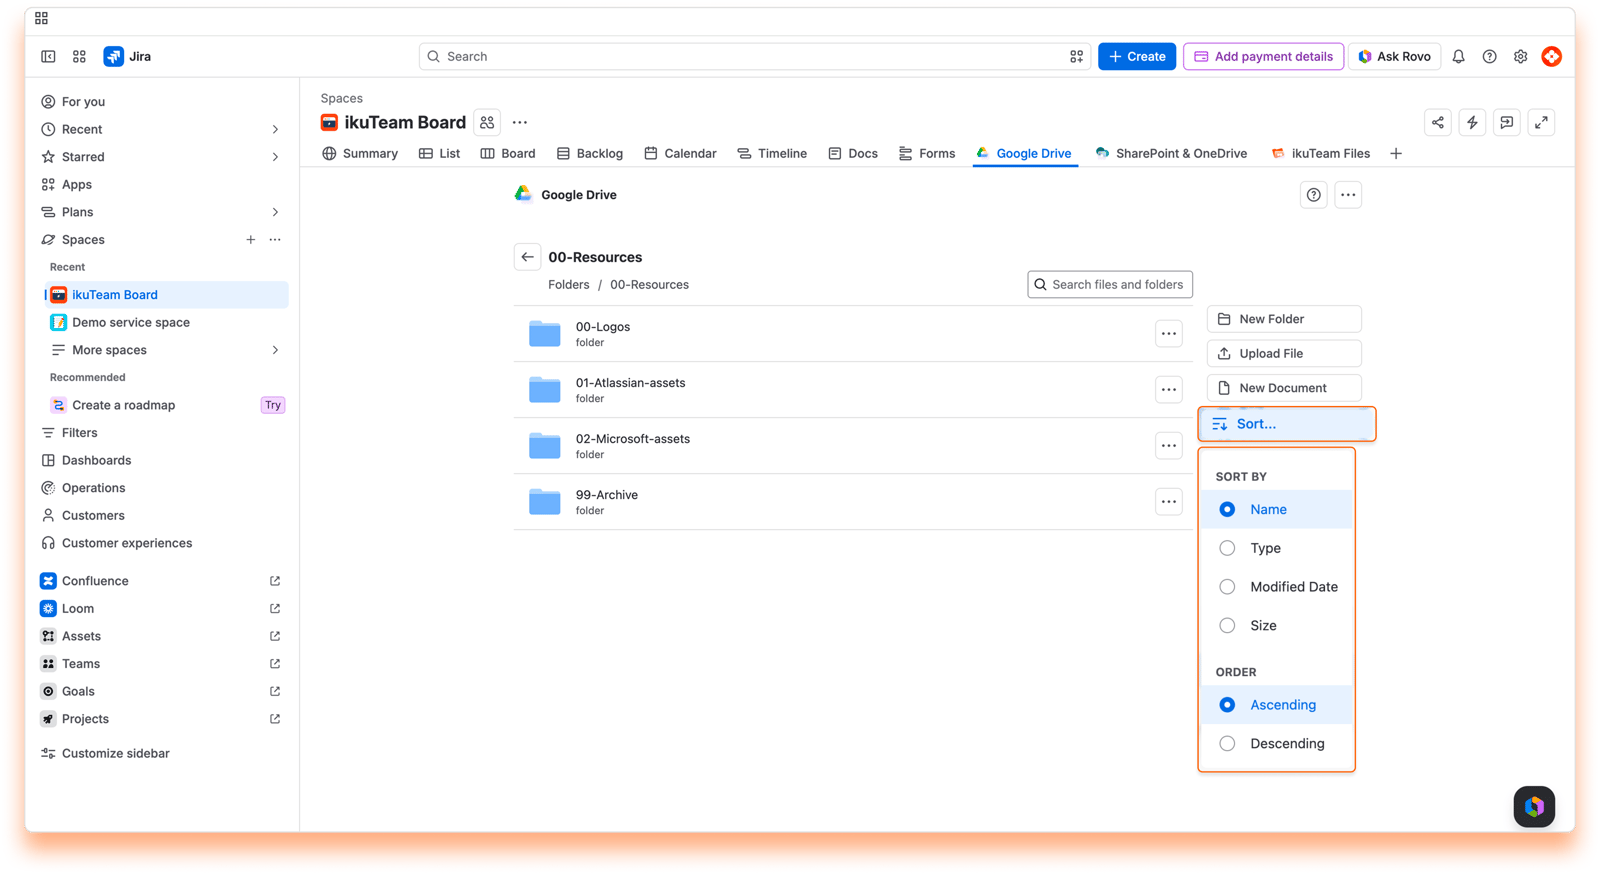
The content of your folders is ordered alphabetically by default.
You can change this by clicking the "Sort..." button and selecting a sort option and the order you prefer. You can sort content by name, type, modified date, and size.
Keep the files and folders you use most close at hand. Select Add to favorites on any file or folder, and it appears under Favorite folders and files on the Google Drive Workspace Overview page, along with your recent activity and the files you updated. To open that page anytime, select Apps in the Jira navigation, then Google Drive. Right after you add a favorite, you can also click Go to Dashboard in the confirmation to open it. To remove one, select Remove from favorites.
Now you know all that you need to use the file manager. You can now learn more about previewing files, editing documents, or attaching files and folders to Jira work items.
If you still have questions about the topics covered on this page, visit our support portal and send them to us. Our team is always happy to help.


