

Confluence Google Drive Integration
Create a single source of truth with seamless syncing and real-time collaboration.
Read more


This guide shows you how to set up a Jira Automation flow that creates a folder in SharePoint or OneDrive and connects it to each new Jira work item (previously called an issue) as soon as the work item is created.
Once it's set up, every new work item in your space gets its own folder, named after the work item key and summary. You build it with SharePoint Connector for Jira, which works with SharePoint, OneDrive for Business and OneDrive.
Automated folder creation: Every new work item gets a dedicated SharePoint or OneDrive folder the moment it's created.
Centralized file management: Keep work item documents in SharePoint or OneDrive while keeping full visibility in Jira.
Less IT overhead: No more creating and linking folders by hand, so your IT team can focus on higher-priority work.
Your design team needs a dedicated folder for every new Design work item. It holds high-resolution mockups, Figma exports, and brand assets without cluttering Jira. With this flow, each new Design work item gets its own folder, ready before anyone uploads a file.
SharePoint Connector for Jira is installed on your Jira site.
You have permission to create automation flows in the space (space admin) or globally (Jira admin).
You have access to a SharePoint or OneDrive account. You'll authenticate it while setting up the "SharePoint - Create folder" action.
The flow runs as the user set in Actor, in the flow's Settings panel. That person needs access to the app and permission on the folder. With Mirror Storage Permissions ON, they must also have signed in to the SharePoint or OneDrive account.
Your site has the Advanced Edition of SharePoint Connector for Jira. The automation actions are part of it.
Create a new flow and set the trigger to "Work item created". The flow runs as soon as a new work item is created.
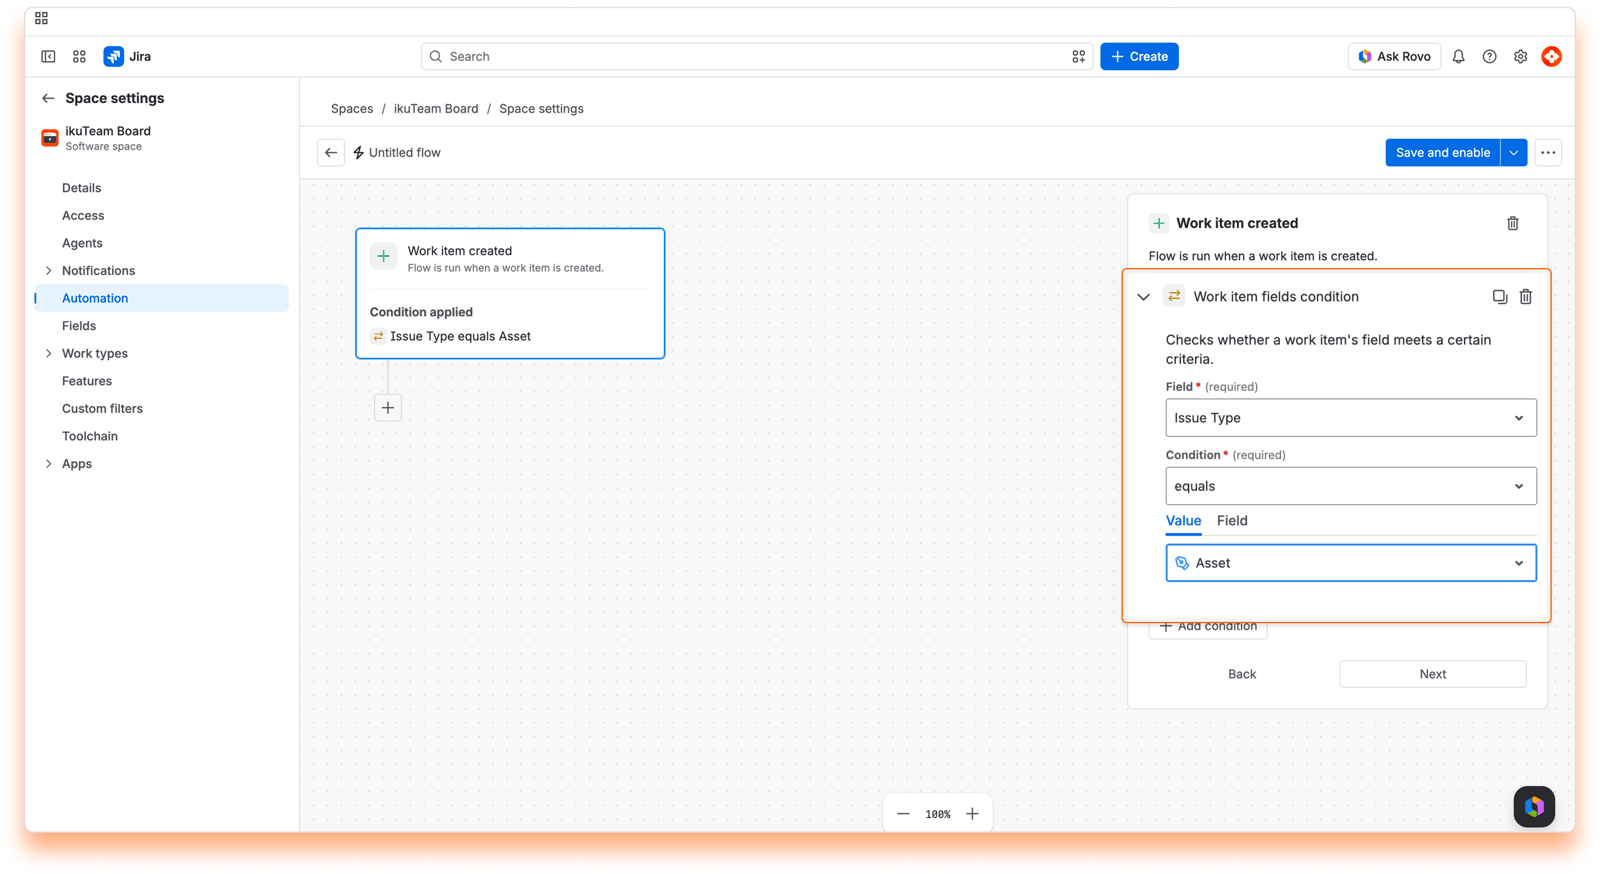
Add a "Work item fields condition" and set "Work type" to Design, so the flow only runs for design work items.
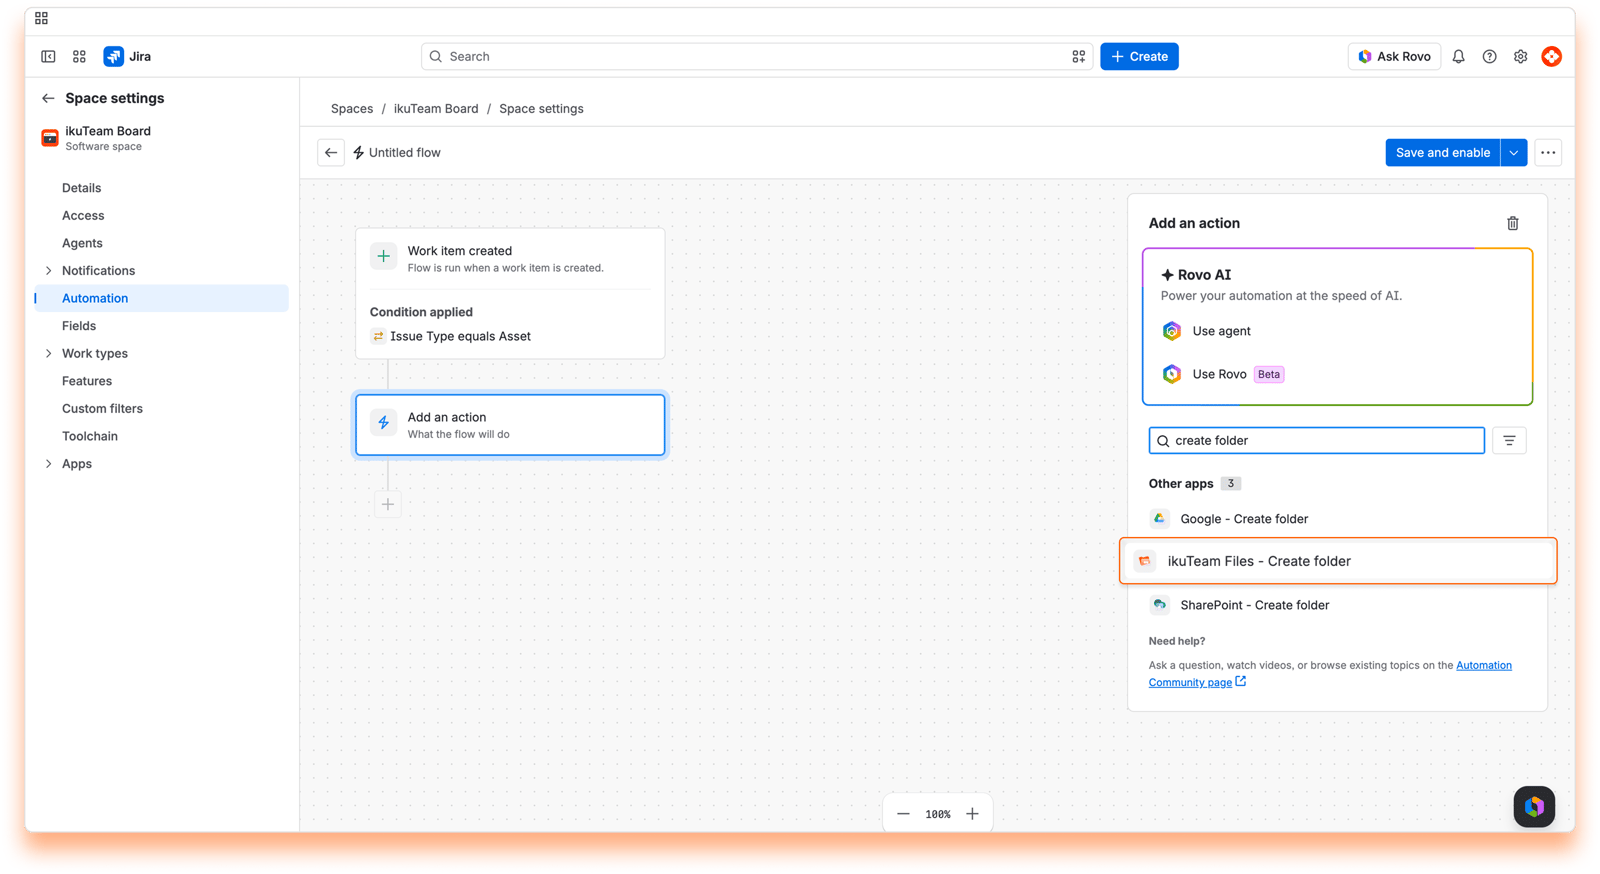
Add a new action, search for "SharePoint - Create folder", and select it.
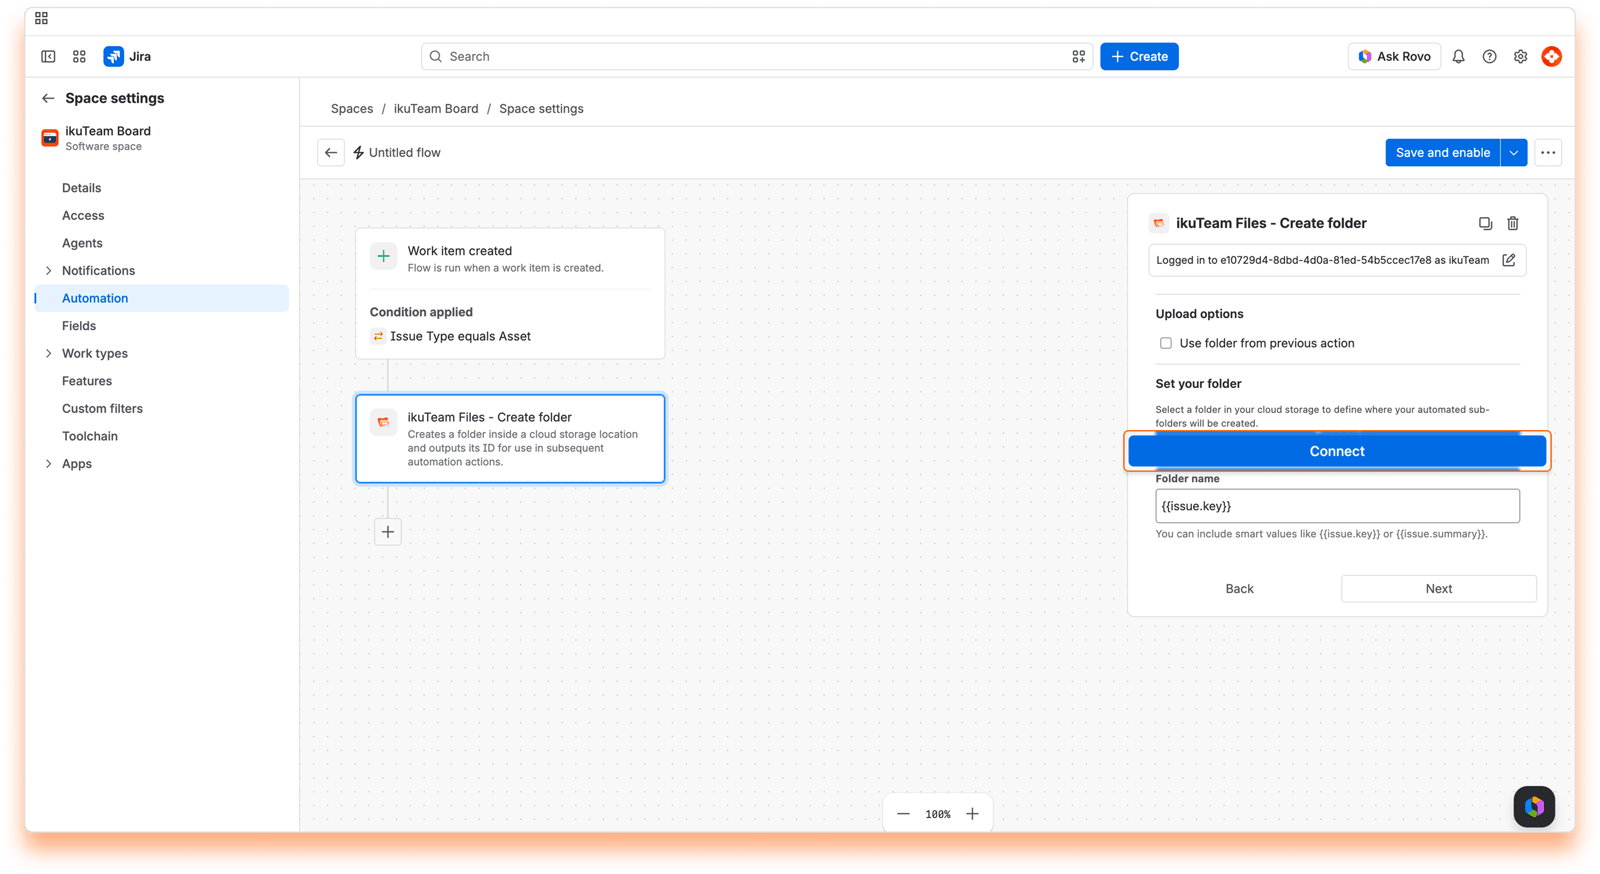
Click "Connect" and authenticate your SharePoint or OneDrive account.
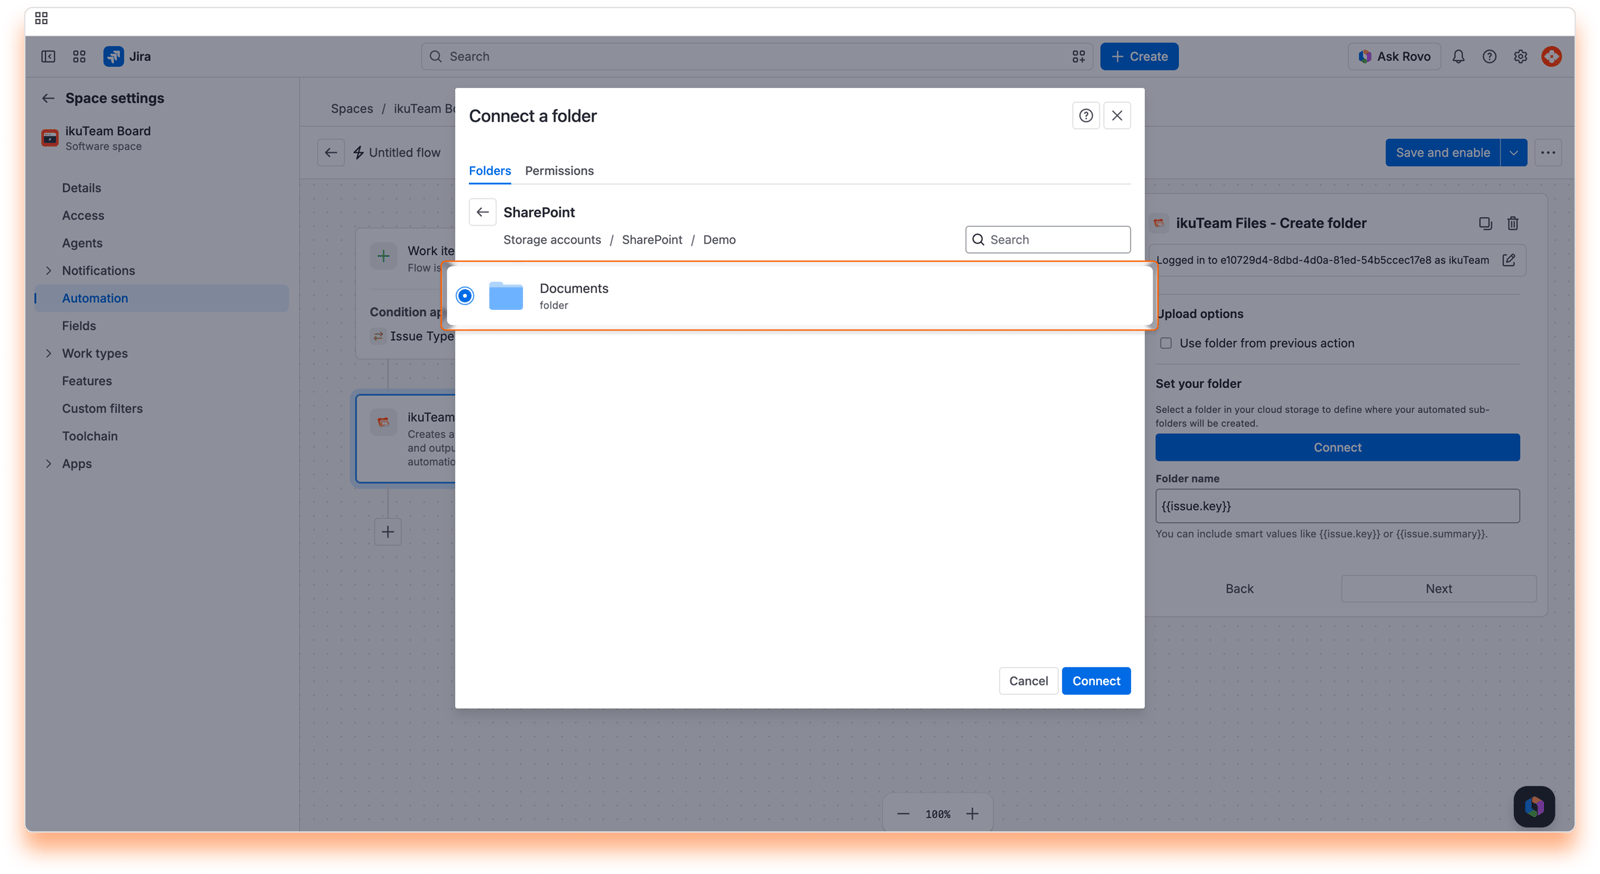
Choose the parent folder where the new folders will be created.
In the "Folder name" field, enter smart values so each folder gets a unique, recognizable name, for example {{issue.key}} - {{issue.summary}}.
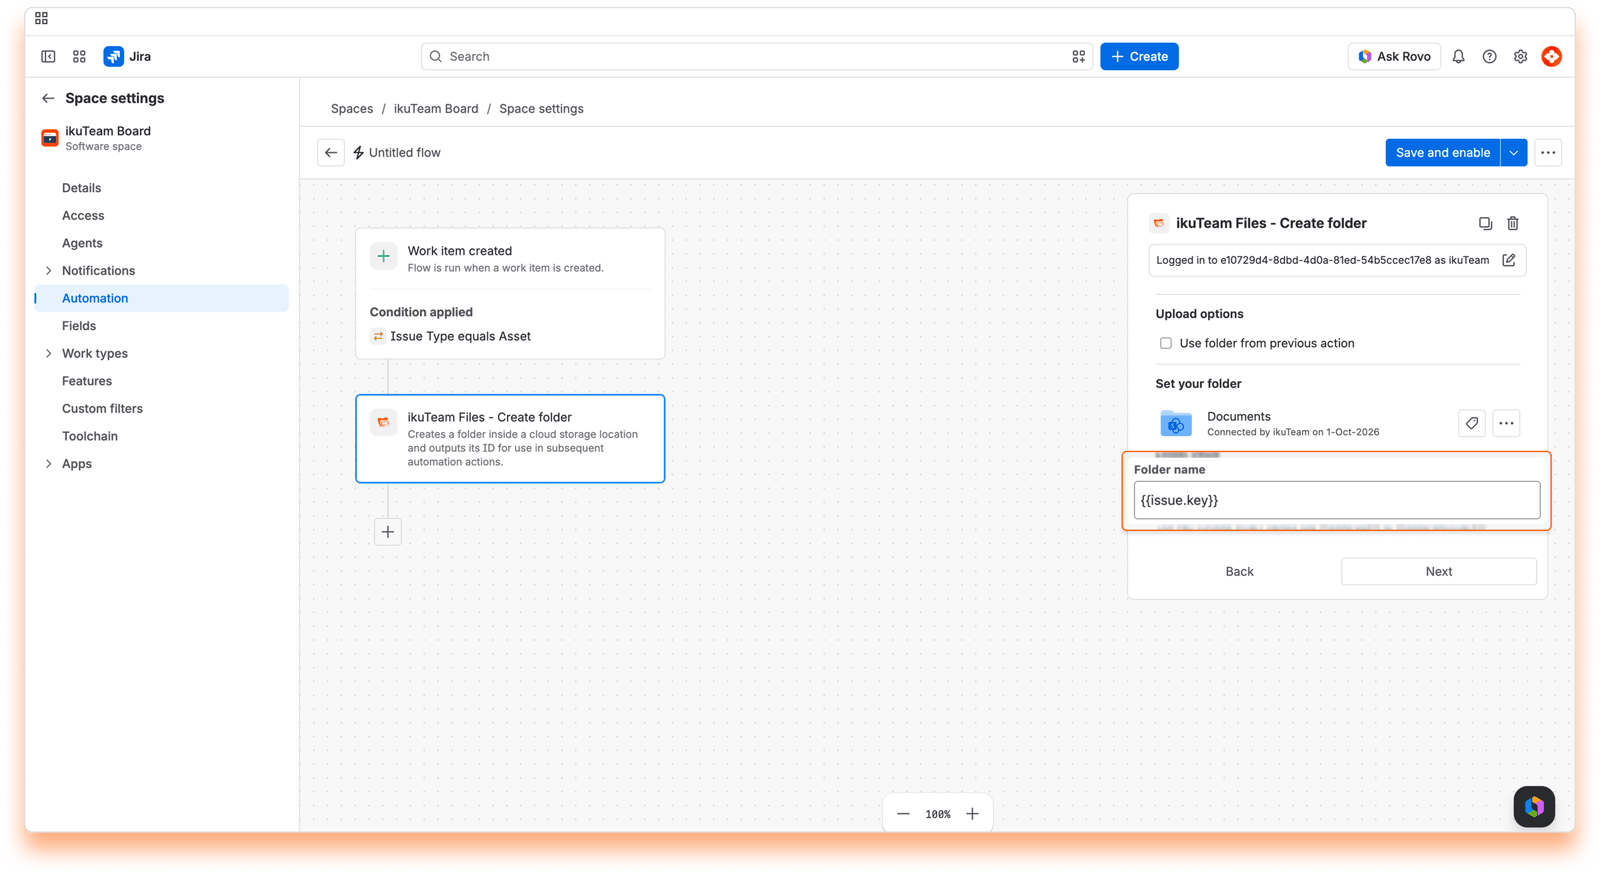
Type the smart values exactly as shown. They still say "issue", even though Jira now calls them work items.
Some work item summaries contain characters SharePoint and OneDrive don't allow in folder names, like / or :. When that happens, the action stops with a message that the folder name isn't valid. If your summaries often have these characters, use {{issue.key}} on its own.
Keep "Use the existing folder" selected under "If a folder with this name already exists", so the flow reuses the work item's folder instead of stopping if it's already there.
Add another action and search for "SharePoint - Connect a folder".
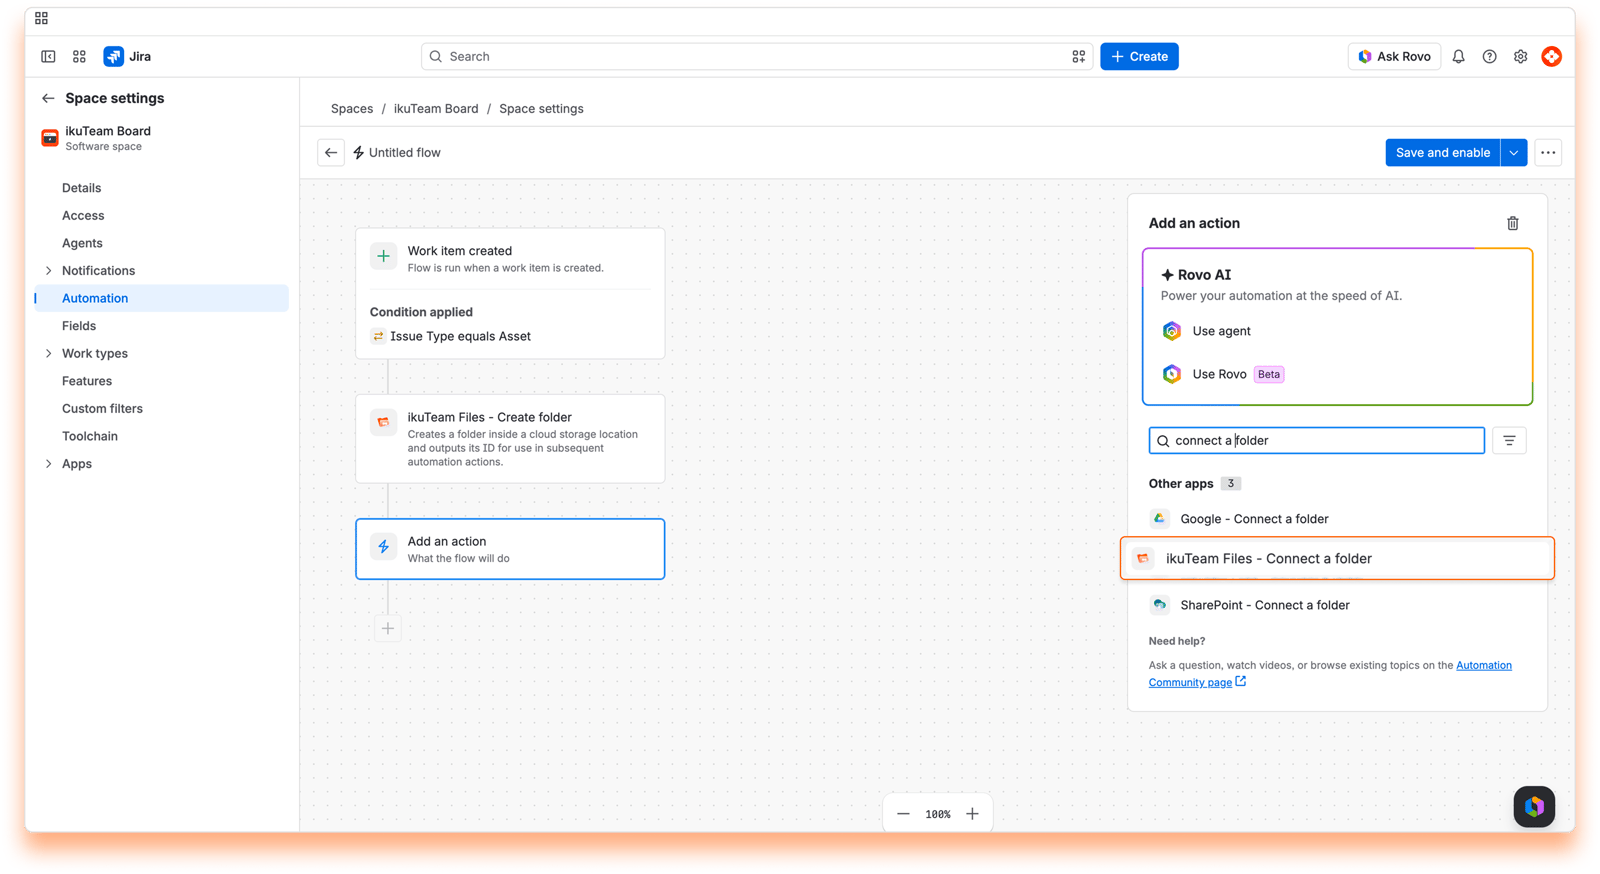
Select "Use folder from previous step". The folder created in step 2 is connected to the work item that triggered the flow, so your team sees it on the work item right away.
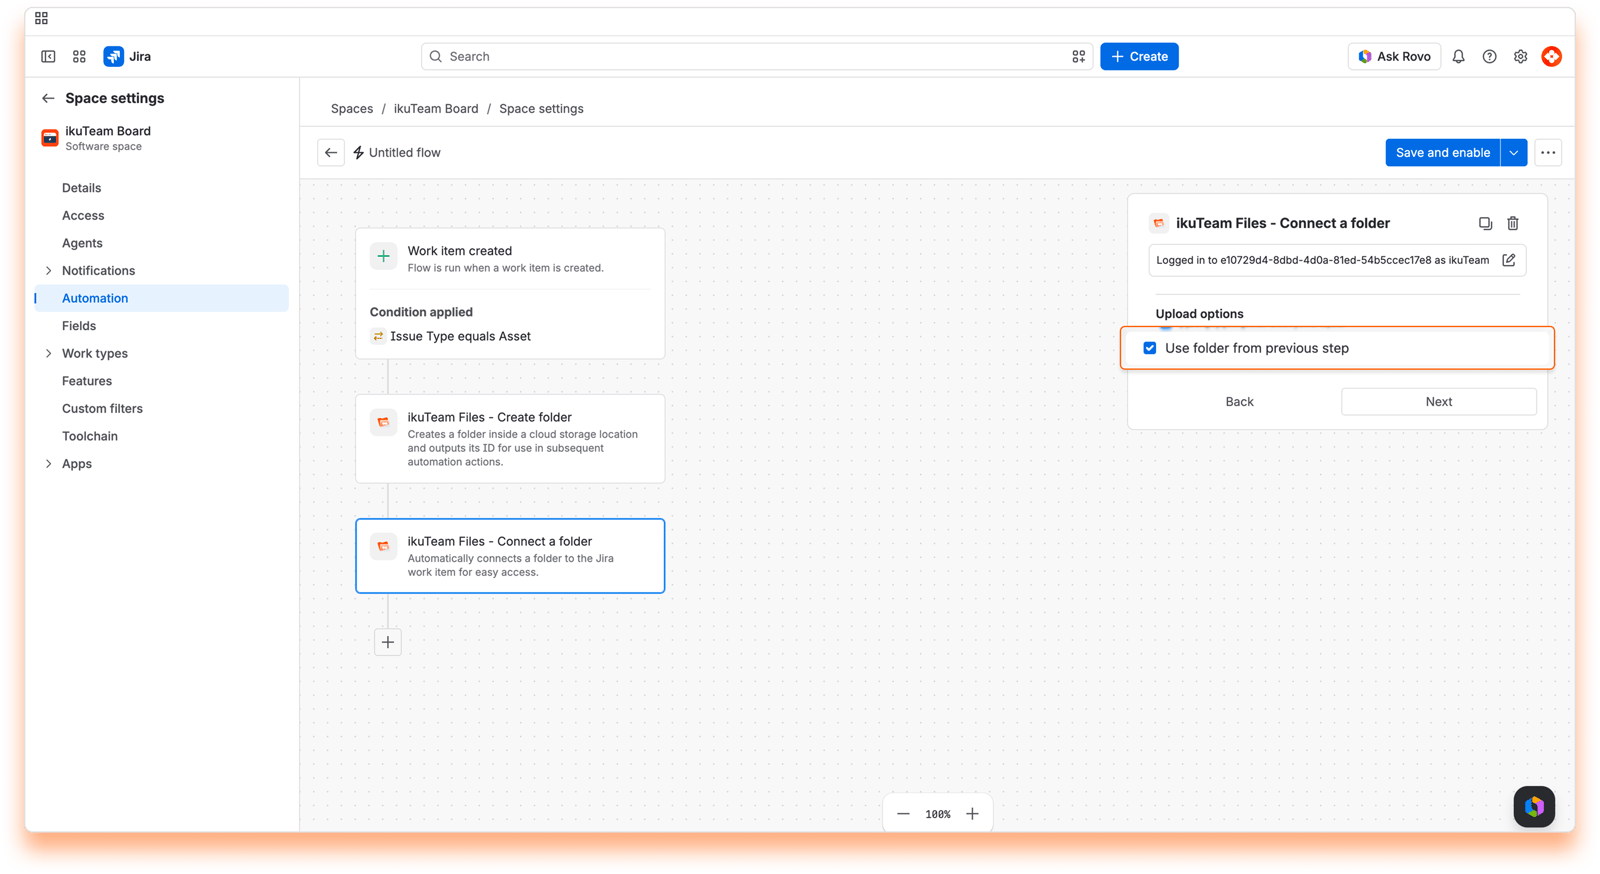
Save and turn on the flow, and your automation is ready to create and connect a folder for every new work item.
Test first. Run new flows in a sandbox or staging environment before turning them on in production. It's the easiest way to confirm the folder structure fits your team's needs.
Check the audit log. If folders aren't appearing as expected, the flow's "Audit log" is the best place to find out why. It shows every time the flow ran, or failed to run.
Use the work item key in folder names. Keys are unique, so folders stay easy to tell apart even when work items have similar summaries.
With this flow in place, every new work item starts with its own folder, ready for your team's files. To see every action you can use, read 4.1 SharePoint Connector automation actions. If you need a hand, reach out on our support portal.


