

Confluence Google Drive Integration
Create a single source of truth with seamless syncing and real-time collaboration.
Read more


This guide shows you how to set up a Jira Automation flow that creates a complete folder structure in SharePoint or OneDrive for each new Jira work item (previously called an issue): one main folder, connected to the work item, with the subfolders your team always needs inside it.
Once it's set up, every new work item starts with the same, tidy structure, so files always land in the right place. You build it with SharePoint Connector for Jira, which works with SharePoint and OneDrive.
Several folders in one flow: Create a main folder and as many subfolders as you need, every time a work item is created.
The same structure everywhere: Every work item gets the same subfolders, so your team always knows where to find and save files.
Ready from day one: The main folder is connected to the work item, and its subfolders are there before anyone uploads a file.
Your legal team handles every new client request as a work item. Each request needs a folder named after the work item, with three subfolders inside it: Contracts, Invoices and Correspondence. With this flow, the whole structure is created and connected the moment the work item is created.
SharePoint Connector for Jira is installed on your Jira site.
You have permission to create automation flows in the space (space admin) or globally (Jira admin).
You have access to SharePoint or OneDrive. You'll authenticate it while setting up the first "SharePoint - Create folder" action.
The flow runs as the user set in Actor, in the flow's Settings panel. That person needs access to the app and Edit permission on the folder. With Mirror Storage Permissions ON, they must also have signed in to SharePoint or OneDrive.
Your site has the Advanced Edition of SharePoint Connector for Jira. The automation actions are part of it.
Each Create folder action can create its folder in one of three places:
The folder you connect with Connect. Use it for the main folder.
Use folder from previous step: inside the folder from the action right before it. Each new folder goes one level deeper.
Use folder from a smart value: inside the folder whose ID you enter in Parent folder. Use it to put several subfolders side by side in the same main folder.
To keep the main folder's ID at hand, you save it in a variable with Jira's Create variable action, right after creating it.
Here's what the finished flow looks like:
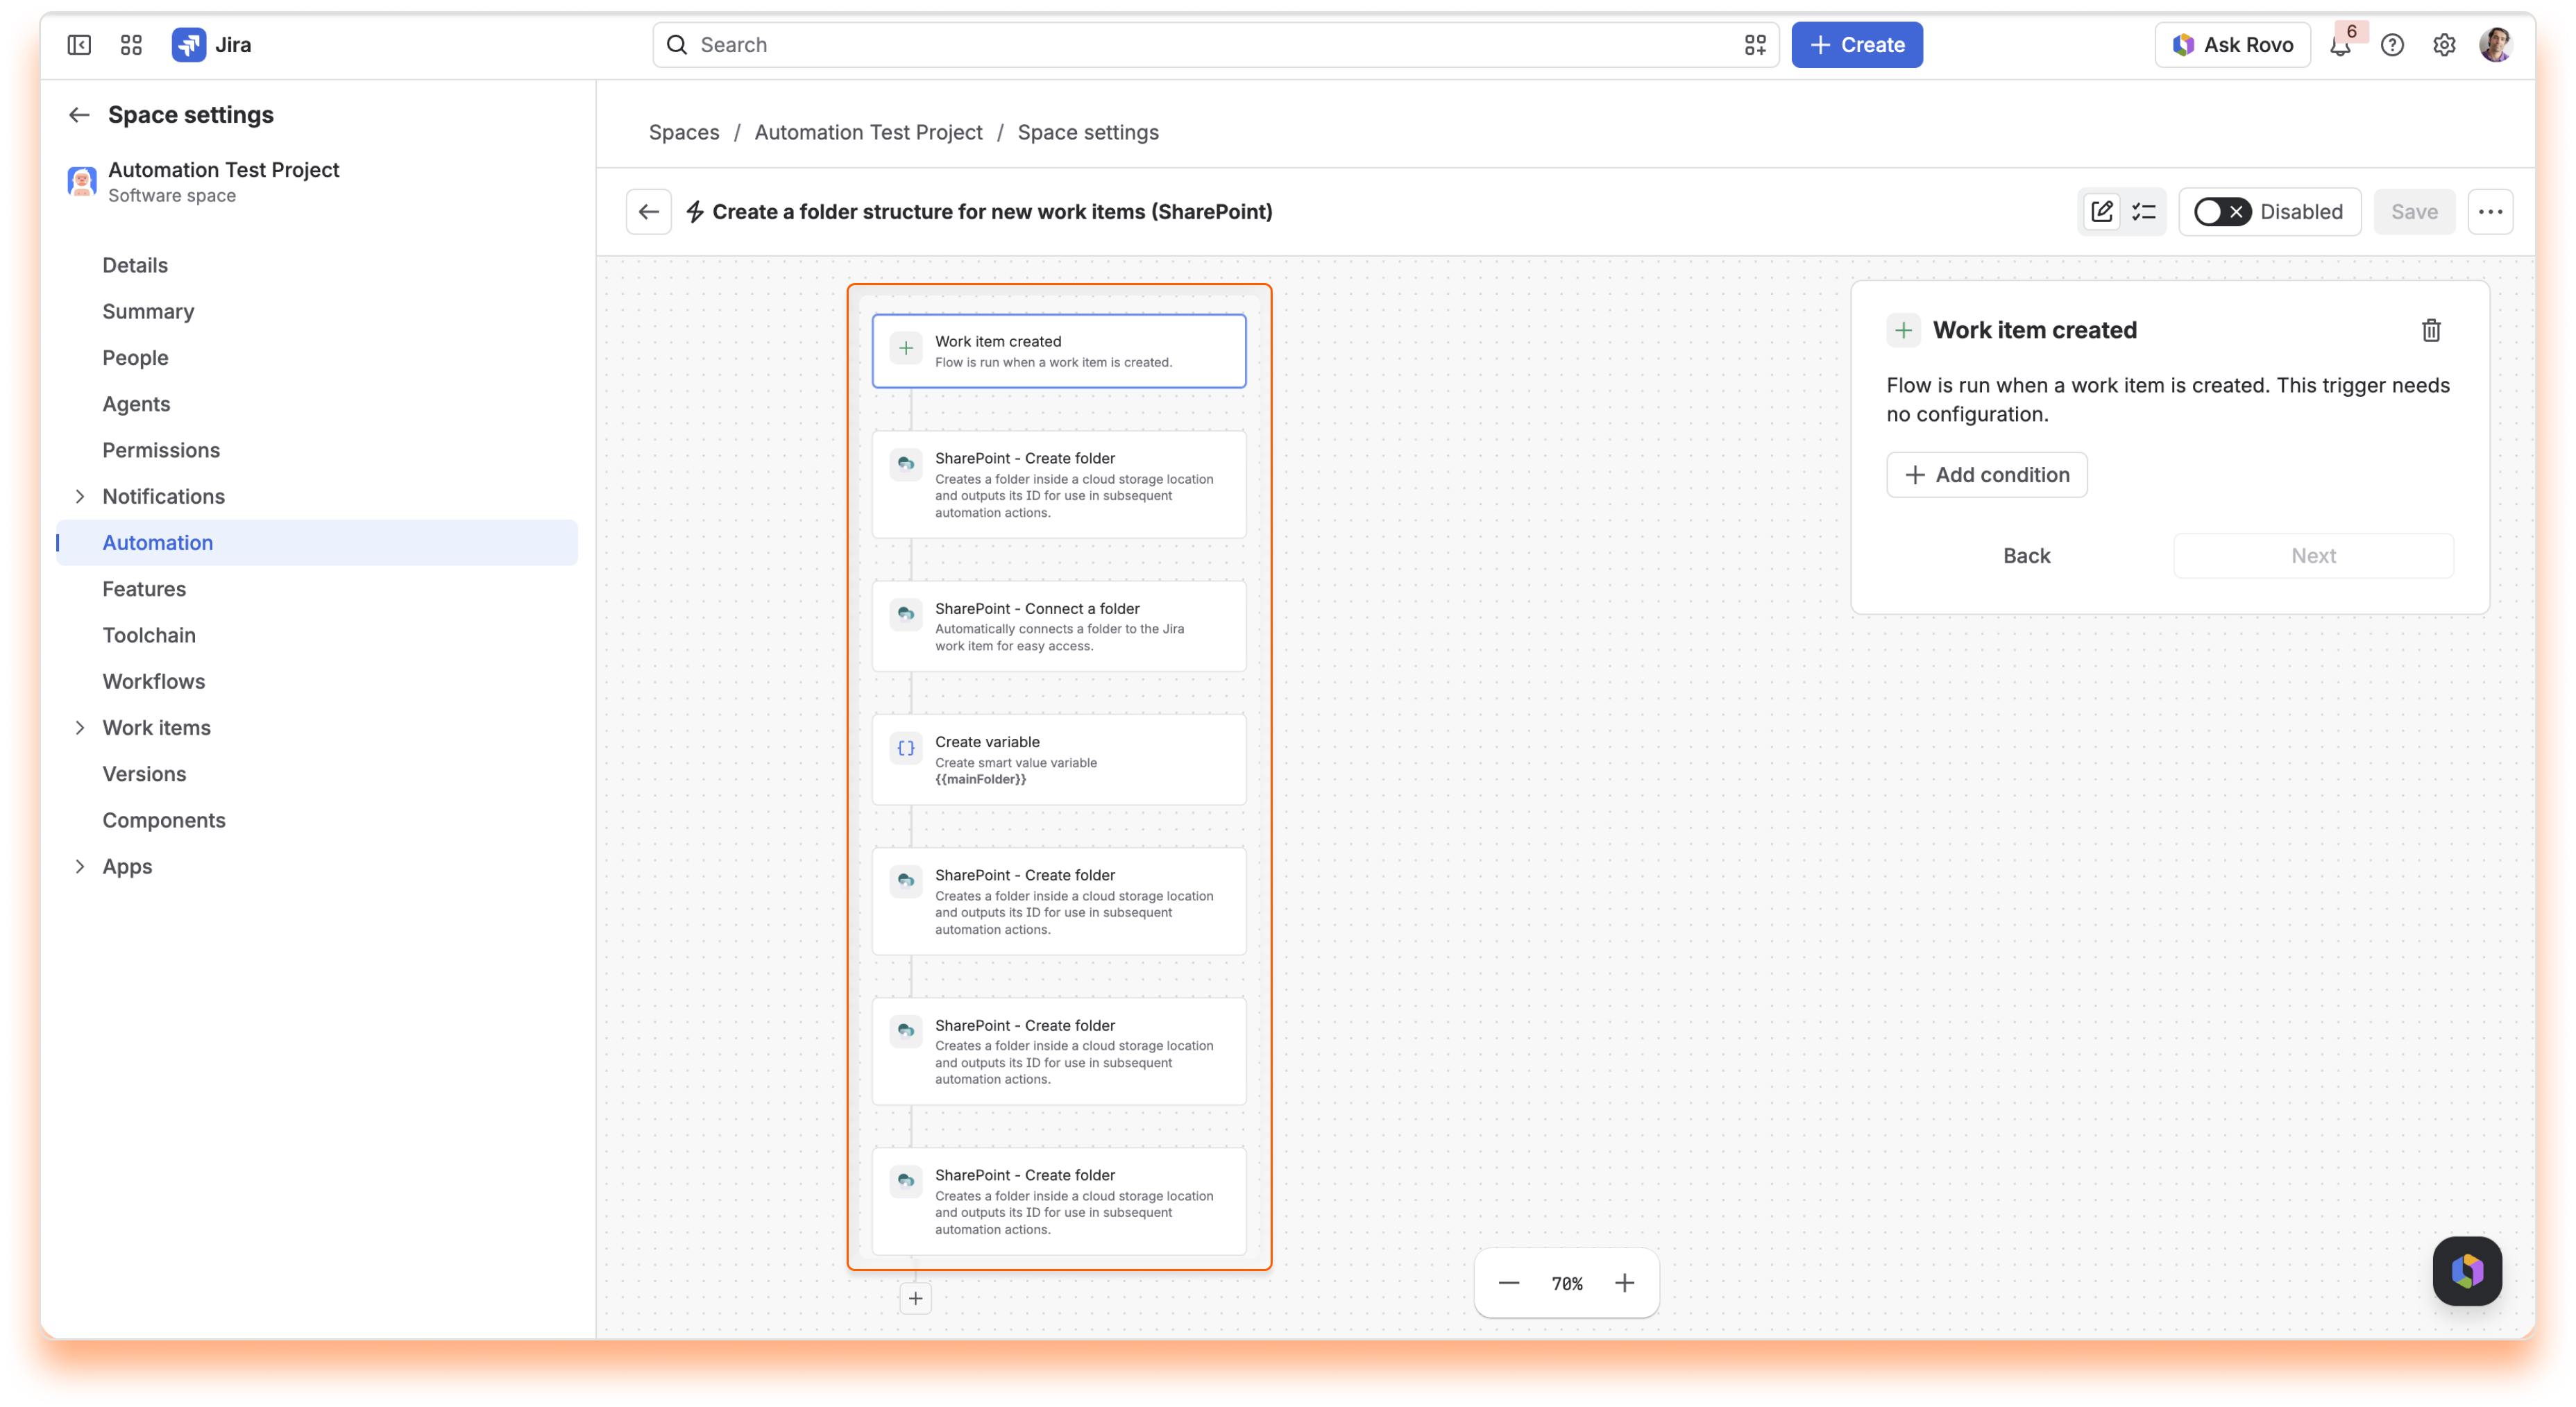
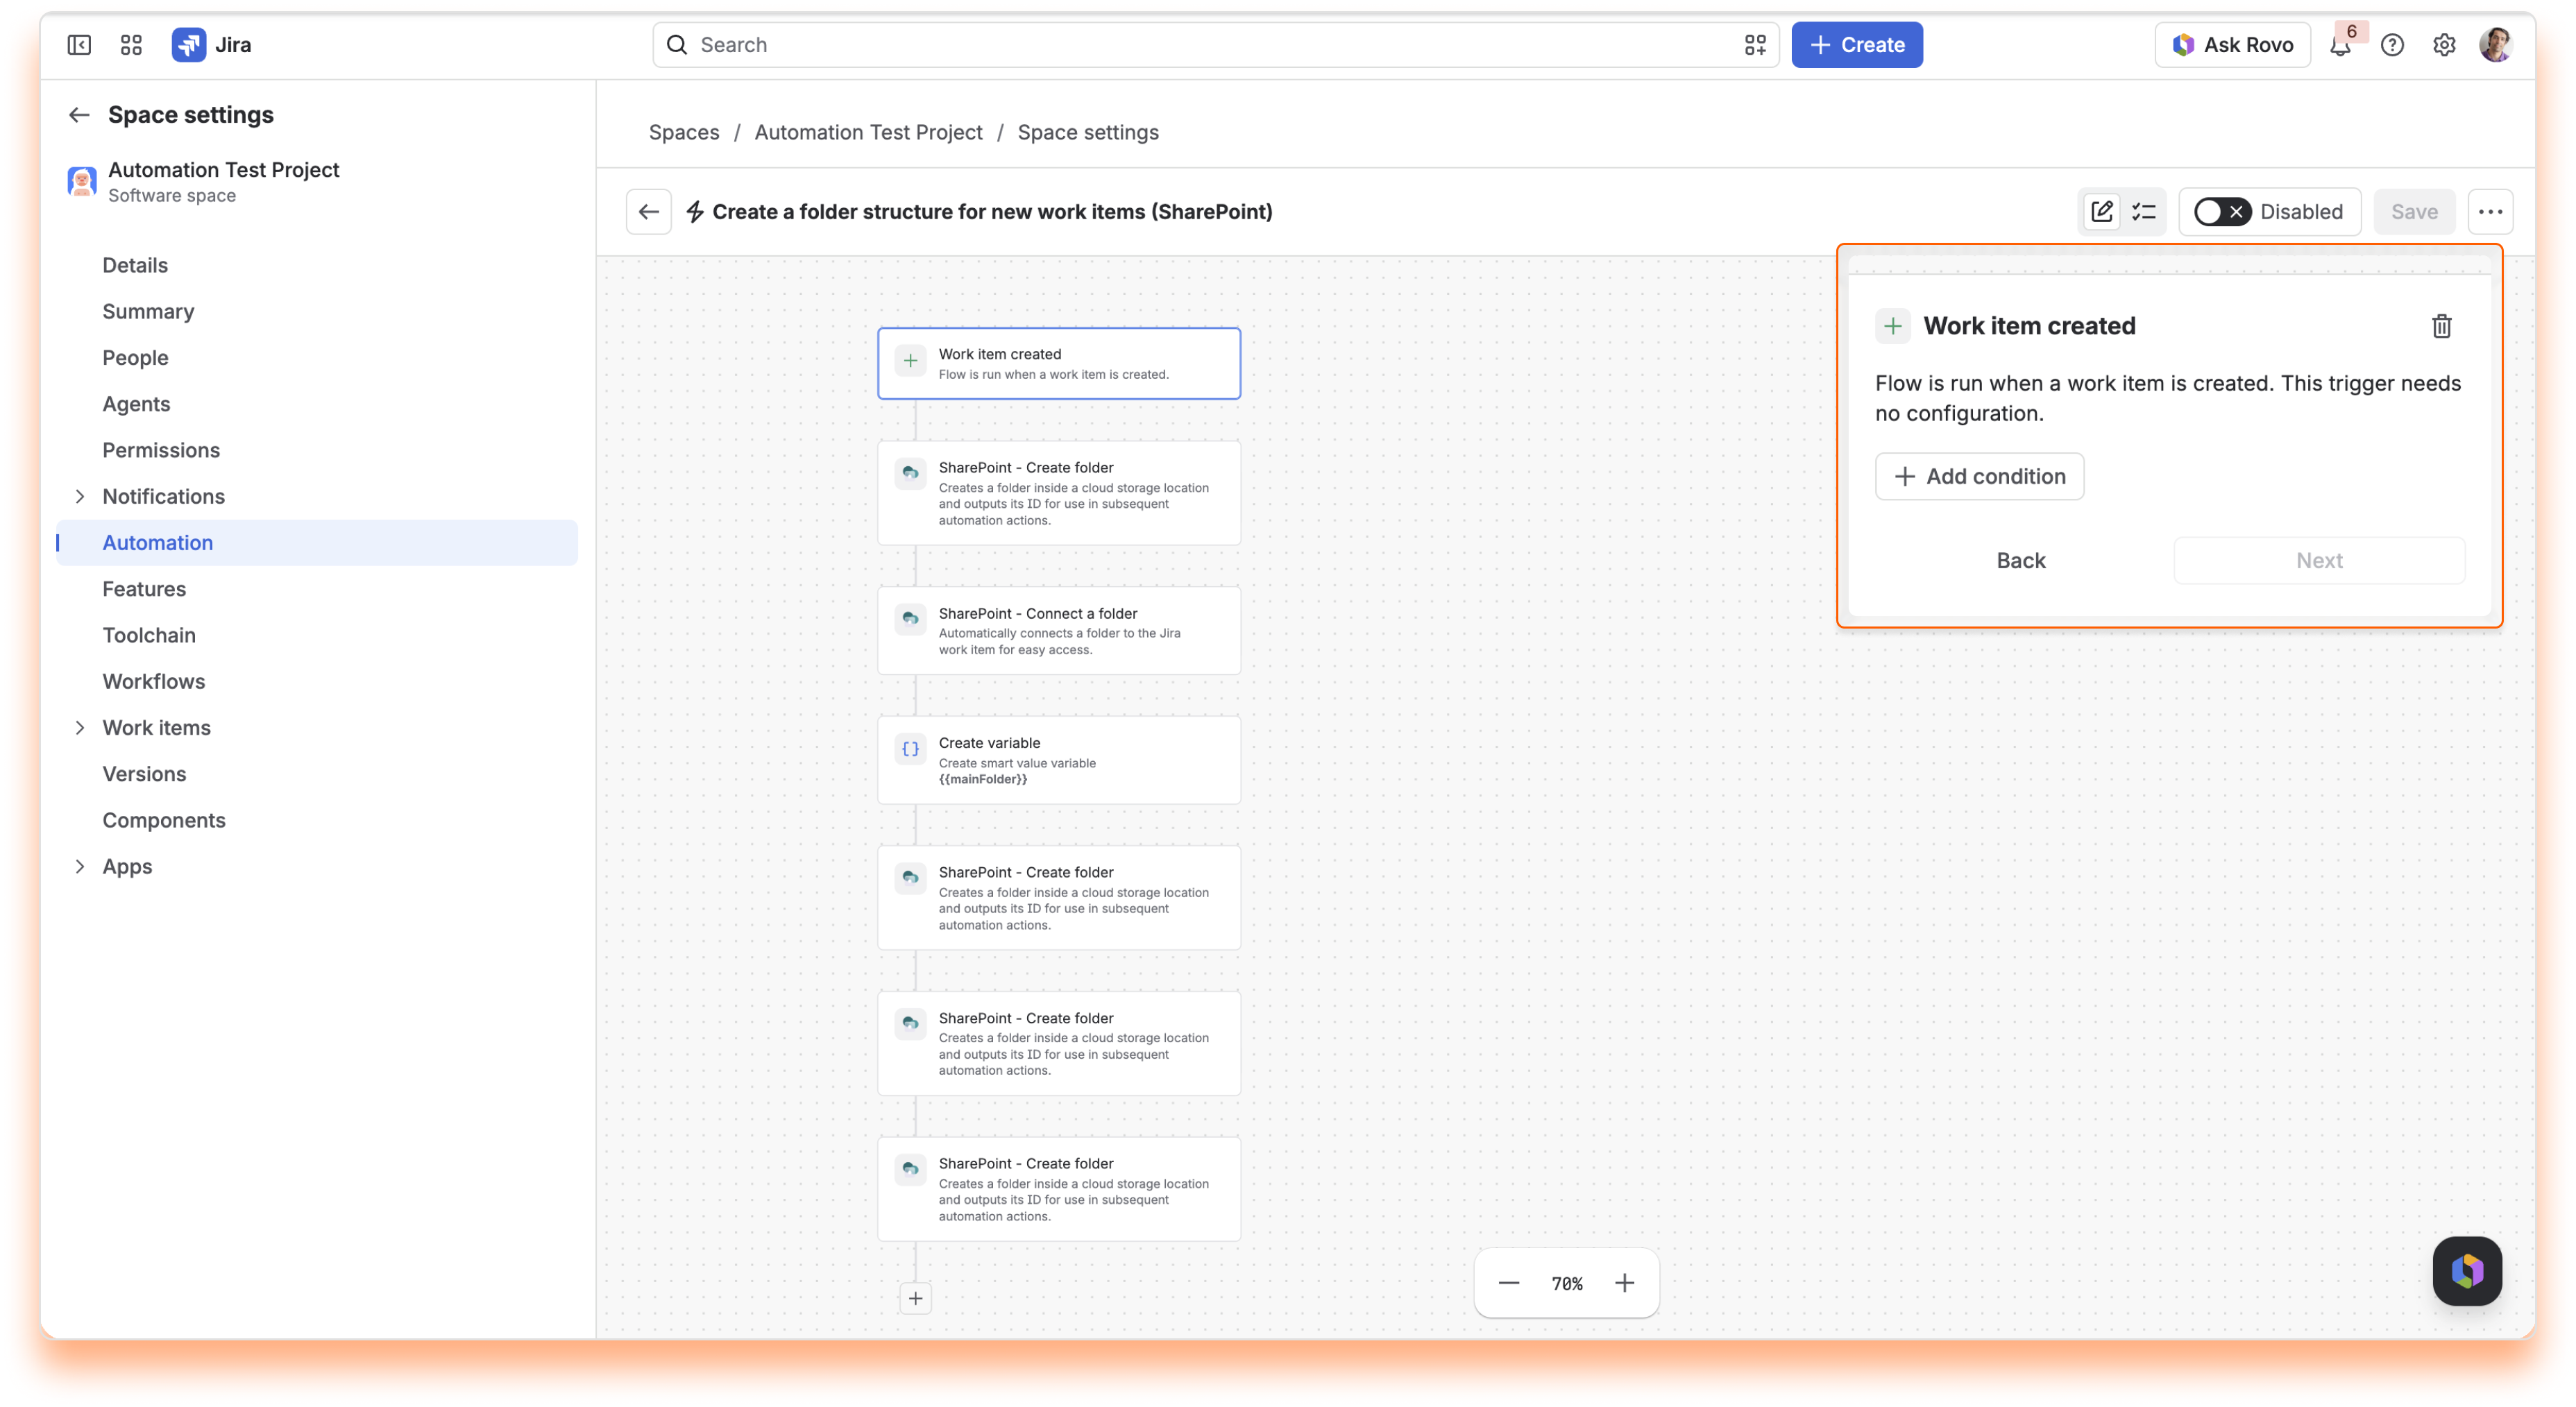
Create a new flow and set the trigger to "Work item created". The flow runs as soon as a new work item is created.
Want the structure only for some work items? Add a "Work item fields condition", for example with "Work type" set to the type your team uses for client requests.
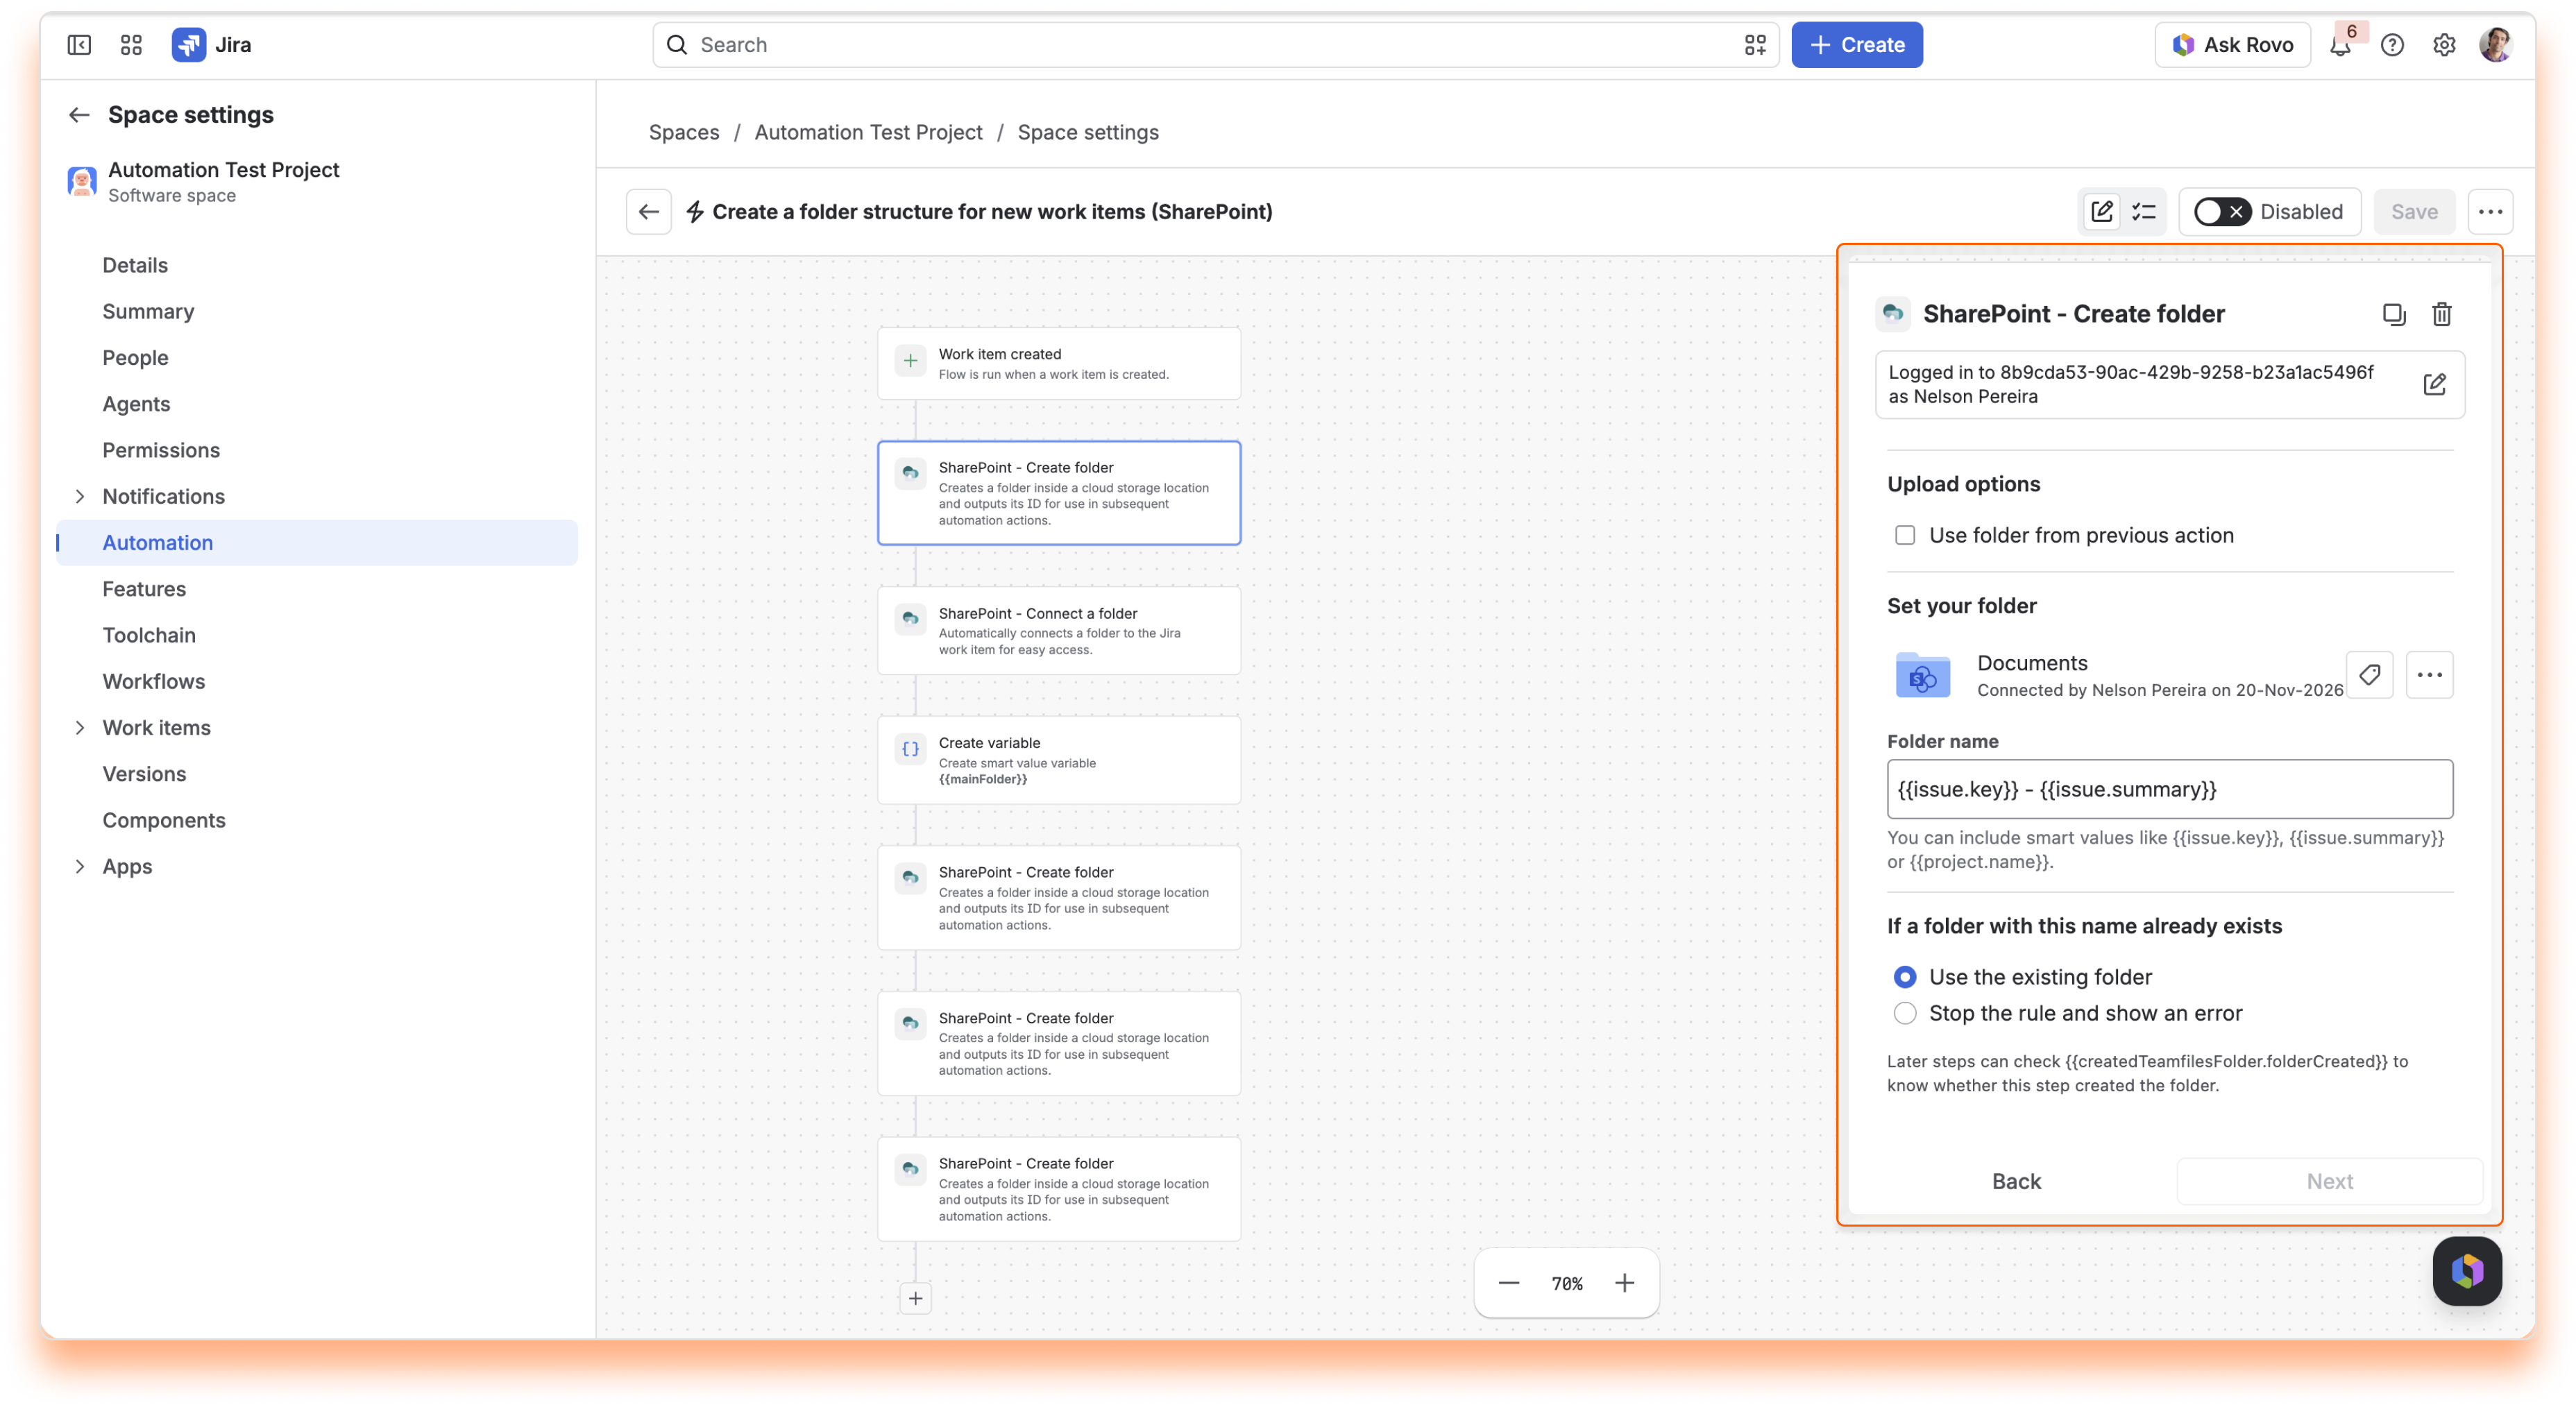
Add the "SharePoint - Create folder" action.
Click "Connect", sign in to SharePoint or OneDrive and choose the folder where your work item folders should go.
In "Folder name", enter {{issue.key}} - {{issue.summary}}.
Keep "Use the existing folder" selected under "If a folder with this name already exists".
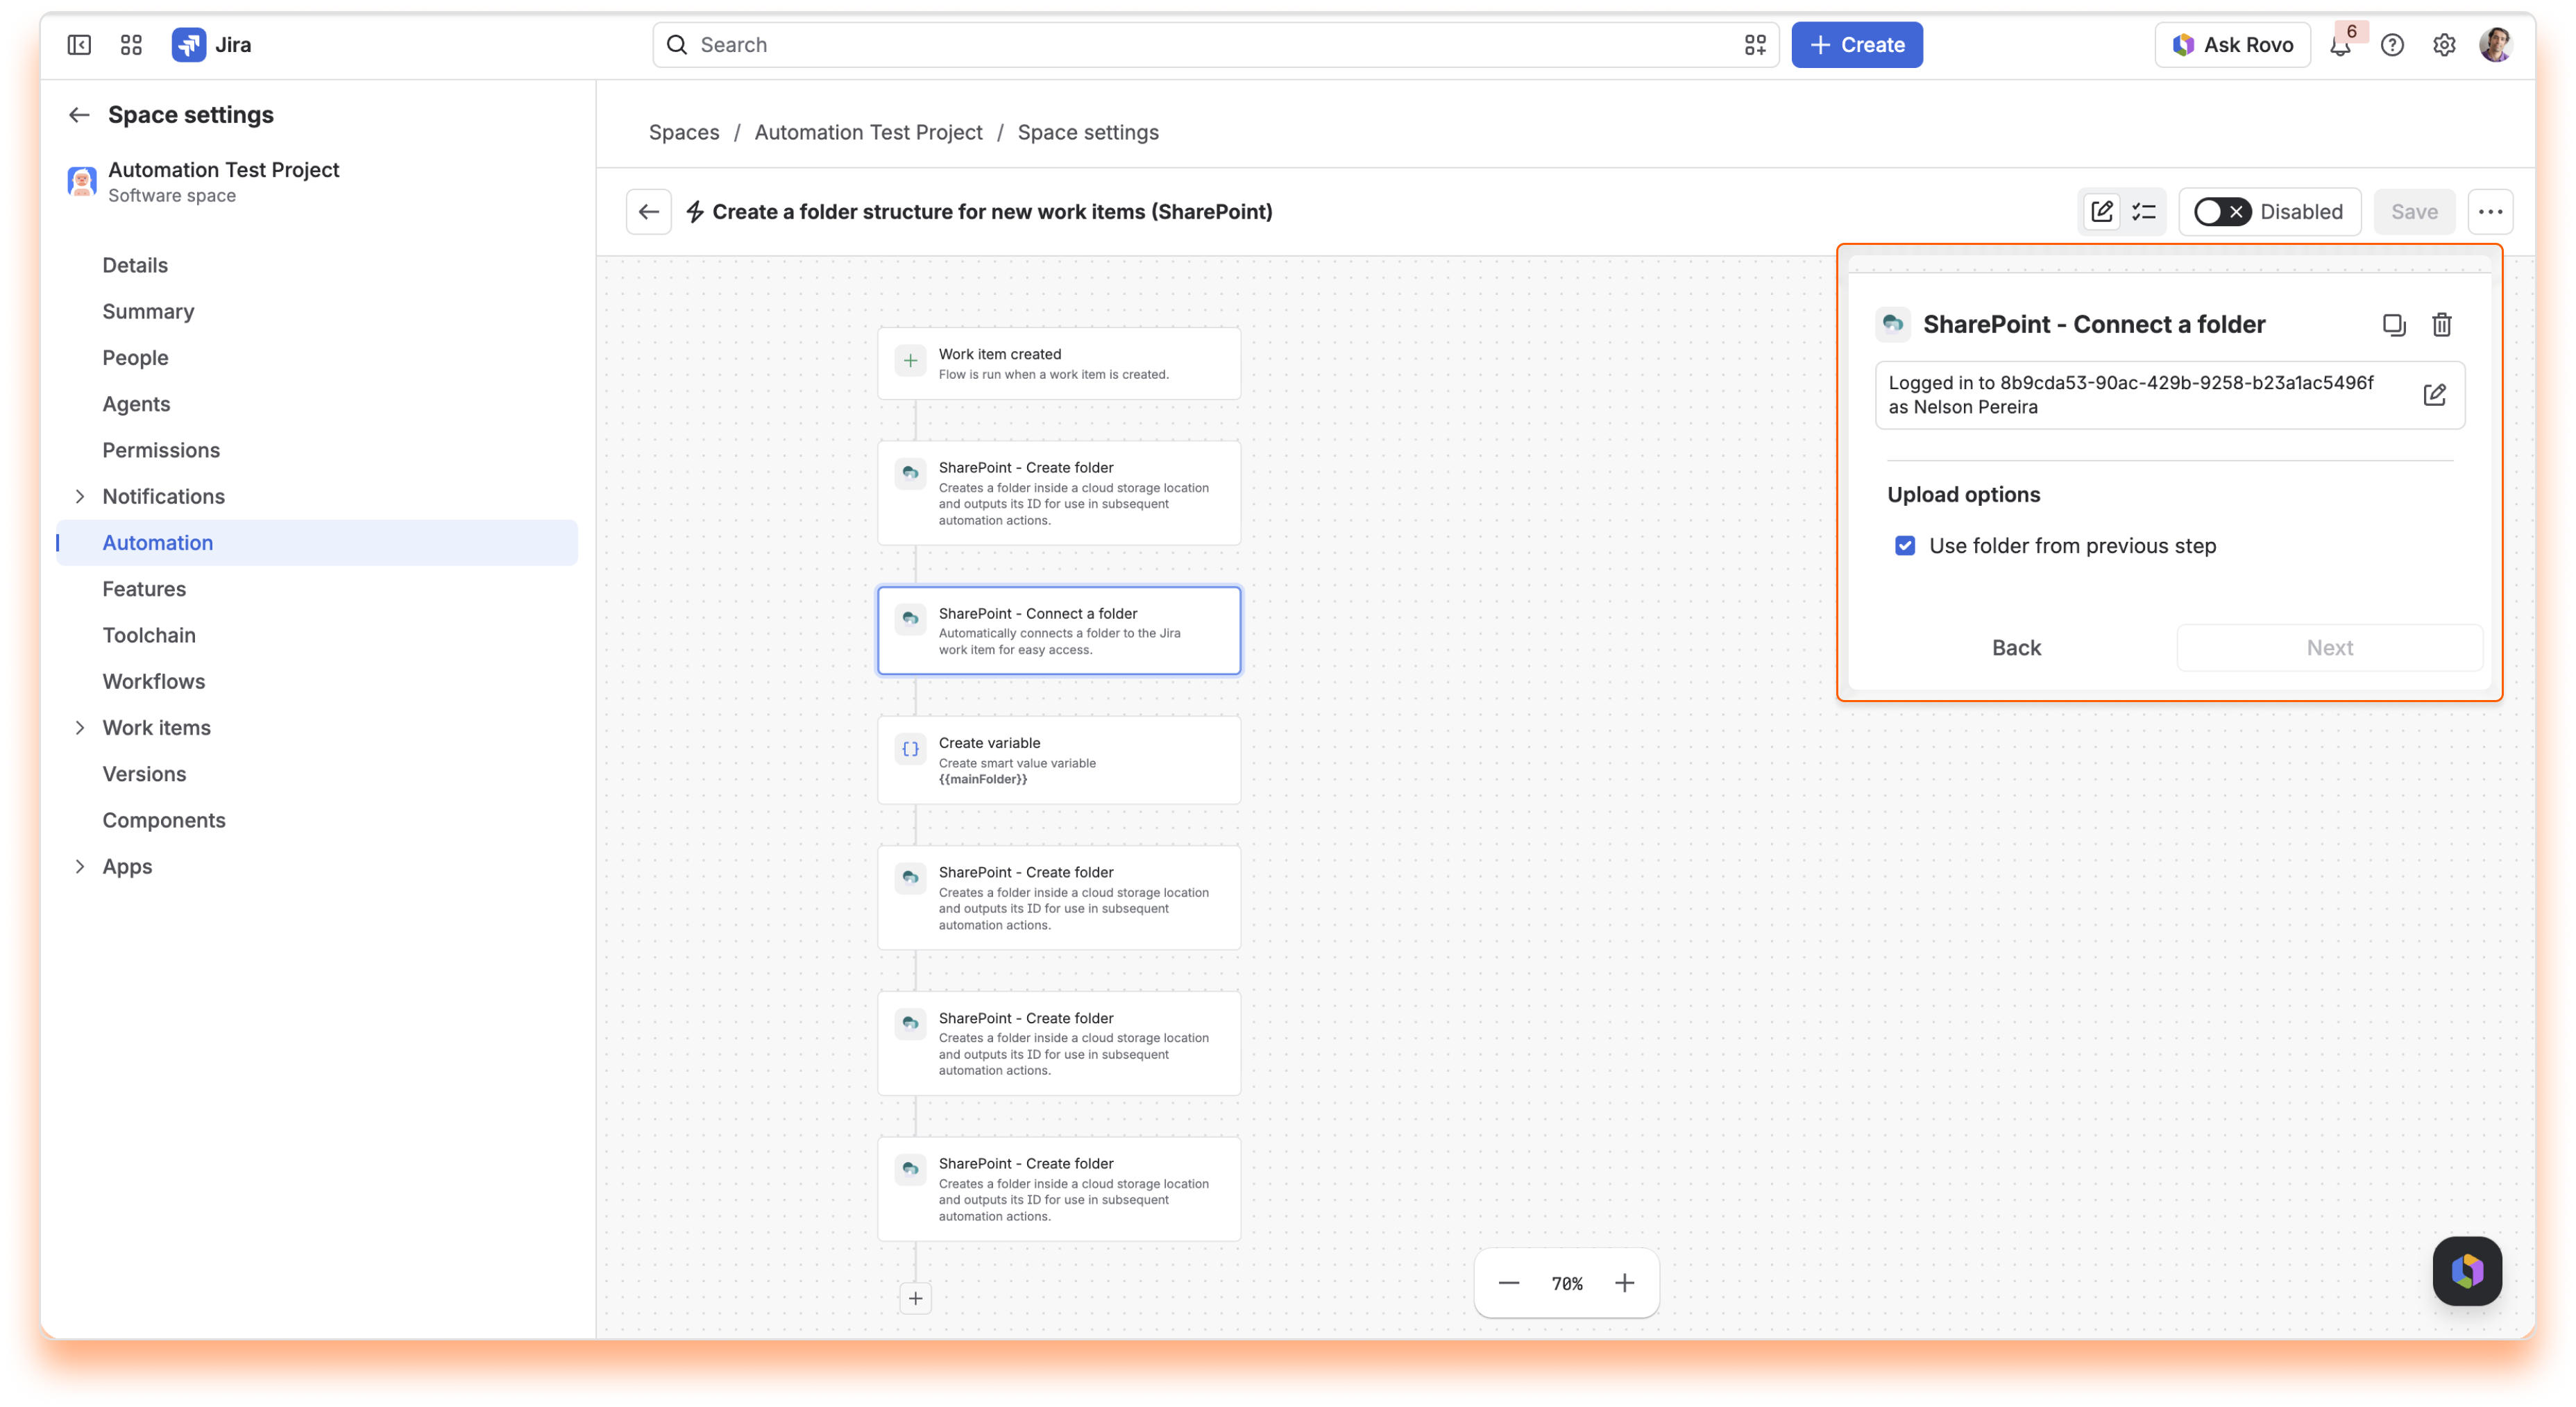
Add "SharePoint - Connect a folder" and select "Use folder from previous step". The main folder is now on the work item, and your team can open it right away.
Do this before you create the subfolders. After them, "previous step" would point to the last subfolder instead.
Add Jira's "Create variable" action.
In "Variable name", enter mainFolder.
In "Smart value", enter {{createdTeamfilesFolder.folderId}}.
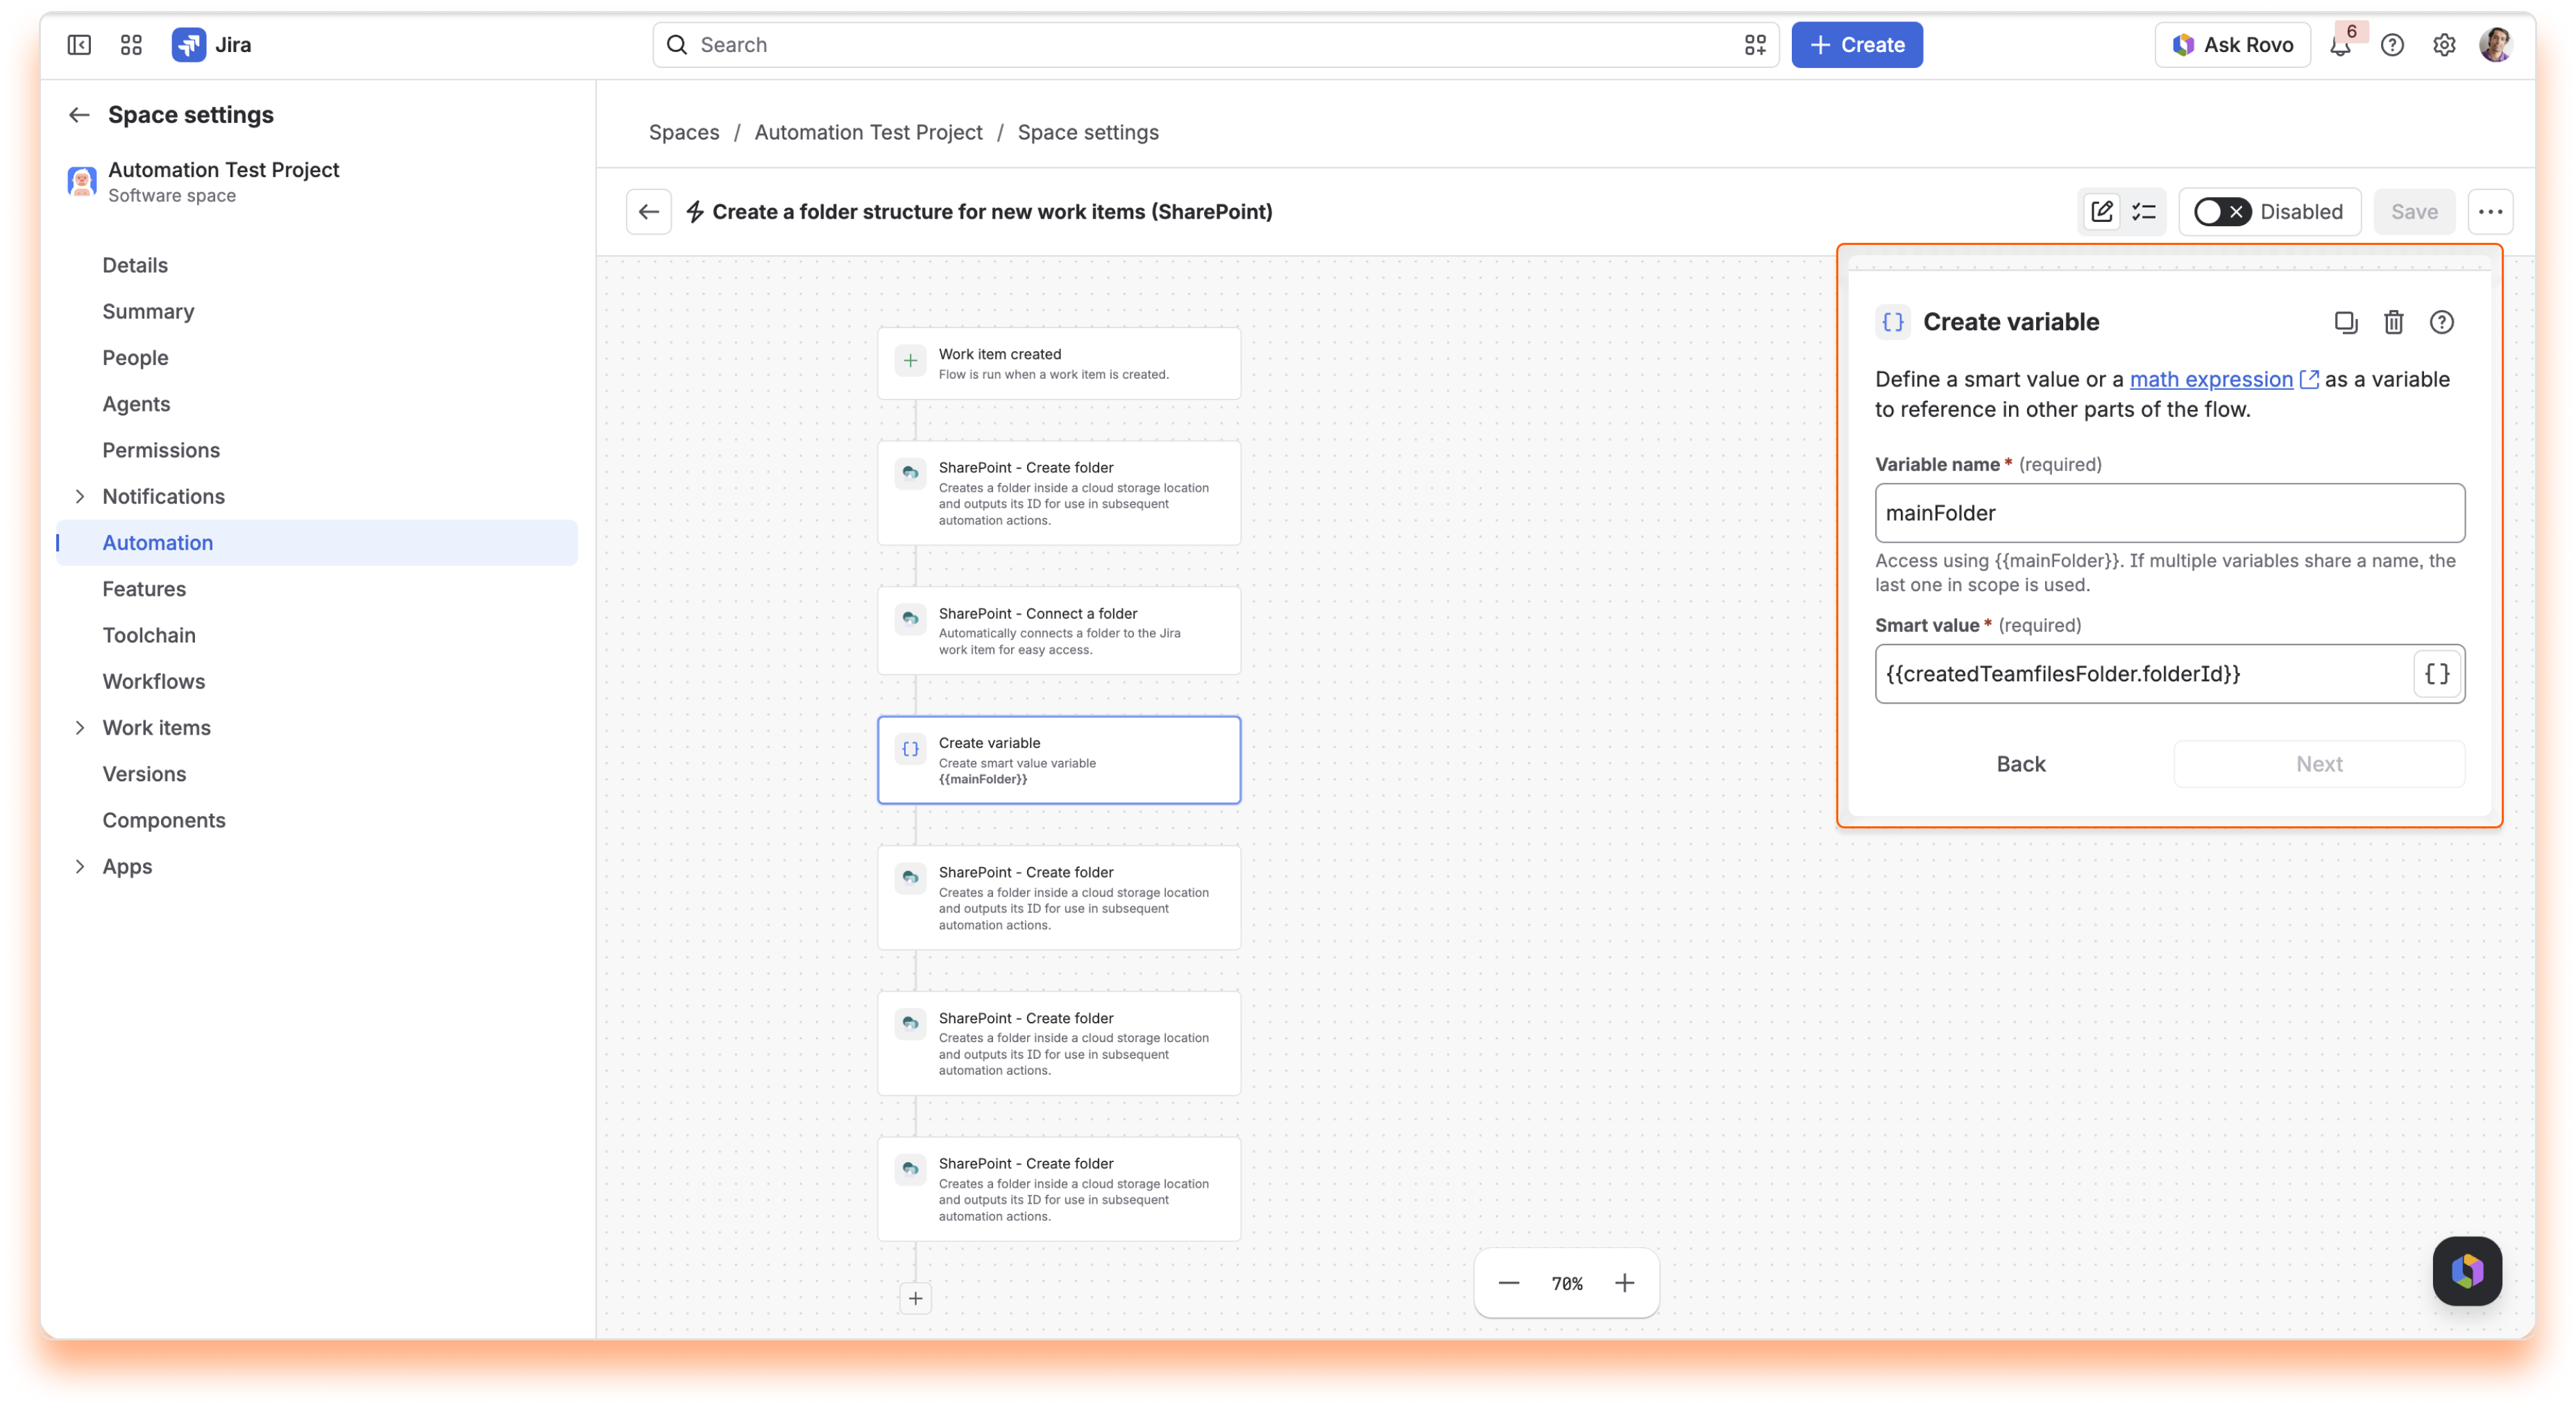
Add "SharePoint - Create folder" and select "Use folder from a smart value".
In "Parent folder", enter {{mainFolder}}.
In "Folder name", enter Contracts.
Repeat this action for Invoices and Correspondence, each with {{mainFolder}} as the parent folder, so all three subfolders sit side by side in the main folder.
Save and turn on the flow, and every new work item gets its own folder with the subfolders inside it.
Need a folder inside a subfolder, for example Contracts > Signed? Right after the Contracts action, add another Create folder with "Use folder from previous step" and the name Signed. Want to reuse a subfolder later in the flow, for example to upload attachments into it? Save its ID in another variable, just like in step 4.
Test first. Run new flows on a test work item, or in a sandbox or staging site, before turning them on in production.
Check the audit log. To see each folder the flow created, add a "Log action" after a Create folder action with {{createdTeamfilesFolder.folderName}} in the log message. The names show up in the flow's "Audit log".
Use IDs from SharePoint Connector only. "Parent folder" only accepts a folder ID returned by a SharePoint Connector action in the same flow, or a variable that holds one. A folder ID copied from SharePoint or OneDrive doesn't work.
Reuse instead of duplicating. Keep "Use the existing folder" selected in every Create folder action, so a flow that runs twice for the same work item doesn't fail.
With this flow in place, every new work item starts with a complete, consistent folder structure. To see every action and option, read 4.1 SharePoint Connector automation actions. If you need a hand, reach out on our support portal.


